1. Introduction
This manual provides detailed instructions for the setup, operation, maintenance, and troubleshooting of your Targus 9-in-1 USB C HUB. Please read this manual thoroughly before using the product to ensure proper functionality and to prevent damage. Retain this manual for future reference.
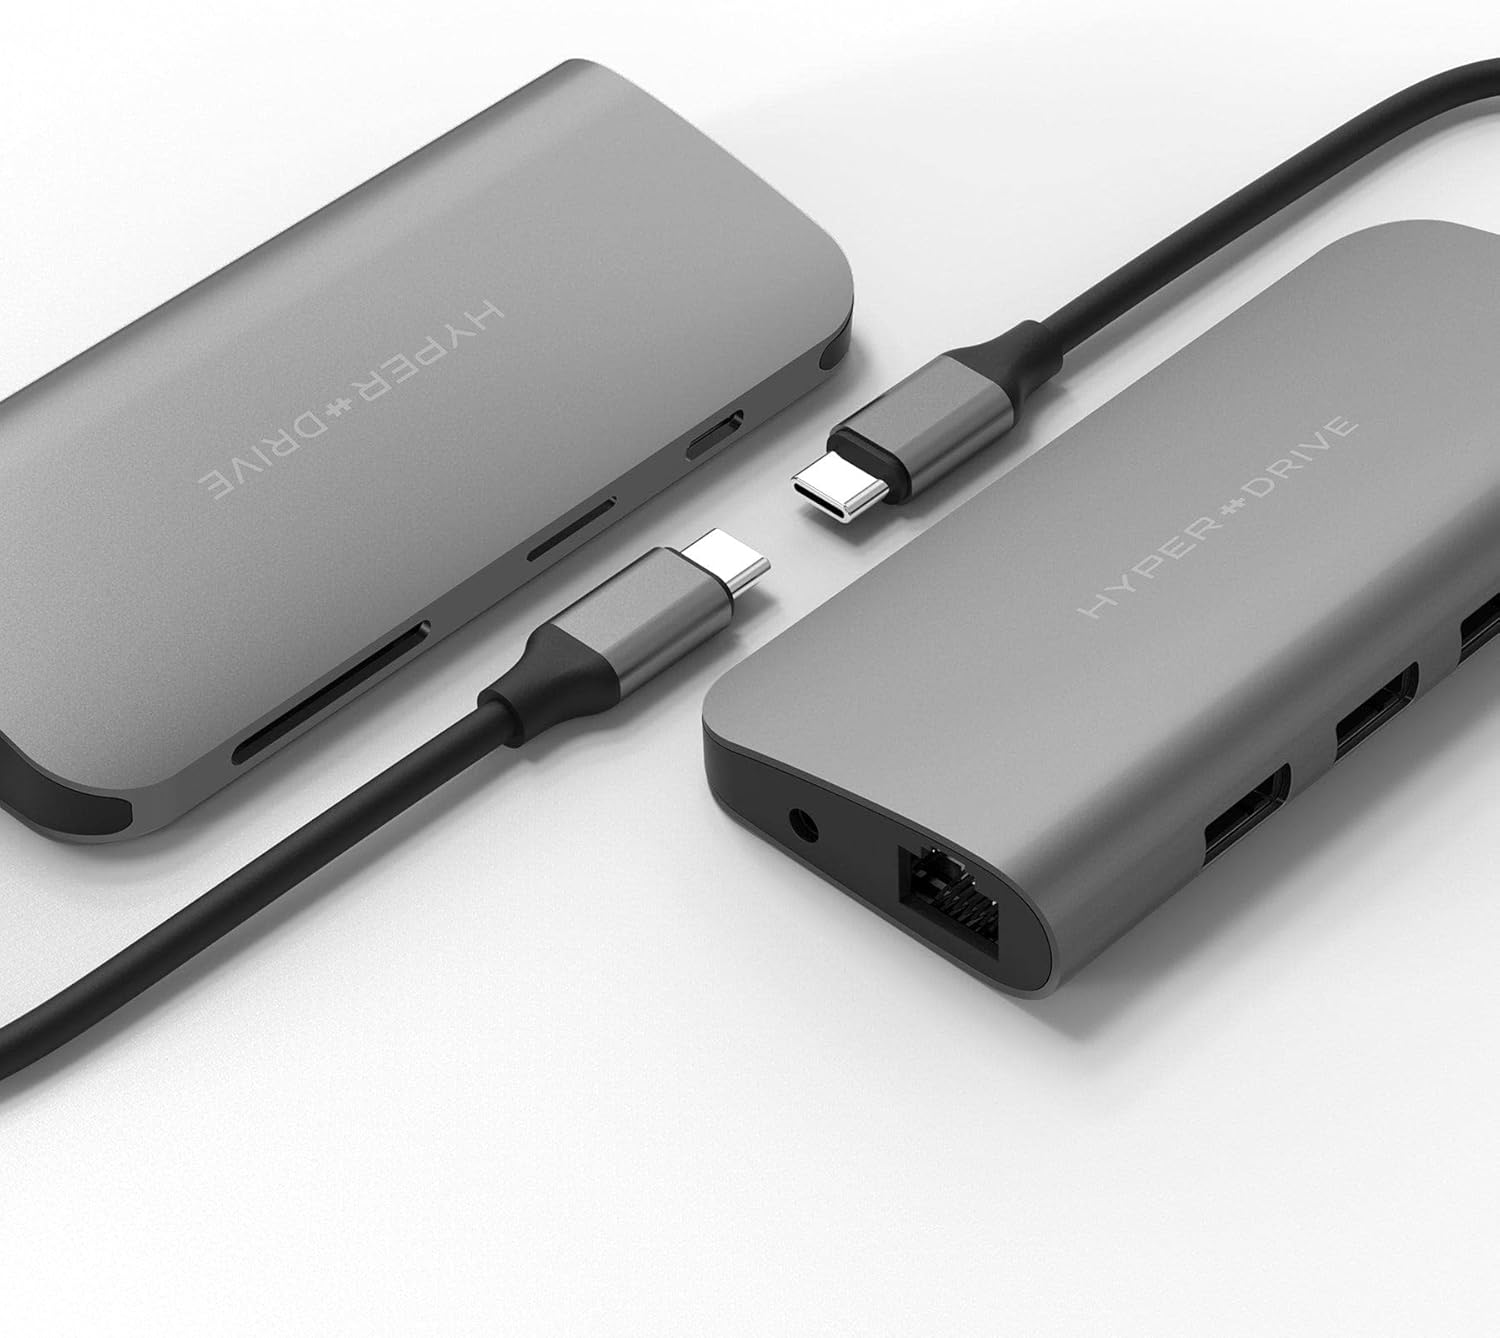
2. Product Overview
The Targus 9-in-1 USB C HUB is a versatile accessory designed to expand the connectivity of your USB-C enabled device. It provides multiple ports for various peripherals and functions.
Key Features:
- USB-C with 60W Power Delivery (PD) for charging your host device.
- HDMI port supporting 4K resolution at 30Hz for external displays.
- Gigabit Ethernet port for stable wired network connectivity.
- SD and microSD card readers for data transfer.
- Three USB-A 5Gbps ports for connecting USB peripherals.
- 3.5mm audio jack for headphones or speakers.
Product Diagram:

3. Setup
Follow these steps to set up your Targus 9-in-1 USB C HUB:
- Connect to Host Device: Plug the integrated USB-C cable from the hub into an available USB-C port on your laptop, tablet, or smartphone. Ensure the USB-C port on your host device supports DisplayPort Alternate Mode (Alt Mode) and Power Delivery for full functionality.
- Power Delivery (Optional): If your host device requires charging, connect your original USB-C power adapter to the USB-C PD port on the hub. The hub supports up to 60W power pass-through.
- Connect Peripherals:
- HDMI Display: Connect an HDMI cable from your monitor or TV to the HDMI port on the hub.
- Ethernet: Connect an Ethernet cable from your router or modem to the Gigabit Ethernet port on the hub.
- USB Devices: Plug your USB-A peripherals (e.g., mouse, keyboard, external hard drive) into the USB-A ports.
- Memory Cards: Insert SD or microSD cards into the respective slots.
- Audio: Connect headphones or speakers to the 3.5mm audio jack.
The hub is generally plug-and-play and does not require additional driver installation for most operating systems.


4. Operating Instructions
Once connected, the Targus 9-in-1 USB C HUB operates automatically. Here are specific instructions for each function:
- USB-C Power Delivery: When a power adapter is connected to the hub's USB-C PD port, power will be passed through to charge your host device. Ensure your power adapter meets the power requirements of your device.
- HDMI Output: Your host device should automatically detect the external display. You may need to adjust display settings (e.g., resolution, extended/mirrored display) in your operating system's display preferences. The hub supports up to 4K@30Hz.
- Gigabit Ethernet: The wired network connection will be established automatically. Check your network settings if you experience connectivity issues.
- USB-A Ports: Connect any USB 2.0 or USB 3.0 (5Gbps) compatible devices. These ports are suitable for data transfer and connecting peripherals like keyboards, mice, and external storage.
- SD/microSD Card Readers: Insert your memory cards into the corresponding slots. They will appear as removable drives on your host device, allowing you to transfer files. Do not insert both SD and microSD cards simultaneously if the hub only supports one at a time (check product specifications if unsure, but typically they are separate slots).
- 3.5mm Audio Jack: Connect standard 3.5mm headphones or speakers. Your operating system should automatically switch audio output to the connected device.


5. Maintenance
Proper care and maintenance will extend the lifespan of your Targus 9-in-1 USB C HUB:
- Cleaning: Disconnect the hub from all devices before cleaning. Use a soft, dry, lint-free cloth to wipe the surface. Do not use liquid cleaners, aerosols, or solvents.
- Storage: Store the hub in a cool, dry place away from direct sunlight and extreme temperatures.
- Handling: Avoid dropping the hub or subjecting it to strong impacts. Do not bend or twist the integrated USB-C cable excessively.
- Heat Generation: It is normal for the hub to generate some heat during operation, especially when multiple ports are in use or when charging a device via Power Delivery. Ensure the hub has adequate ventilation and is not covered to prevent excessive heat buildup. If the hub becomes excessively hot to touch, disconnect it and allow it to cool down.
6. Troubleshooting
If you encounter issues with your Targus 9-in-1 USB C HUB, refer to the following common problems and solutions:
| Problem | Possible Solution |
|---|---|
| No display on external monitor via HDMI. |
|
| USB devices are not recognized. |
|
| Ethernet connection is unstable or not working. |
|
| Host device is not charging via USB-C PD port. |
|
| Hub feels warm during operation. | It is normal for the hub to generate some heat, especially when multiple ports are active or when charging a device. Ensure it has adequate ventilation. If it becomes excessively hot, disconnect it and allow it to cool. |
7. Specifications
| Feature | Detail |
|---|---|
| Model Name | 9-in-1 USB C HUB |
| USB-C Port | 1x USB-C with 60W Power Delivery (PD) |
| HDMI Port | 1x HDMI 4K@30Hz |
| Ethernet Port | 1x Gigabit Ethernet |
| USB-A Ports | 3x USB-A 5Gbps |
| Card Readers | 1x SD Card Reader, 1x microSD Card Reader |
| Audio Jack | 1x 3.5mm Audio Jack |
| ASIN | B087BMPHGS |
| Date First Available | October 23, 2023 |
8. Warranty and Support
Targus products are designed for quality and reliability. For information regarding warranty coverage, please refer to the warranty card included with your product or visit the official Targus website. If you require technical assistance or have questions not covered in this manual, please contact Targus customer support.
For the most up-to-date support information, please visit: www.targus.com/us/support


