1. Introduction
This instruction manual provides essential information for the safe and effective installation, operation, and maintenance of your Hella Proj-Light SL60 LED Blue Worklight. Please read this manual thoroughly before attempting to install or operate the product. Retain this manual for future reference.
2. Safety Information
Always observe the following safety precautions to prevent injury or damage to the product and vehicle.
- Disconnect the vehicle's battery before beginning any electrical work to prevent electrical shock or short circuits.
- Ensure the operating voltage of the worklight (10-80V) is compatible with your vehicle's electrical system.
- Do not look directly into the light beam when the light is active, as it may cause eye damage.
- Mount the worklight securely to prevent it from dislodging during vehicle operation.
- Route cables away from hot surfaces, sharp edges, and moving parts to prevent damage.
- Use appropriate personal protective equipment (PPE) during installation.
3. Package Contents
Verify that all components are present before proceeding with installation:
- 1 x Hella 996210001 Proj-Light SL60 LED Blue 10-80V Worklight
4. Setup and Installation
Follow these steps for proper installation of the Hella Proj-Light SL60 LED Worklight.
4.1 Mounting
Select a suitable mounting location on your vehicle that provides clear visibility and is structurally sound. The worklight comes with an adjustable mounting bracket.
- Position the mounting bracket at the desired location and mark the drilling points.
- Drill pilot holes if necessary, ensuring not to damage any underlying components.
- Secure the bracket using appropriate fasteners (not included, unless specified in package contents).
- Attach the worklight to the bracket using the provided bolt and nut, allowing for angle adjustment.

Figure 1: Hella Proj-Light SL60 LED Worklight showing the mounting bracket and heat sink fins.
4.2 Wiring
The Hella Proj-Light SL60 is designed for 10-80V DC electrical systems. Ensure correct polarity during connection.
- Identify the positive (+) and negative (-) wires from the worklight.
- Connect the positive wire of the worklight to a switched 10-80V DC power source (e.g., a dedicated switch or existing auxiliary circuit) using appropriate gauge wiring and a fuse.
- Connect the negative wire of the worklight to a reliable ground point on the vehicle chassis.
- Ensure all connections are secure and insulated to prevent short circuits and corrosion.
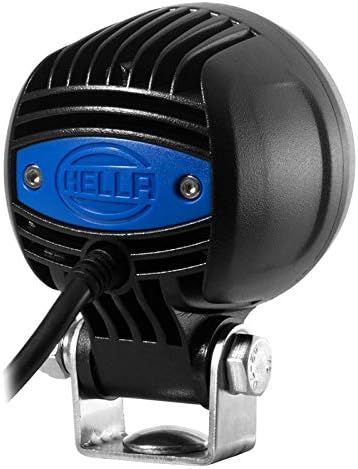
Figure 2: Rear view of the Hella Proj-Light SL60 LED Worklight with power cable.
4.3 Dimensions
Refer to the diagram below for the physical dimensions of the worklight (measurements in millimeters).

Figure 3: Dimensional drawing of the Hella Proj-Light SL60 LED Worklight.
5. Operation
Once properly installed and wired, the Hella Proj-Light SL60 LED Worklight can be operated via the connected switch.
- Activate the switch to turn the worklight ON.
- Deactivate the switch to turn the worklight OFF.
- Adjust the angle of the worklight by loosening the mounting bolt, repositioning the light, and then securely tightening the bolt.
The blue light projection is designed to enhance safety by indicating the presence and direction of moving vehicles or equipment, such as forklifts in warehouses or industrial settings.
6. Maintenance and Care
The Hella Proj-Light SL60 LED Worklight is designed for durability and minimal maintenance. Regular inspection and cleaning will ensure optimal performance.
- Cleaning: Clean the lens and housing periodically with a soft cloth and mild soap solution. Avoid abrasive cleaners or solvents that could damage the lens or finish.
- Inspection: Regularly check the mounting hardware for tightness and inspect the wiring for any signs of wear, fraying, or corrosion. Replace any damaged components immediately.
- LED Life: The LED elements have an estimated operating life of 50,000 hours and do not require replacement under normal operating conditions.
7. Troubleshooting
If you encounter issues with your Hella Proj-Light SL60, refer to the following table for common problems and solutions.
| Problem | Possible Cause | Solution |
|---|---|---|
| Light does not turn on. | No power supply; Blown fuse; Incorrect wiring; Faulty switch. | Check power connections; Inspect and replace fuse if necessary; Verify wiring polarity and connections; Test or replace switch. |
| Light is dim or flickers. | Low voltage; Loose connection; Corroded terminals. | Check vehicle voltage; Tighten all electrical connections; Clean any corroded terminals. |
| Mounting bracket is loose. | Fasteners are not tight. | Tighten all mounting bolts and nuts securely. |
8. Technical Specifications
| Feature | Detail |
|---|---|
| Brand | Hella |
| Model | 996210001 |
| Voltage | 10-80V DC |
| Light Type | LED Worklight |
| Light Color | Blue |
| Operating Life | 50,000 Hours |
| Dimensions (Product) | 4 x 5 x 4 inches (approximate) |
| Item Weight | 12.7 ounces |
| Manufacturer Part Number | 996210001 |
| UPC | 760687177890 |
9. Warranty and Customer Support
Hella products are manufactured to high-quality standards and are backed by a manufacturer's warranty against defects in materials and workmanship. Please refer to the warranty documentation provided with your purchase for specific terms and conditions.
For technical assistance, warranty claims, or further inquiries, please contact Hella customer support through their official website or authorized distributors. Keep your proof of purchase and product model number (996210001) readily available when contacting support.