1. Introduction
The Walfront TM610C Intelligent DIN Rail Timing Switch is a high-performance, programmable time relay designed for precise control of electrical circuits. This device allows you to automate the switching ON and OFF of various electrical appliances and systems, such as street lights, factory equipment, advertising signs, and more, based on a pre-set 24-hour schedule. Its robust design and easy DIN rail installation make it suitable for a wide range of industrial and domestic applications.
2. Safety Information
Please read and understand all safety instructions before installing or operating this device. Failure to follow these instructions may result in electric shock, fire, or serious injury.
- Electrical Hazard: Installation and wiring should only be performed by a qualified electrician.
- Power Disconnection: Always disconnect power at the main circuit breaker before performing any installation, wiring, or maintenance.
- Voltage Compatibility: Ensure the supply voltage matches the device's specifications (220V AC).
- Load Capacity: Do not exceed the maximum resistive load of 16 Amperes.
- Proper Grounding: Ensure the device is properly grounded according to local electrical codes.
- Indoor Use Only: This device is designed for indoor use in dry environments.
3. Product Features
- High Performance: Provides stable and reliable timing control.
- Programmable: 24-hour programmable cycle with a minimum setting interval of 15 minutes.
- Manual Override: Features a convenient ON-AUTOMATIC switch for manual control.
- Easy Installation: Designed for standard DIN rail mounting.
- Power Backup: Built-in battery provides up to 100 hours of power backup to maintain time settings during power outages.
- Wide Application: Suitable for various electrical equipment requiring scheduled operation.
4. Package Contents
- 1 x Walfront TM610C Intelligent DIN Rail Timing Switch
- 1 x User Manual (this document)
5. Product Overview and Components
Familiarize yourself with the components of the TM610C timing switch.

Figure 5.1: Front-side view of the Walfront TM610C timing switch, showing the transparent cover and terminal screws.

Figure 5.2: Top-down view of the TM610C with the protective cover open, revealing the 24-hour dial and the manual ON-AUTOMATIC switch.

Figure 5.3: Direct front view of the TM610C, highlighting the time dial and indicator arrow.

Figure 5.4: Back view of the TM610C, displaying the electrical specifications and wiring diagram for connection.
6. Specifications
| Parameter | Value |
|---|---|
| Model Number | TM610C |
| Brand | Walfront |
| Coil Voltage | 220V AC |
| Frequency | 45-60Hz |
| Resistive Load | AC250V 16A |
| Contact Material | Copper |
| Contact Type | Normally Open |
| Operating Mode | Automatic |
| Mounting Type | DIN Rail Mounting |
| Minimum Setting Interval | 15 minutes per day |
| Power Backup | 100 hours |
| Connector Type | Screw |
| ASIN | B0873DHK41 |
| GTIN | 03512730907995 |
7. Setup and Installation
7.1 DIN Rail Mounting
The TM610C is designed for quick and easy installation on a standard 35mm DIN rail. Simply align the device with the DIN rail and press firmly until it clicks into place.
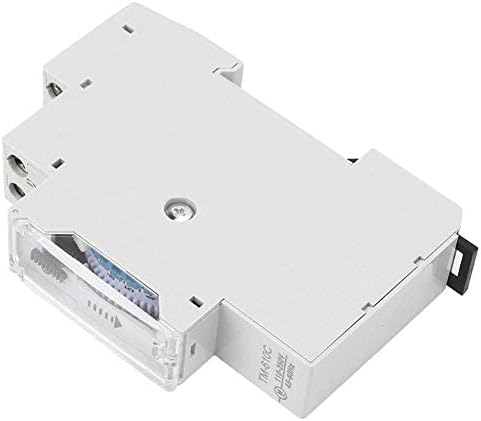
Figure 7.1: Side view illustrating the DIN rail mounting mechanism.
7.2 Wiring Instructions
WARNING: Ensure all power is disconnected before wiring. Incorrect wiring can cause damage to the device or connected equipment, and poses a risk of electric shock.
Refer to the wiring diagram on the back of the unit (Figure 5.4) and the instructions below:
- Power Input (L, N): Connect the 220V AC live (L) and neutral (N) wires to the corresponding input terminals.
- Load Output (1, 2): Connect the load (e.g., light fixture, motor) to the output terminals. Terminal '1' is typically the switched live output, and '2' is the common neutral or return path for the load.
- Ensure all screw terminals are tightened securely to prevent loose connections.
Figure 7.2: Detailed wiring diagram on the back of the unit. L and N are input terminals for 110-250VAC. Terminals 1 and 2 are the output contacts for the load (AC250V 16A).
8. Operating Instructions
8.1 Setting the Current Time
Rotate the dial clockwise until the current time aligns with the arrow indicator on the front of the unit. The dial represents a 24-hour cycle.
Figure 8.1: Front view showing the 24-hour dial and the time indicator arrow.
8.2 Programming ON/OFF Cycles
The dial has segments, each representing 15 minutes. To program an ON period, push the corresponding segments outwards. To program an OFF period, leave the segments pushed inwards.
- Each segment corresponds to 15 minutes.
- Pushing a segment outwards will turn the connected device ON during that 15-minute interval.
- Leaving a segment inwards will keep the connected device OFF during that 15-minute interval.
- You can set multiple ON/OFF periods throughout the 24-hour cycle.
Figure 8.2: View of the programmable segments on the dial. Segments pushed outwards activate the timer.
8.3 Manual Override Switch
The TM610C features a manual override switch with two positions:
- "ON" (I): The connected device will remain continuously ON, overriding the programmed schedule.
- "AUTOMATIC" (Clock Symbol): The device will operate according to the programmed ON/OFF schedule.
Ensure the switch is set to the "AUTOMATIC" position for scheduled operation.
Figure 8.3: The manual override switch located near the time dial. Set to 'I' for permanent ON, or the clock symbol for automatic operation.
8.4 Power Backup Function
The TM610C includes an internal battery that provides up to 100 hours of power backup. This feature ensures that the internal clock continues to run and maintains your programmed settings even during power outages, preventing the need for reprogramming after a power interruption.
9. Maintenance
- Cleaning: Use a soft, dry cloth to clean the exterior of the device. Do not use liquid cleaners or solvents.
- Connections: Periodically check the wiring connections to ensure they remain secure.
- Environment: Ensure the device is kept in a dry, dust-free environment within its specified operating temperature range.
10. Troubleshooting
| Problem | Possible Cause | Solution |
|---|---|---|
| Device not turning ON/OFF as programmed. |
|
|
| Clock dial not moving. |
|
|
| Connected device not receiving power. |
|
|
11. Warranty and Support
11.1 Warranty Information
Walfront products are manufactured to high-quality standards. For specific warranty details, please refer to the warranty policy provided by your retailer or the official Walfront website. Keep your purchase receipt as proof of purchase for any warranty claims.
11.2 Customer Support
If you encounter any issues or have questions regarding your Walfront TM610C Intelligent DIN Rail Timing Switch that are not covered in this manual, please contact Walfront customer service or your local distributor for assistance. You can often find contact information on the Walfront brand store page or their official website.
For more information, visit the Walfront Store on Amazon.
