1. Introduction
This manual provides detailed instructions for the installation, operation, and maintenance of your NewAir 15" Outdoor Beverage Refrigerator, Model NOF090SS00. This appliance is designed for outdoor use, featuring weatherproof stainless steel construction and a 90-can capacity, suitable for both built-in and freestanding applications. Please read this manual thoroughly before using the appliance to ensure safe and efficient operation.

Figure 1.1: NewAir 15" Outdoor Beverage Refrigerator (Model NOF090SS00)

Figure 1.2: Key features for outdoor use, including temperature maintenance, rust resistance, and portability.
2. Safety Information
Your safety and the safety of others are very important. We have provided many important safety messages in this manual and on your appliance. Always read and obey all safety messages.
- Electrical Safety: Ensure the appliance is connected to a properly grounded outlet. Do not use extension cords or ungrounded adapters.
- Ventilation: Maintain adequate clearance around the appliance for proper ventilation, especially if built-in. Blocked vents can lead to overheating and reduced performance.
- Outdoor Use: This appliance is designed for outdoor use and is constructed with weatherproof materials. However, avoid direct exposure to extreme weather conditions if possible, and ensure the electrical outlet is suitable for outdoor environments.
- Child Safety: Do not allow children to play with or inside the appliance. Proper supervision is necessary when the appliance is used near children.
- Flammable Materials: Do not store or use gasoline or other flammable vapors and liquids in the vicinity of this or any other appliance.
- Servicing: All servicing should be performed by a qualified service technician.
3. Setup and Installation
Unpack your refrigerator and prepare it for use by following these steps.
3.1 Unpacking
- Remove all packaging materials, including foam and adhesive tape.
- Inspect the refrigerator for any shipping damage. Report any damage to the retailer immediately.
- Keep packaging materials until you are satisfied with the product's condition.
3.2 Location and Placement
The NewAir NOF090SS00 is designed for both freestanding and built-in applications.
- Freestanding Installation: Place the unit on a flat, stable surface. The integrated easy-glide casters allow for convenient repositioning. Ensure there is adequate space around the unit for air circulation.
- Built-in Installation: The refrigerator features flushed hinges and a recessed kickplate, making it suitable for installation into a standard 15-inch counter opening. Ensure proper ventilation is maintained around the compressor area.

Figure 3.1: The refrigerator can be used as a portable freestanding unit or built into outdoor cabinetry.
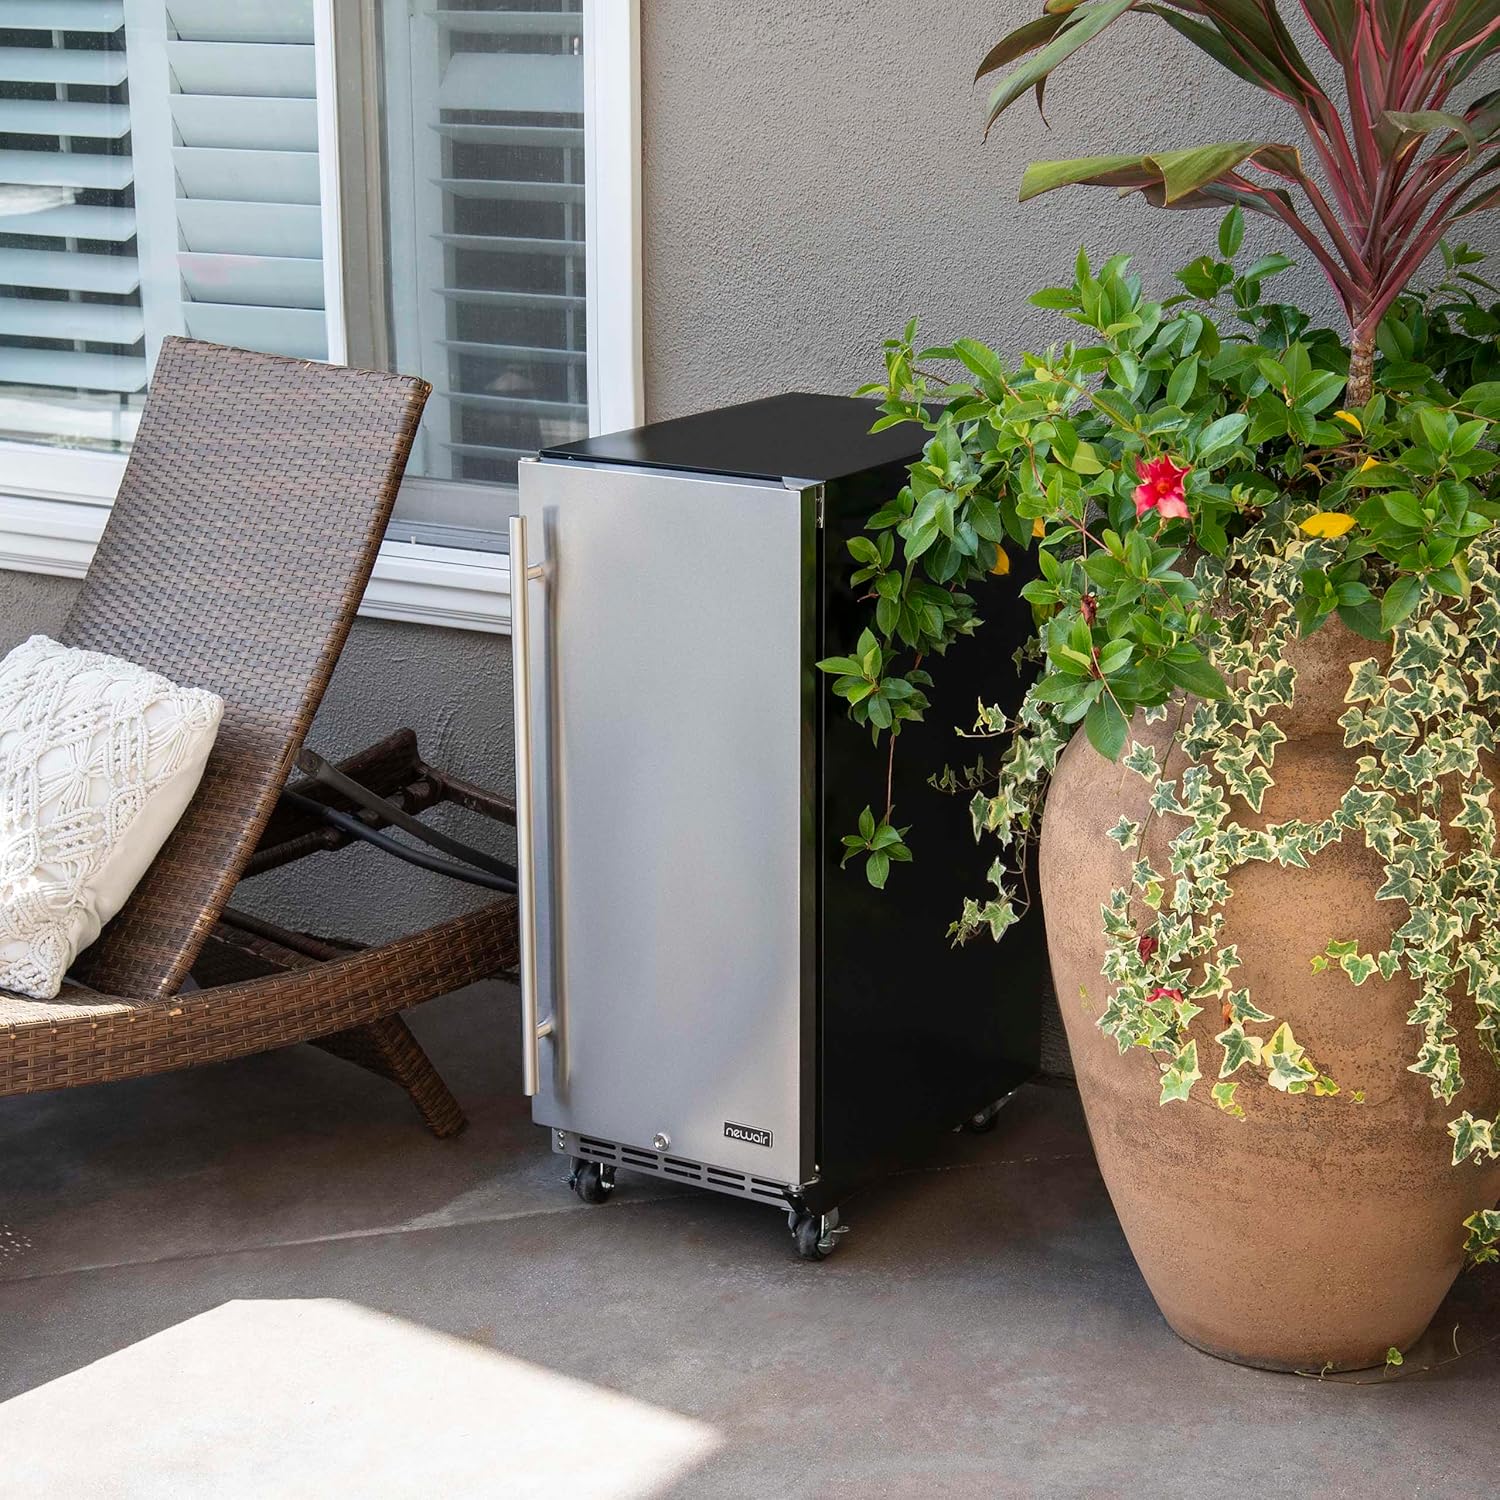
Figure 3.2: Example of freestanding placement on a patio.

Figure 3.3: Example of built-in placement in an outdoor kitchen.
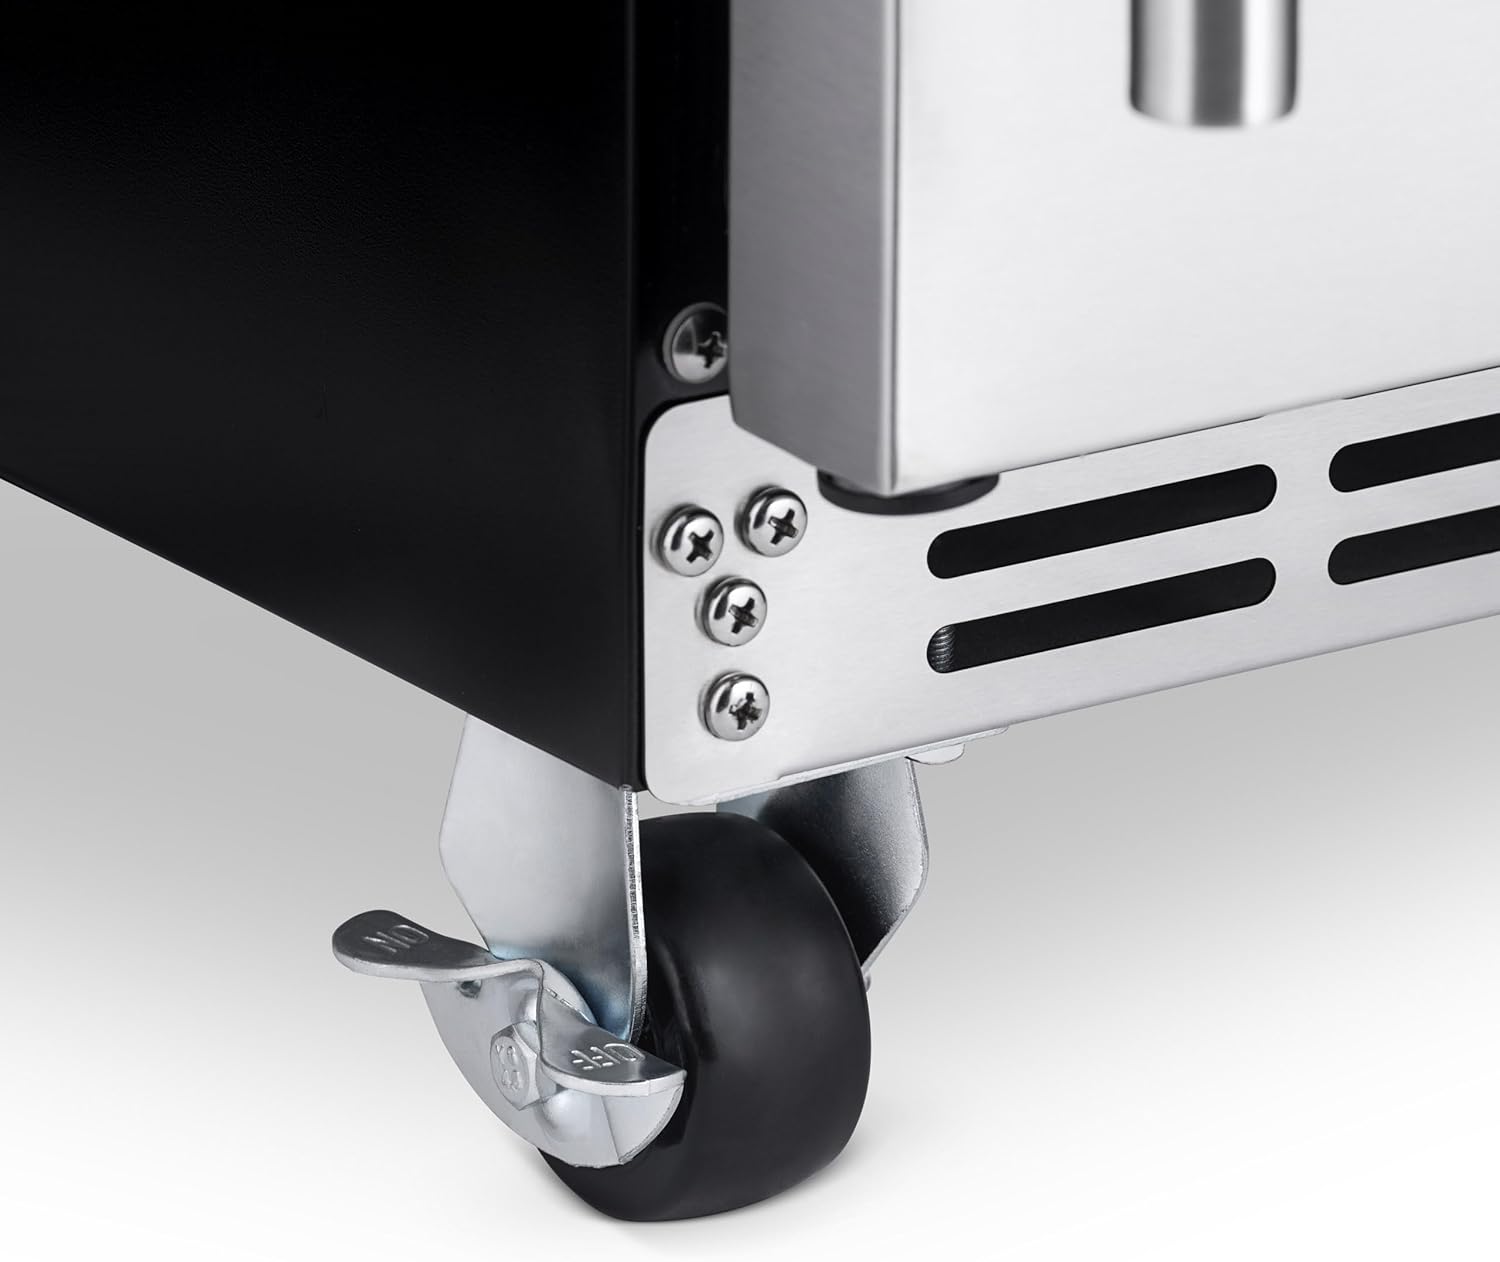
Figure 3.4: Easy-glide casters for mobility.
3.3 Leveling
It is important for the refrigerator to be level to function properly. Adjust the leveling feet (if applicable, or ensure casters are locked) to ensure the unit is stable and level.
3.4 Electrical Connection
Before plugging in the appliance, allow it to stand upright for at least 24 hours. This allows the refrigerant to settle. Connect the refrigerator to a dedicated, grounded 120 Volt, 60 Hz AC outlet. Do not use an extension cord.
4. Operating Instructions
Familiarize yourself with the controls and features of your NewAir beverage refrigerator.
4.1 Temperature Control
The refrigerator features a digital temperature control panel located inside the unit.

Figure 4.1: Digital Temperature Control Panel.
- Use the + and - buttons to adjust the desired temperature. The temperature can be set as low as 32°F (0°C).
- The digital display shows the current internal temperature.
4.2 Internal LED Lighting
The refrigerator is equipped with an internal LED light that automatically illuminates when the door is opened, and turns off when the door is closed. There may also be a manual light button on the control panel.
4.3 Auto-Closing Door
The appliance features an auto-closing door mechanism to ensure the door is not accidentally left ajar, helping to maintain internal temperature and energy efficiency.

Figure 4.2: Auto-closing door feature.
4.4 Adjustable Shelves and Capacity
The refrigerator includes adjustable wire shelves, allowing you to customize the internal storage space to accommodate various sizes of beverages and food items. The unit has a capacity of up to 90 standard 12 fl. oz. cans.

Figure 4.3: Interior view showcasing can capacity.

Figure 4.4: Flexible storage for cans and bottles.
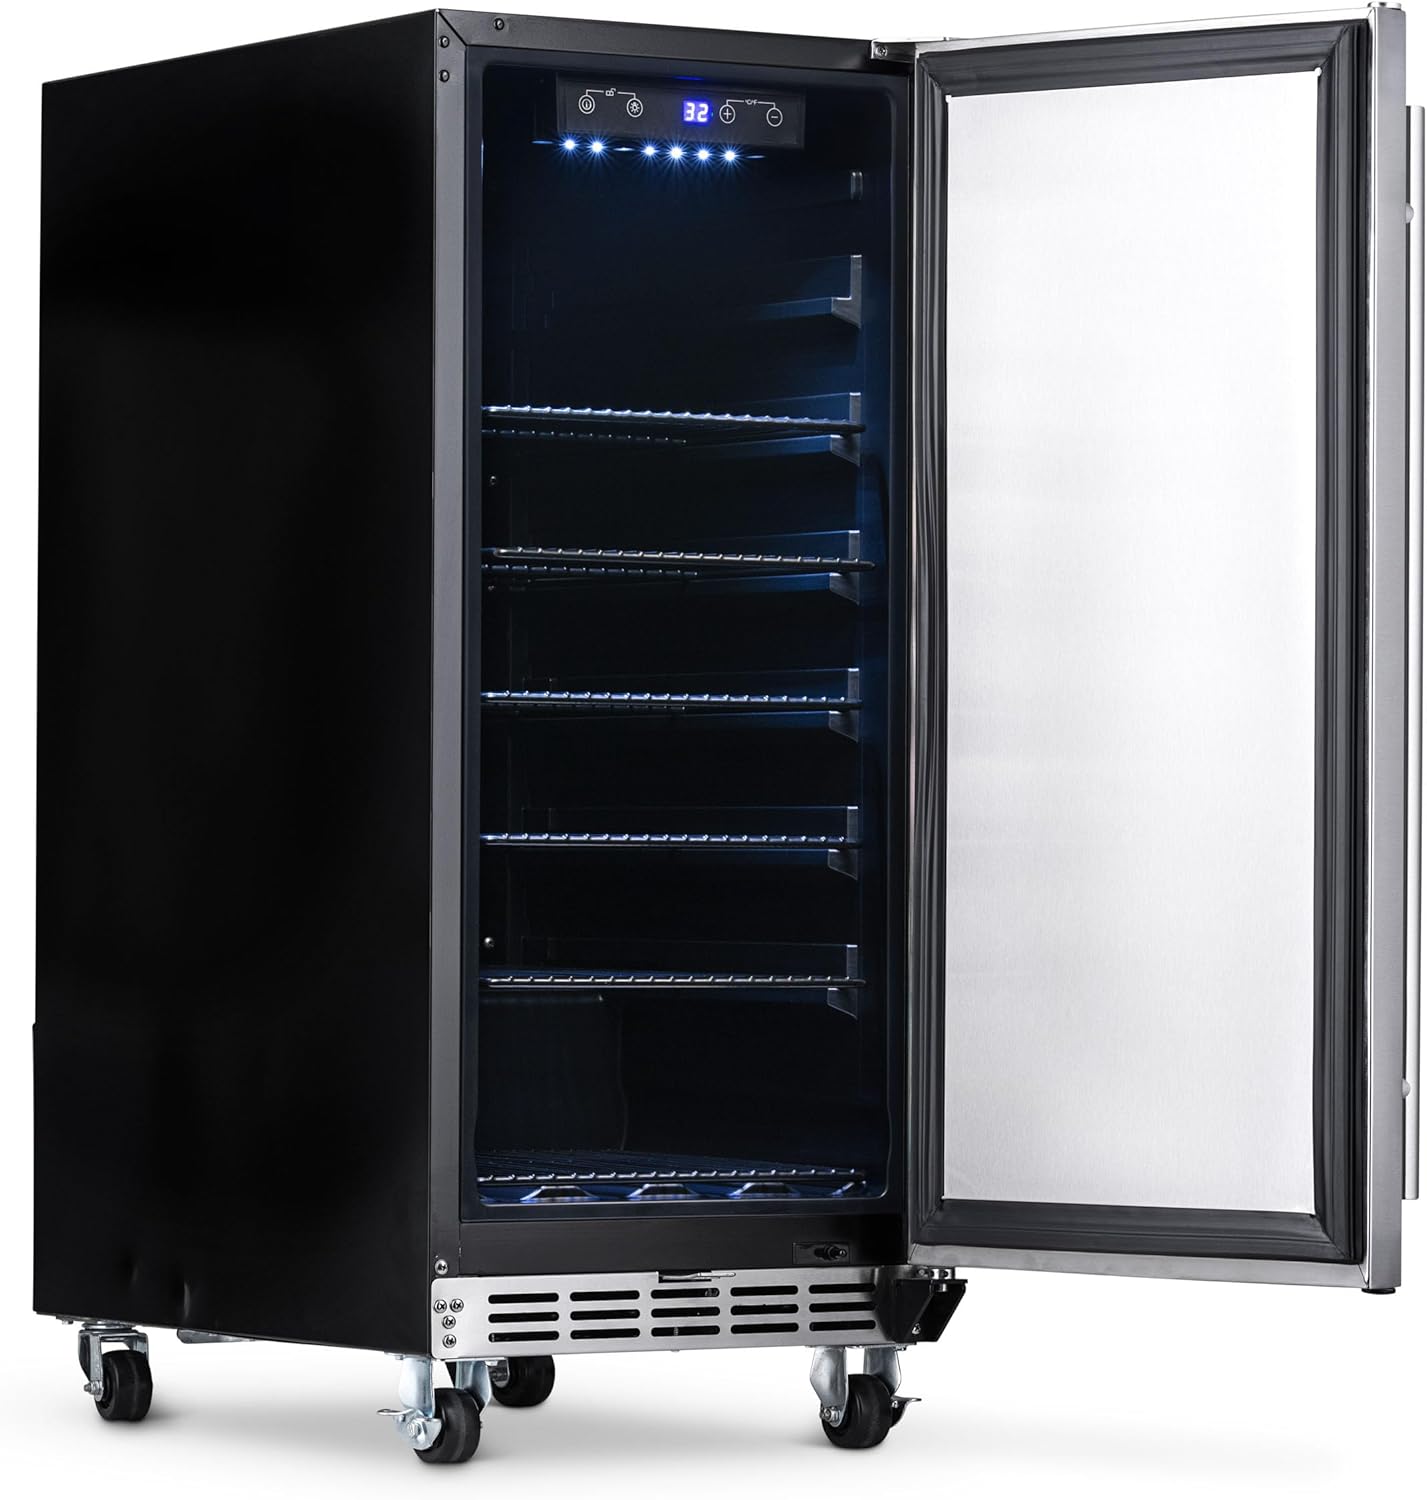
Figure 4.5: Interior with shelves removed, demonstrating adjustability.
4.5 Door Lock
The refrigerator is equipped with a door lock for security. Use the provided keys to lock and unlock the door.

Figure 4.6: Door lock and keys.
5. Maintenance
Regular maintenance helps ensure the longevity and optimal performance of your refrigerator.
5.1 Cleaning
- Interior: Unplug the unit before cleaning. Use a soft cloth and a mild, non-abrasive cleaner to wipe down the interior surfaces and shelves. Rinse with clean water and dry thoroughly.
- Exterior: Clean the stainless steel exterior with a soft cloth and a stainless steel cleaner. Avoid abrasive cleaners or scouring pads that can scratch the surface.
- Door Gasket: Regularly clean the door gasket to ensure a tight seal. A dirty or damaged gasket can lead to poor cooling performance.
5.2 Defrosting
This appliance features an automatic defrost system. Frost buildup on the evaporator will melt during the off-cycle of the compressor and drain into a drip tray where it evaporates.
6. Troubleshooting
Before contacting customer service, please refer to the following troubleshooting guide for common issues.
| Problem | Possible Cause | Solution |
|---|---|---|
| Refrigerator does not operate. | No power to the unit. | Check if the power cord is securely plugged into a working outlet. Check the circuit breaker. |
| Temperature is not cold enough. | Door not closed properly; excessive door openings; warm items placed inside; poor ventilation; ambient temperature too high. | Ensure door is fully closed. Reduce frequency of door openings. Allow warm items to cool before placing inside. Ensure adequate clearance for ventilation. Unit is designed for outdoor use, but extreme heat can affect performance. |
| Unit is making unusual noises. | Normal operating sounds (compressor, fan); unit not level. | Some sounds are normal. Ensure the unit is level to prevent rattling. |
| Door handle is loose or difficult to install. | Improper installation or loose screws. | Refer to the assembly instructions for the handle. Ensure all screws are tightened properly. Do not overtighten. |
7. Specifications
Technical specifications for the NewAir 15" Outdoor Beverage Refrigerator.
| Specification | Value |
|---|---|
| Brand Name | NewAir |
| Model Info | NOF090SS00 |
| Item Weight | 61.8 pounds |
| Product Dimensions | 23.25 x 15 x 36 inches (D x W x H) |
| Capacity | 3.2 Liters (90 Can Capacity) |
| Annual Energy Consumption | 250 Kilowatt Hours Per Year |
| Installation Type | Built-In / Freestanding |
| Form Factor | Compact |
| Special Features | Auto-Closing Door, Easy Glide Casters, Weatherproof Stainless Steel |
| Color | Stainless Steel |
| Control Console | Manual (Digital Display) |
| Voltage | 120 Volts |
| Wattage | 85 watts |
| Shelves | 4 Wire Shelves |
| Defrost System | Automatic |
| Door Hinges | Right |
| Certification | ETL/cETL |
| Included Components | Wheels |

Figure 7.1: Product Dimensions.
8. Warranty and Customer Support
NewAir stands behind the quality of its products.
- Warranty: This product is covered by a 1-year manufacturer's warranty from the date of purchase. Please retain your proof of purchase for warranty claims.
- Returns: The product is eligible for 30-day hassle-free product returns.
- Customer Support: For technical assistance, troubleshooting beyond this manual, or warranty inquiries, please visit the official NewAir website or contact their customer service department.

Figure 8.1: Warranty and Return Information.


