Product Overview
The Phanteks Evolv X2 is a mid-tower gaming chassis designed for high-performance PC builds. It features a unique see-through tempered glass design, a vertical cooling system for optimal airflow, and an aluminum interior with integrated D-RGB lighting. This chassis supports ATX rear-connect mainboards and offers extensive fan and radiator compatibility for efficient thermal management.

Figure 1: Phanteks Evolv X2 Mid-Tower Gaming Chassis, showcasing its sleek design and tempered glass panels.
Setup and Installation
Before beginning installation, ensure you have all necessary components and tools. Handle tempered glass panels with care to prevent damage.
1. Unboxing and Initial Access
- Carefully remove the chassis from its packaging.
- Locate and remove the screws securing the tempered glass side panels. Gently slide or lift the panels off.
- Identify the accessory box containing screws, zip ties, and other installation hardware.

Figure 2: The Phanteks Evolv X2 chassis with its tempered glass side panels removed, providing access to the interior for component installation.
2. Motherboard Installation
- Install the necessary standoffs for your motherboard form factor (ATX, Micro ATX, Mini ITX).
- Carefully place your motherboard onto the standoffs, aligning the screw holes.
- Secure the motherboard with the provided screws.
3. Power Supply Unit (PSU) Installation
- Mount the PSU to the designated area at the bottom of the chassis.
- Secure the PSU with screws from the rear of the chassis.
4. Storage Drive Installation
- Utilize the dedicated mounting points for 2.5" SSDs and 3.5" HDDs. Refer to the chassis diagram for specific locations.
- Secure drives using the appropriate screws or tool-less mechanisms.
5. Graphics Card (GPU) Installation
- Remove the necessary PCIe slot covers.
- Insert your graphics card into the primary PCIe slot on the motherboard.
- Secure the graphics card with screws.
6. Fan and Radiator Installation
- The Evolv X2 supports triple 120mm fan positions in the bottom for air intake and triple 120mm fan positions in the top with dedicated 360 radiator clearance for exhaust. A rear 120mm fan position is also available.
- Install fans and radiators according to your cooling configuration. Ensure proper airflow direction (intake from bottom, exhaust from top/rear).
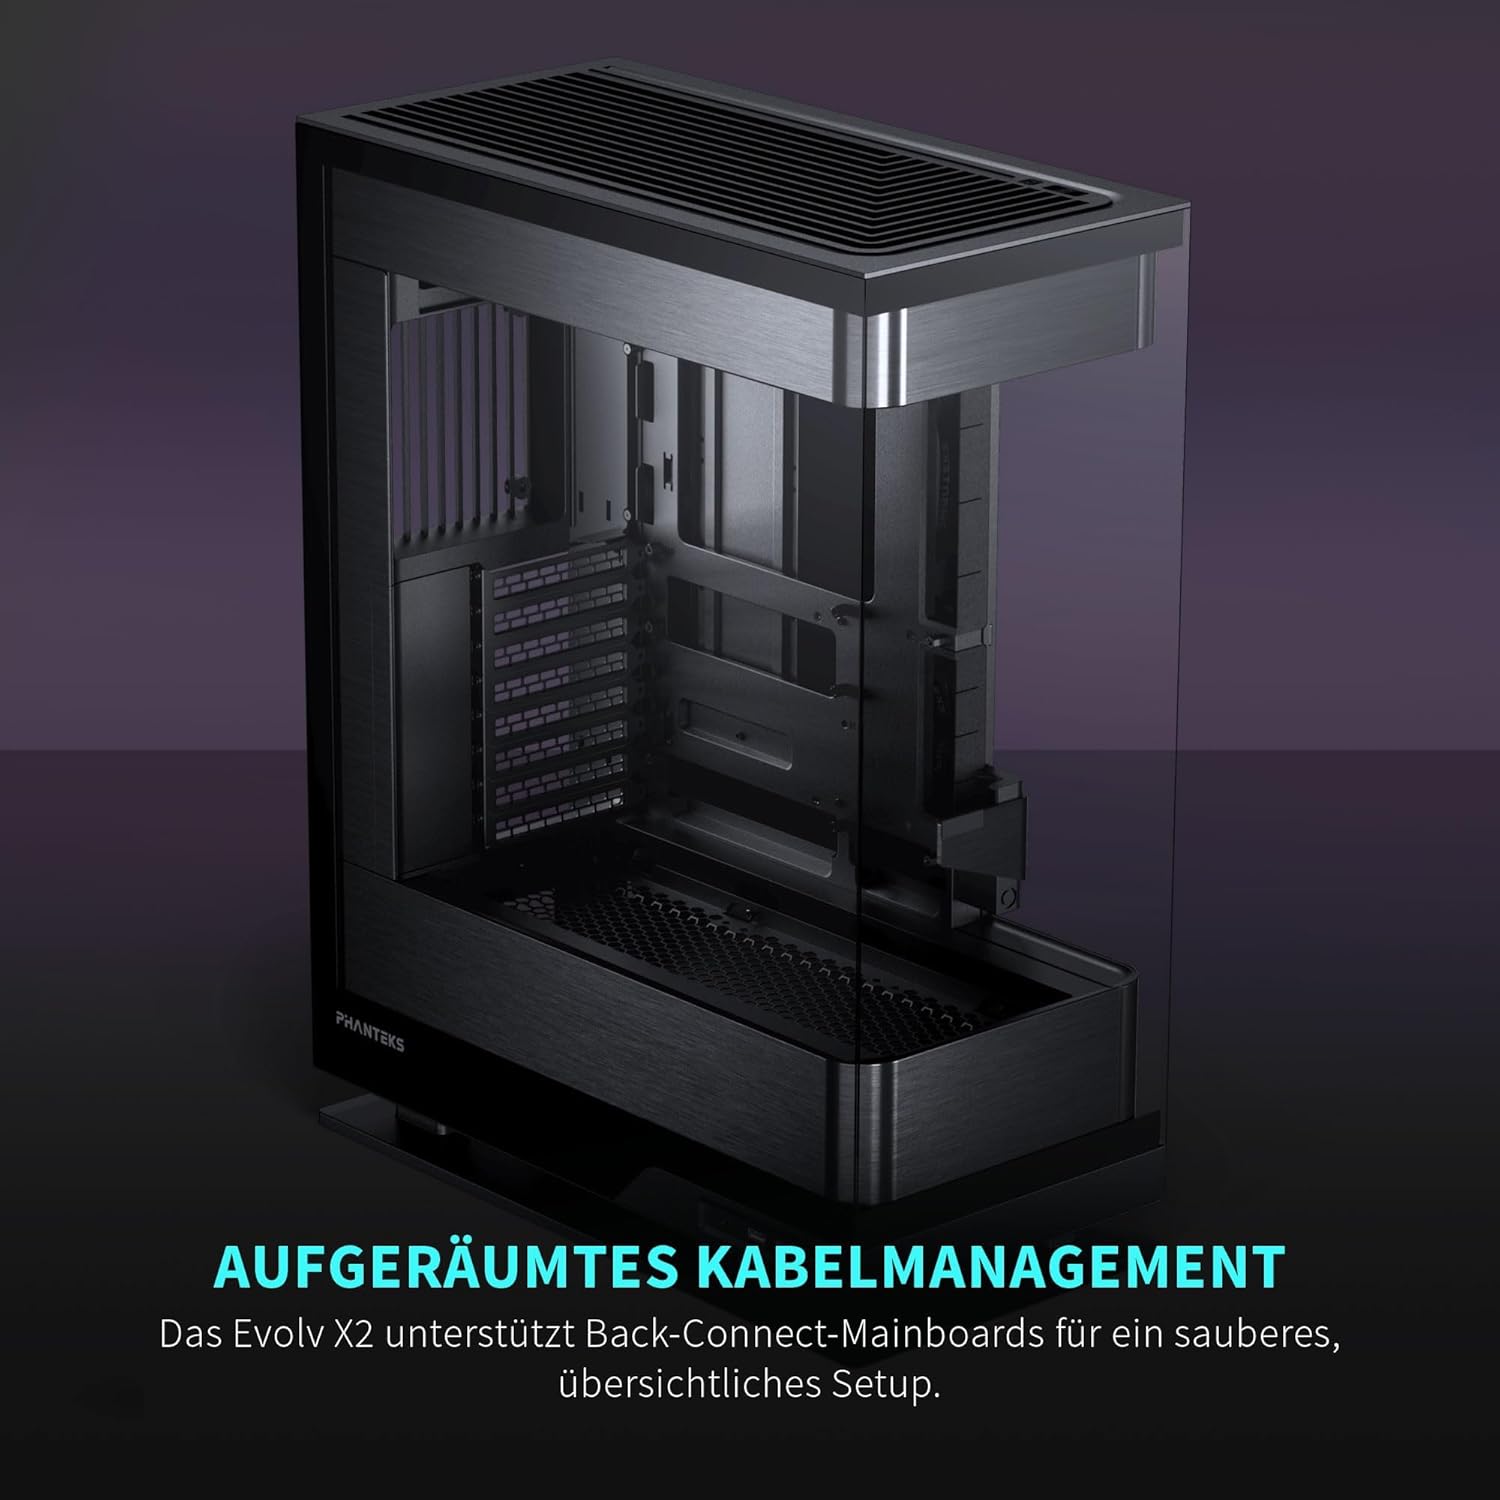
Figure 3: Illustration of the vertical cooling system, demonstrating air intake from the bottom and exhaust through the top, ensuring efficient thermal dissipation.
7. Cable Management
The Evolv X2 features a floating motherboard tray and ample space behind the motherboard for organized cable routing. Utilize the integrated cable ties and channels to maintain a clean interior and optimize airflow.

Figure 4: The rear side of the chassis, highlighting the dedicated cable management area and routing options for a tidy build.
Operating Instructions
Powering On
Once all components are securely installed and cables connected, plug the power cable into your PSU and a wall outlet. Press the power button located on the front I/O panel to start your system.
D-RGB Lighting Control
The Phanteks Evolv X2 features integrated D-RGB lighting. This lighting can be controlled via compatible motherboard software or through the chassis's built-in D-RGB controller, if applicable. Refer to your motherboard manual for software-based control or the Phanteks website for specific controller instructions.

Figure 5: The interior of the Phanteks Evolv X2 with D-RGB lighting active, highlighting the aesthetic integration of lighting with internal components.
Maintenance
Dust Filter Cleaning
To maintain optimal airflow and prevent dust buildup, regularly clean the dust filters located at the bottom and top of the chassis. These filters are designed for easy removal and cleaning with water or a soft brush.
- Gently slide out the bottom dust filter.
- The top panel can be removed to access the top dust filter.
- Clean the filters and ensure they are completely dry before re-installing.
Tempered Glass Care
Clean tempered glass panels with a soft, lint-free cloth and a non-abrasive glass cleaner. Avoid harsh chemicals or abrasive materials that could scratch the glass.
Troubleshooting
This section addresses common issues you might encounter. For more complex problems, please refer to the Phanteks support website.
- No Power: Ensure all power cables (PSU to wall, PSU to components) are securely connected. Verify the PSU switch is in the 'ON' position.
- Fans Not Spinning: Check fan connections to the motherboard or fan controller. Ensure fan headers are correctly configured in BIOS/UEFI.
- D-RGB Lighting Issues: Confirm D-RGB cables are properly connected to the motherboard or controller. Check lighting software settings.
- Excessive Dust Buildup: Regularly clean dust filters as described in the Maintenance section. Ensure proper positive or neutral air pressure within the case.
Specifications
| Feature | Detail |
|---|---|
| Brand | Phanteks |
| Model Name | Evolv X2 Brushed Black |
| Item Model Number | PH-ES524XTG_DBK01 |
| Case Type | Mid Tower |
| Motherboard Compatibility | ATX, Micro ATX, Mini ITX |
| Color | Black |
| Item Weight | 32 Pounds (approx. 14.5 kg) |
| Product Dimensions (LxWxH) | 17.87 x 8.97 x 23.15 inches (approx. 45.4 x 22.8 x 58.8 cm) |
| Number of USB 3.0 Ports | 2 |
| Cooling Method | Air |
| Power Supply Mounting Type | Bottom Mount |
Warranty and Support
For detailed warranty information, technical support, or to register your product, please visit the official Phanteks website. Keep your proof of purchase for warranty claims.
Official Phanteks Website: www.phanteks.com