
Outwell 111046
Outwell Cloud Pole Tent User Manual
Model: 111046
1. Introduction
Welcome to the user manual for your Outwell Cloud Pole Tent, Model 111046. This tent is designed to provide a comfortable and reliable shelter for up to five campers, featuring a stable dome style with an extended porch. Its design prioritizes fast and easy pitching, ensuring durability and protection for families and groups in various outdoor conditions.
Key features include a living area with a detachable bathtub groundsheet, a rear entrance for convenient access, the Outwell Wind Guard System for enhanced stability, a dark inner tent for improved sleep comfort, and reinforcement patches at all stress points for increased longevity.
2. Safety Information
Always prioritize safety when using your tent. Adhere to the following guidelines:
- Fire Safety: Keep all flame and heat sources away from tent fabric. The tent material is not fireproof.
- Ventilation: Ensure adequate ventilation, especially when cooking or using heating appliances inside or near the tent. Carbon monoxide can be deadly.
- Weather Conditions: Do not pitch the tent under trees that may drop branches. In strong winds, ensure all guy lines are securely pegged and tensioned. In heavy rain, ensure proper drainage around the tent.
- Site Selection: Choose a level site free of sharp objects. Avoid pitching in depressions where water might collect.
- Children: Supervise children around the tent to prevent accidents.
- Lightning: Seek appropriate shelter during lightning storms; a tent offers no protection from lightning.
3. Setup Instructions
Follow these steps for a quick and easy setup of your Outwell Cloud Pole Tent:
- Unpack and Lay Out: Remove the tent from its pack sack and lay it flat on your chosen pitching site. Identify the main tent body, poles, and pegs.

Image: The Outwell Cloud Pole Tent fully pitched, showing its dome shape and extended porch.
- Assemble Poles: Connect the fiberglass pole sections. The Cloud tent typically uses 5 poles.

Image: A close-up view of a tent pole connection point, illustrating the sturdy bracing.
- Insert Poles: Slide the assembled poles through the corresponding sleeves on the tent flysheet. Ensure they are fully inserted and seated at the ends.
- Raise the Tent: Lift the tent structure by pushing up the poles. Secure the pole ends into the eyelets or pins at the base of the tent.
- Peg Down Corners: Secure the four main corners of the tent to the ground using pegs. This will give the tent its initial shape and stability.
- Attach Inner Tent: If the inner tent is not pre-attached, clip it into the designated attachment points inside the main tent. Ensure the detachable bathtub groundsheet for the living area is properly positioned.

Image: Interior view of the Outwell Cloud tent, showing the entrance to the dark inner sleeping compartment.

Image: A close-up of the tent's groundsheet, highlighting its durable material and construction.
- Tension Guy Lines: Extend all guy lines and peg them securely into the ground at an appropriate angle (approximately 45 degrees from the tent). Adjust the tensioners to make the tent taut and stable. This activates the Outwell Wind Guard System.
- Final Adjustments: Check all zips and doors for smooth operation. Ensure the tent is evenly tensioned and free of wrinkles.

Image: Front view of the Outwell Cloud tent with the main entrance open, revealing the spacious porch area.
4. Operating Your Tent
4.1 Doors and Ventilation
The tent features multiple access points and ventilation options:
- Main Entrance: The wide front entrance provides easy access to the extended porch area.
- Rear Entrance: A dedicated rear entrance allows convenient access to and from the inner tent, improving flow and ventilation.
- Windows: Tinted windows offer privacy and protection from UV rays while allowing light into the living area. They can be covered with integrated curtains for full privacy.
- Ventilation Panels: Ensure proper airflow by utilizing the ventilation openings. This helps reduce condensation inside the tent.

Image: View from inside the tent looking out through a clear window, showing the surrounding environment.
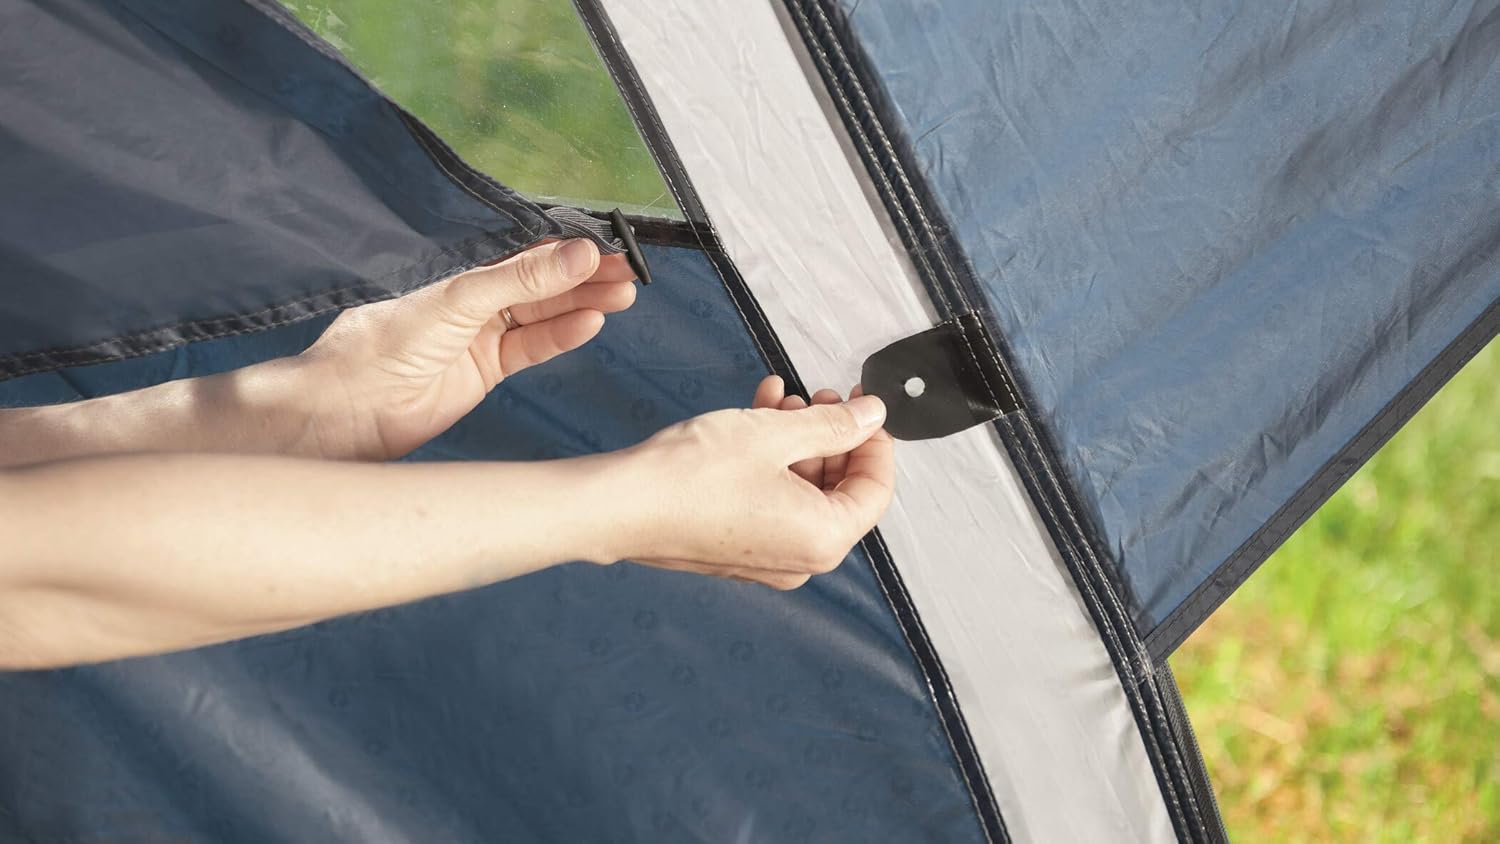
Image: Hands demonstrating how to adjust the window flap on the tent, indicating privacy or ventilation control.
4.2 Dark Inner Tent
The inner tent is designed with a dark material to reduce light penetration, promoting better sleep comfort, especially during long summer days.
5. Maintenance and Care
Proper care will extend the life of your tent:
- Cleaning: Clean the tent with a soft brush or sponge and lukewarm water. Do not use detergents or harsh chemicals, as they can damage the fabric's waterproof coating. Hand wash only.
- Drying: Always ensure the tent is completely dry before packing it away to prevent mildew and odors. If you must pack it wet, unpack and dry it as soon as possible.
- Storage: Store the tent in a cool, dry place, away from direct sunlight and extreme temperatures.
- Waterproofing: Over time, the waterproof coating may degrade. Re-proof the tent fabric periodically with a suitable tent-specific waterproofing spray or treatment.

Image: Close-up of water beading on the tent fabric, demonstrating its waterproof properties.
- Zippers: Keep zippers clean and lubricated with a silicone-based spray to ensure smooth operation.
- Poles: Inspect poles for damage before and after each use. Replace any cracked or bent sections promptly.
6. Troubleshooting
| Problem | Possible Cause | Solution |
|---|---|---|
| Condensation inside tent | Lack of ventilation; high humidity. | Open vents and doors for better airflow. Ensure tent is pitched in a well-ventilated area. |
| Tent not stable in wind | Guy lines not tensioned correctly; insufficient pegs. | Ensure all guy lines are fully extended and taut. Use all available pegging points. Re-tension guy lines as needed. |
| Water leaking through fabric | Waterproof coating worn out; seam leakage. | Re-proof the tent fabric with a suitable waterproofing spray. Seal seams with a seam sealer. |
| Zipper sticking | Dirt or debris in zipper teeth; lack of lubrication. | Clean zipper teeth with a brush. Apply a silicone-based zipper lubricant. |
7. Specifications
| Feature | Detail |
|---|---|
| Brand | Outwell |
| Model Name | Cloud |
| Model Number | 111046 |
| Occupancy | 5 Person |
| Shape | Dome |
| Material | 100% Polyester |
| Pole Material Type | Fiberglass |
| Color | Blue |
| Item Weight | 8.7 Kilograms |
| Package Weight | 10.16 Kilograms |
| Number of Doors | 2 |
| Number of Rooms | 2 |
| Water Resistance Level | Waterproof |
| Assembly Required | Yes |
| Included Components | Pack sack, Pegs |
| Item Dimensions (LxWxH) | 141.73 x 125.98 x 72.83 inches |

Image: Technical diagram illustrating the tent's external dimensions in centimeters.

Image: Floor plan diagram showing the internal layout and suggested sleeping arrangement for five people.
8. Warranty and Support
For warranty information and customer support, please refer to the official Outwell website or contact their customer service directly. Keep your proof of purchase for any warranty claims.
Outwell Official Website: www.outwell.com
Related documents111046

Ask a question about this manual
Ask about setup, troubleshooting, compatibility, parts, safety, or missing instructions. Manuals+ will review the question and use this page’s manual context to help answer it.