
1. Introduction
This manual provides instructions for the installation, operation, and maintenance of the WELLYE JR1758RX-2S and JR1958RX-2S 2.4G Bluetooth Remote Control and Receiver Kit. This kit is designed as a replacement part for children's powered ride-on cars. The JR1758RX-2S and JR1958RX-2S models are compatible and can be used interchangeably.

Image: The JR1958RX-2S and JR1758RX-2S control boxes are shown, highlighting their similar appearance and compatibility.
2. Compatibility Check
Before installation, ensure this control box is compatible with your child's ride-on car. Open the existing control box compartment in your ride-on car and compare its appearance with the images provided in this manual. If the appearance matches, this part should be suitable for your car.

Image: A detailed view of the JR1758RX-2S control box, displaying its model number, supply voltage (DC 12V), load current (Max 15A), and frequency (2.405GHz-2.483GHz).
3. Setup and Installation
This section outlines the basic steps for connecting the control box and pairing the remote control. Professional installation is recommended if you are unfamiliar with electrical wiring.
3.1. Control Box Installation
Connect the control box to the ride-on car's electrical system, including motors and power supply. Ensure all connections are secure and match the original wiring configuration. The control box operates on a 12V supply voltage.
Video: This video demonstrates the basic assembly and wiring of a control box with motors and a power source, showing the components in operation.
3.2. Remote Control Battery Installation
The remote controller requires two AAA (1.5V) batteries. Batteries are not included with the kit.
- Locate the battery compartment on the back of the remote control.
- Use a screwdriver to loosen the screw and open the battery cover.
- Insert two AAA (1.5V) batteries, ensuring correct polarity (+/-).
- Replace the battery cover and tighten the screw.

Image: A diagram illustrating the remote control's button layout and the process for installing two AAA batteries in its compartment.
3.3. Pairing the Remote Control (Matching Frequency)
The remote control must be paired with the receiver for the first use or after replacing the batteries.
- Load two AAA batteries into the remote controller.
- Hold down the "▲" (Forward) and "▼" (Backward) keys on the remote control simultaneously for 3 seconds to initiate the match code process. The first LED indicator on the remote will flicker.
- Turn on the power switch of the ride-on vehicle.
- The red indicator lights on the remote control will stop flashing, indicating that the pairing process is successful.
4. Operating the Remote Control
Once paired, the remote control allows you to operate the ride-on car. Familiarize yourself with the button functions:
- "S" button: Sets up speed.
- One LED lit: Low speed
- Two LEDs lit: Medium speed
- Three LEDs lit: High speed
- "▲" button: Forward movement.
- "▼" button: Backward movement.
- "◀" button: Turn Left.
- "▶" button: Turn Right.
- "P" button: Hold to apply the brake. All LED indicators will flicker when the brake is engaged.
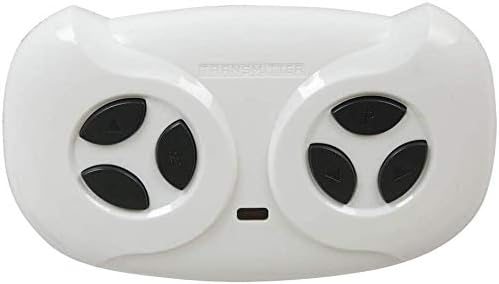
Image: The remote control unit, showing its ergonomic design and the layout of its red control buttons.
5. Maintenance
To ensure the longevity and proper functioning of your remote control and receiver kit, follow these maintenance guidelines:
- Keep the control box and remote control dry and away from moisture.
- Clean the units with a soft, dry cloth. Do not use harsh chemicals or abrasive cleaners.
- If the ride-on car will not be used for an extended period, remove the batteries from the remote control to prevent leakage.
- Regularly check all wiring connections for looseness or damage.
6. Troubleshooting
If you encounter issues with your remote control and receiver kit, refer to the following common problems and solutions:
| Problem | Possible Cause | Solution |
|---|---|---|
| Remote control not responding. |
|
|
| Vehicle moves erratically or not at all. |
|
|
7. Specifications
- Brand: WELLYE
- Model Numbers: JR1758RX-2S, JR1958RX-2S (compatible)
- Voltage: 12V
- Control Method: 2.4G Bluetooth
- Load Current (JR1758RX-2S): Max 15A
- Load Current (JR1958RX-2S): Max 30A
- Frequency (JR1758RX-2S): 2.405GHz-2.483GHz
- Frequency (JR1958RX-2S): 2.407GHz-2.473GHz
- Product Dimensions: Approximately 4 x 3 x 3 inches (Control Box)
- Item Weight: Approximately 5.9 ounces
- Recommended Age: 16 years and up (for product use, not for ride-on car operator)
8. Warranty and Support
For warranty information or technical support, please contact the manufacturer or your point of purchase. Keep your purchase receipt for any warranty claims.


