1. Introduction
This manual provides detailed instructions for the installation, operation, and maintenance of your Bluavido 10-inch IPS Car DVR Camera. This device is designed to enhance your driving experience with features such as dual-lens recording, GPS navigation, 4G connectivity, and advanced driver-assistance systems (ADAS). Please read this manual thoroughly before using the product to ensure proper function and safety.
2. Product Overview
2.1 Key Features
- 10-inch IPS Touch Screen Display
- Android 8.1 Operating System
- Dual Lens Recording (Front 720P, Rear 1080P)
- Integrated GPS Navigation with Free Maps
- 4G/3G/2G Network Connectivity
- Advanced Driver-Assistance Systems (ADAS): LDWS, FCWS
- G-Sensor for Automatic Collision Detection
- 24-Hour Parking Monitoring
- Night Vision Capability
- Bluetooth 4.0 for Hands-free Calls and Music
- Wi-Fi Functionality
- Remote View Functionality
- Max External Memory: 64GB (Class 10 required)
2.2 Package Contents
The package includes the following items:
- Bluavido 10-inch Car DVR Camera
- Rearview Camera
- GPS Antenna
- Power Cable (USB)
- Adhesive Mount
- Memory Card
- User Manual (this document)
3. Setup
3.1 Mounting the DVR
The Bluavido Car DVR uses an adhesive mount for secure placement on your vehicle's dashboard or windshield. Ensure the chosen location provides a clear view of the road and does not obstruct the driver's vision.
- Clean the mounting surface thoroughly to ensure optimal adhesion.
- Attach the adhesive mount to the desired location.
- Securely attach the DVR to the mount.
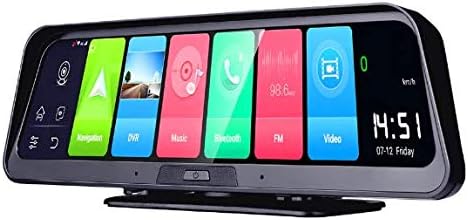
Image: The Bluavido 10-inch Car DVR, showing its sleek design and the main Android interface with various application icons like Navigation, DVR, Music, and Bluetooth.
3.2 Connecting the Cameras
The DVR supports dual-lens recording. The front camera is integrated into the main unit, while the rear camera needs to be connected separately.
- Connect the rear camera cable to the designated AV-In port on the main DVR unit.
- Route the rear camera cable discreetly along the vehicle's interior to the rear of the car.
- Mount the rear camera in a position that provides a clear view of the road behind, typically near the license plate or on the rear window.

Image: A diagram illustrating the coverage areas of the front (720P @ 25fps, 140° view) and rear (1080P @ 25fps, 120° view) cameras, indicating their respective recording resolutions and angles.
3.3 Inserting the Memory Card
A Class 10 Micro SD/TF card (up to 64GB) is required for recording. A memory card is included in the package.
- Locate the Micro SD/TF card slot on the DVR unit.
- Insert the memory card with the contacts facing down until it clicks into place.
- To remove, gently push the card until it springs out.
3.4 Power Connection
Connect the provided USB power cable to the DVR and then to your vehicle's 12V power outlet (cigarette lighter socket).
3.5 Initial Power On and Network Setup
Once powered, the device will boot up. Follow the on-screen prompts for initial setup, including language selection and time zone. To enable 4G connectivity, insert a compatible SIM card (not included) into the designated slot. For Wi-Fi, navigate to the settings menu to connect to an available network.

Image: The Bluavido 10-inch Car DVR shown with its rear camera. Key features are highlighted, including 2GB/32GB memory, Android 8.1, 4G & WiFi connectivity, phone control, free GPS maps, and ADAS/LDWS functionality.
4. Operating Instructions
The Bluavido DVR features a responsive IPS touch screen for easy navigation. All functions can be accessed via the on-screen interface.
4.1 Basic Recording
Upon powering on, the DVR will automatically begin loop recording. Video files are saved to the memory card. When the card is full, the oldest files will be overwritten by new recordings (cyclic recording).
4.2 GPS Navigation
The device comes with pre-installed free maps and an external GPS logger for accurate positioning. Access the navigation application from the main screen to plan routes and receive turn-by-turn directions.

Image: The Bluavido Car DVR mounted on a dashboard, with its screen clearly showing a detailed GPS navigation map, guiding the driver on a road.
4.3 ADAS (Advanced Driver-Assistance Systems)
The ADAS features, including Lane Departure Warning System (LDWS) and Forward Collision Warning System (FCWS), provide real-time alerts to help prevent accidents. These features can be configured in the settings menu.

Image: A visual representation of the ADAS Plus functions (LDWS, FCWS, FVMA) as seen through the Bluavido DVR's rearview mirror display, showing distance indicators to vehicles ahead on a multi-lane highway.
4.4 Parking Monitoring
The 24-hour parking monitoring feature automatically activates and records when an impact or collision is detected while the vehicle is parked, providing security footage.
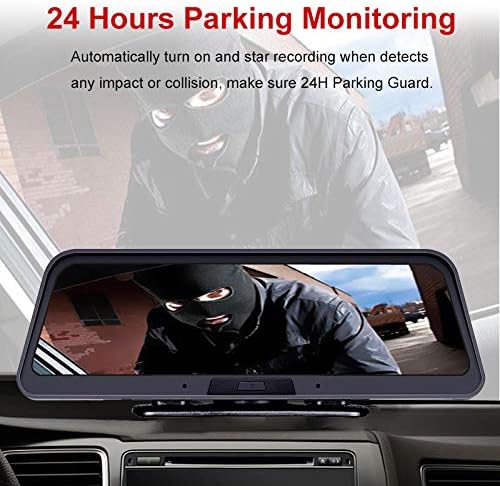
Image: The Bluavido DVR screen displaying a scene captured during 24-hour parking monitoring, showing a masked individual near a vehicle, indicating the system's ability to record suspicious activity.
4.5 G-Sensor
The built-in 3-axis G-Sensor detects sudden acceleration, braking, or collisions. In such events, it automatically locks the current video footage to prevent it from being overwritten, ensuring critical evidence is preserved.

Image: An illustration explaining the G-Sensor's automatic locking function, depicting two crashed cars and a padlock icon, symbolizing the protection of critical footage during an accident.
4.6 Auto Parking Line
When the vehicle is shifted into reverse gear, the DVR automatically switches to the rear camera view and displays parking guidelines on the screen, assisting with safer parking maneuvers.

Image: The Bluavido DVR screen displaying the rear camera view with dynamic parking lines overlaid, assisting a driver in reverse parking within a parking garage.
4.7 Connectivity (4G, Wi-Fi, Bluetooth)
The device supports 4G/3G/2G networks for online features, Wi-Fi for internet access, and Bluetooth 4.0 for hands-free calling and music playback. These functions are managed through the Android 8.1 interface.

Image: A composite image demonstrating various functionalities of the Bluavido DVR, including web surfing, music playback, video viewing, remote monitoring via phone, GPS navigation, and Bluetooth phone connectivity, along with network speed information.
5. Maintenance
5.1 Cleaning the Device
To maintain optimal performance and clear visibility, regularly clean the DVR screen and camera lenses. Use a soft, lint-free cloth. For stubborn marks, slightly dampen the cloth with water or a screen-safe cleaner. Avoid abrasive materials or harsh chemicals.
5.2 Memory Card Management
Periodically format the memory card within the DVR's settings to ensure stable recording and prevent data corruption. Back up any important video files to another storage device before formatting.
6. Troubleshooting
If you encounter issues with your Bluavido Car DVR, refer to the following common problems and solutions:
- Device not powering on: Ensure the power cable is securely connected to both the DVR and the vehicle's power outlet. Check the vehicle's fuse for the power outlet.
- Recording issues: Verify that a Class 10 memory card is inserted correctly and has sufficient free space. Format the memory card if necessary.
- GPS signal loss: Ensure the GPS antenna is properly connected and positioned with a clear view of the sky.
- Poor image quality: Clean the camera lenses. Check the recording resolution settings.
- Touch screen unresponsive: Restart the device. If the issue persists, a factory reset may be required (note: this will erase all user data).
For further assistance, please contact Bluavido customer support.
7. Specifications
| Feature | Specification |
|---|---|
| Model | AC89 |
| Display | 10-inch IPS Touch Screen |
| Operating System | Android 8.1 |
| Processor | Spreadtrum SL8541E |
| RAM/ROM | 2GB / 32GB |
| Front Camera Resolution | 1280x720P @ 25fps |
| Rear Camera Resolution | 1920x1080P @ 25fps |
| View Angle | Front: 140°, Rear: 120° (Total 170° field of view) |
| Video Format | TS (H.264) |
| Max External Memory | 64GB Micro SD/TF (Class 10) |
| GPS | External GPS Logger, Built-in GPS, Free Maps |
| Network Bands | LTE:FDD,2100(B1)/1800(B3); WCDMA:2100(B1)/900(B8); GSM:900(B8)/1800(B3) |
| Connectivity | 4G, Wi-Fi, Bluetooth 4.0, USB2.0, AV-Out |
| Special Features | G-Sensor, Cycle Recording, ADAS (LDWS, FCWS), Night Vision, Parking Monitoring, Dual Lens, Remote View |
| Mounting Type | Adhesive Mount |
| Power Source | USB (Car Charger) |
8. Warranty and Support
Your Bluavido Car DVR comes with a standard manufacturer's warranty. Please refer to the warranty card included in your package for specific terms and conditions. For technical support, troubleshooting assistance, or warranty claims, please contact your retailer or the official Bluavido customer service channels.


