
Introduction
The Vista Outdoor Lighting Pro Pack 2 Black is a comprehensive lighting solution designed to enhance your outdoor spaces. This professional-grade kit includes a selection of high-quality LED lights and a robust power transformer, providing efficient and reliable illumination for various landscape applications. This manual provides detailed instructions for installation, operation, maintenance, and troubleshooting to ensure optimal performance and longevity of your lighting system.

Figure 1: The complete Vista Outdoor Lighting Pro Pack 2 Black kit, featuring four path lights, six spotlights, a stainless steel power transformer, and a white timer.
Safety Information
Please read and understand all instructions before installing or operating this product. Failure to follow these instructions may result in electric shock, fire, or other hazards. Keep this manual for future reference.
- Always disconnect power at the circuit breaker or fuse box before installing, servicing, or cleaning the unit.
- Ensure all wiring connections are secure and properly insulated, especially for outdoor use. Use only UL-listed components.
- Do not submerge the transformer or any electrical components in water.
- Avoid installing lights near flammable materials or in areas with excessive heat.
- Use only the specified wattage and type of bulbs.
- Keep children and pets away from the installation area during setup.
- If you are unsure about any part of the installation, consult a qualified electrician.
Package Contents
Verify that all components listed below are present in your package:
- (6) Black GR-5006 LED Spotlights: 4.5 Watt, 36 Degree LED MR-16.
- (4) Black 4704 LED Path Lights: 2.5 Watt LED G4 Bi-Pin.
- (1) ES-150 Stainless Steel Transformer: 150 Watts, includes timer.
- Wire connectors (quantity as needed for connections).
- Ground stakes for lights.
Setup and Installation
1. Planning Your Layout
Before beginning installation, plan the placement of your lights and transformer. Consider the areas you wish to illuminate and the path for the low-voltage cable. Ensure the transformer is placed in a dry, accessible location, preferably near a GFCI (Ground Fault Circuit Interrupter) protected outdoor outlet.
2. Installing the Lights
For path lights and spotlights, attach the included ground stakes to the base of each fixture. Press the stakes firmly into the ground at your desired locations. Ensure the lights are stable and positioned to achieve the desired lighting effect.
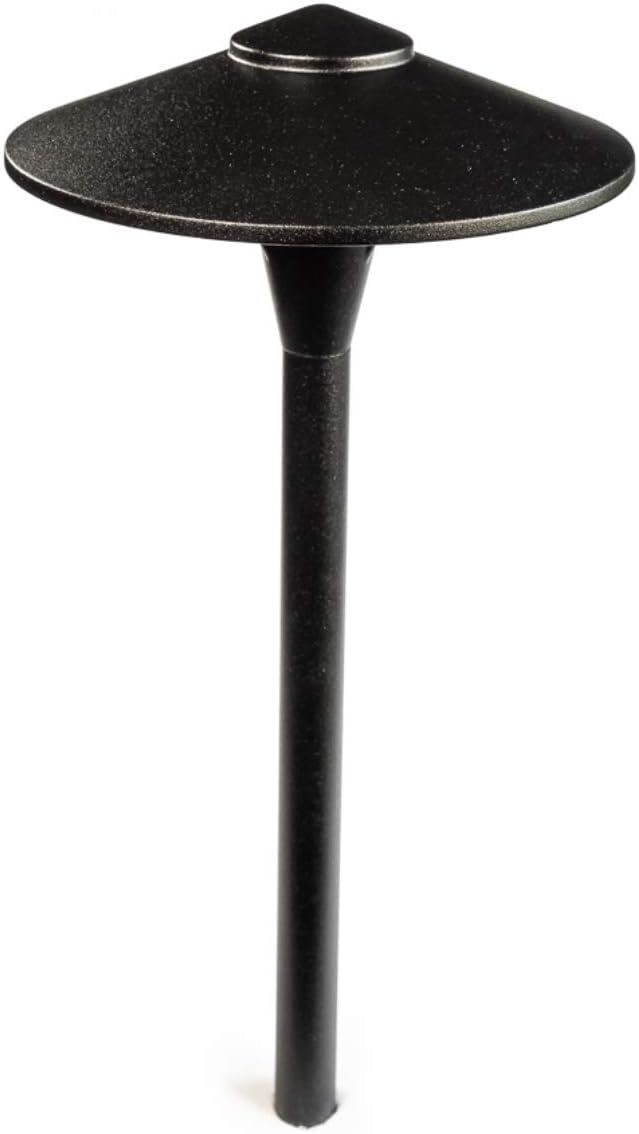
Figure 2: A detailed view of one of the black path lights included in the kit, designed for illuminating pathways.

Figure 3: A detailed view of one of the black spotlights included in the kit, suitable for accent lighting.

Figure 4: A black plastic ground stake used to firmly secure the path lights and spotlights into the ground.
3. Wiring the System
Lay out the low-voltage cable from the transformer to each light fixture. Ensure the cable is buried at least 6 inches deep or concealed to prevent tripping hazards and damage. Connect each light fixture to the main low-voltage cable using the provided wire connectors. Twist the connectors tightly to ensure a secure, waterproof connection.

Figure 5: Waterproof wire connectors, essential for securing electrical connections in outdoor environments.
4. Connecting the Transformer
Mount the ES-150 transformer to a wall or sturdy post near your outdoor outlet. Open the transformer cover and connect the low-voltage cable from your lighting system to the appropriate terminals inside the transformer. Refer to the wiring diagram inside the transformer cover for correct connections (typically 12V or 15V terminals, depending on cable length and load). Ensure all connections are tight.

Figure 6: The stainless steel ES-150 power transformer, showing its robust casing and power cord.

Figure 7: The inside of the ES-150 transformer, revealing the wiring terminals and internal components for connecting the lighting system.
Once all connections are made, close the transformer cover securely. Plug the transformer into a GFCI-protected outdoor electrical outlet. The included timer can be set to control the on/off cycles of your lighting system.
Operating Instructions
Using the Timer
The ES-150 transformer comes with an integrated timer to automate your lighting. To set the timer:
- Locate the timer dial on the transformer or the separate timer unit.
- Rotate the outer dial to align the current time with the arrow indicator.
- Push down the segments on the dial for the hours you want the lights to be ON. Each segment typically represents 15 or 30 minutes.
- Ensure the timer switch is set to "Timer" mode, not "ON" or "OFF" (if applicable).
Your lights will now automatically turn on and off according to your programmed schedule.
Maintenance
Regular maintenance ensures the longevity and optimal performance of your outdoor lighting system.
- Cleaning: Periodically clean the light fixtures and transformer casing with a soft, damp cloth to remove dirt, dust, and debris. Do not use abrasive cleaners or solvents.
- Bulb Replacement: While the included LEDs have a long lifespan, if a bulb needs replacement, ensure the power is disconnected before attempting to replace it. Use only compatible LED MR-16 (for spotlights) or G4 Bi-Pin (for path lights) bulbs of the specified wattage.
- Wiring Inspection: Annually inspect all wiring and connections for any signs of wear, damage, or corrosion. Repair or replace damaged components immediately.
- Fixture Adjustment: Adjust the angle of spotlights as needed to maintain desired illumination.
Troubleshooting
If your outdoor lighting system is not functioning correctly, refer to the following common issues and solutions:
| Problem | Possible Cause | Solution |
|---|---|---|
| Lights are not turning on. | No power to transformer, faulty connections, tripped GFCI, timer setting incorrect, faulty bulb. | Check power outlet and GFCI. Ensure transformer is plugged in. Verify all wire connections are secure. Check timer settings. Replace any suspected faulty bulbs. |
| Some lights are not working. | Loose connection to specific light, faulty bulb in that fixture, damaged wire. | Inspect connections for the non-working lights. Test with a known good bulb. Check for cuts or damage in the low-voltage cable. |
| Lights are flickering or dim. | Voltage drop due to long cable run, too many lights on one transformer, loose connections. | Ensure total wattage of lights does not exceed transformer capacity (150W). Check for loose connections. Consider using a heavier gauge wire for longer runs or splitting the load. |
| Timer is not working correctly. | Incorrect timer setting, timer malfunction. | Re-read operating instructions for timer setup. Ensure timer is set to "Timer" mode. If issues persist, the timer may need replacement. |
Specifications
| Feature | Detail |
|---|---|
| Brand | Vista |
| Model | Pro Pack 2 Black |
| Color | Black |
| Material | Stainless Steel (Transformer), Other (Lights) |
| Finish Type | Powder Coated |
| Light Source Type | LED |
| Power Source | Corded Electric |
| Voltage | 110 Volts (Input to Transformer) |
| Transformer Wattage | 150 Watts (ES-150) |
| Spotlight Bulb Type | 4.5 Watt 36 Degree LED MR-16 |
| Path Light Bulb Type | 2.5 Watt LED G4 Bi-Pin |
| Number of Light Sources | 10 (6 Spotlights, 4 Path Lights) |
| Mounting Type | Wall Mount (Transformer), Ground Stake (Lights) |
| UPC | 850009121653 |
| Date First Available | March 30, 2020 |
Warranty Information
For detailed warranty information regarding your Vista Outdoor Lighting Pro Pack 2 Black, please refer to the warranty card included with your product or visit the official Vista website. Warranty terms typically cover manufacturing defects for a specified period from the date of purchase. Keep your proof of purchase for warranty claims.
Customer Support
If you have any questions, require technical assistance, or need to report an issue with your Vista Outdoor Lighting Pro Pack 2 Black, please contact Vista customer support. Contact information can typically be found on the manufacturer's website or on the product packaging.
For general inquiries, you may also refer to the product page on Amazon.com.