
1. Introduction
This manual provides essential information for the safe and efficient operation, maintenance, and troubleshooting of your Gaggia Classic Evo Pro Espresso Machine. Please read all instructions carefully before first use and retain this manual for future reference.
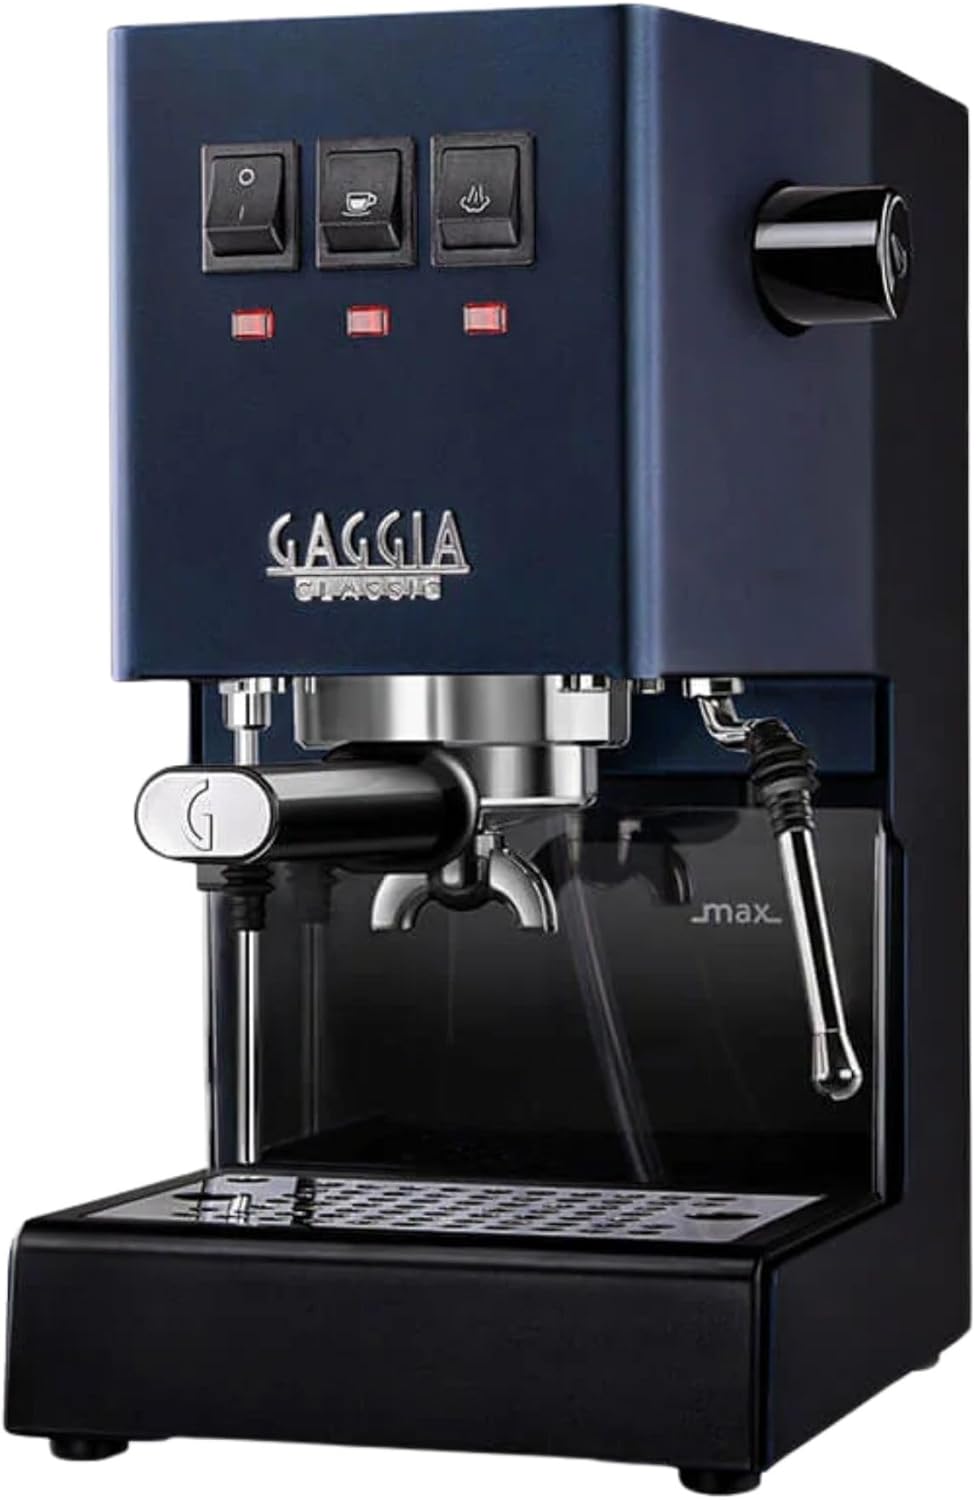
Figure 1: Gaggia Classic Evo Pro Espresso Machine, Classic Blue.
Key Features:
- Brass boiler with increased capacity and power for consistent temperature.
- Constructed in Italy with durable machine-grade components.
- Solid steel housing and a brass group head with stainless steel surround.
- Designed for 9-bar extractions, featuring a 3-way solenoid valve.
- Equipped with a commercial-style steam wand for milk frothing.

Figure 2: Close-up view of the Gaggia Classic Evo Pro's control panel, highlighting its classic design.
2. Setup
Before operating your espresso machine, ensure it is properly set up according to these instructions.
2.1 Unpacking
- Carefully remove all packaging materials.
- Verify all components are present: espresso machine, water reservoir, reservoir lid, drip tray, drip tray cover, decompression duct tube, portafilter, pressurized double shot basket, commercial single shot basket, commercial double shot basket, tamper, and coffee scoop.
- Place the machine on a stable, level surface away from heat sources and water.
2.2 Initial Cleaning
- Wash the water reservoir, portafilter, and filter baskets with warm water and mild detergent. Rinse thoroughly.
- Wipe the exterior of the machine with a damp cloth.
2.3 Filling the Water Reservoir
- Remove the water reservoir from the back of the machine.
- Fill the reservoir with fresh, cold, filtered water up to the MAX line. Avoid using distilled water.
- Replace the reservoir securely in its position.
2.4 Priming the Machine
- Plug the machine into a grounded electrical outlet.
- Turn on the main power switch (usually marked with 'O|').
- Place a container under the steam wand. Open the steam knob.
- Press the brew button (coffee cup icon). Water will start to flow from the steam wand.
- Once water flows continuously, close the steam knob and press the brew button again to stop. The machine is now primed.
3. Operating Instructions
Follow these steps to brew espresso and froth milk.
3.1 Brewing Espresso
- Preheat: Turn on the machine and allow it to heat up for at least 15-20 minutes. The 'coffee ready' indicator light will illuminate when the machine reaches brewing temperature.
- Prepare Portafilter: Select the appropriate filter basket (single or double). Grind fresh coffee beans to a fine consistency suitable for espresso. Fill the basket with ground coffee.
- Tamp: Use the tamper to press the coffee grounds firmly and evenly into the basket. Ensure the surface is level.
- Insert Portafilter: Attach the portafilter to the group head by inserting it and rotating it firmly to the right until it is secure.
- Brew: Place your espresso cup(s) under the portafilter spouts. Press the brew button. Espresso will begin to flow.
- Stop Brew: Press the brew button again when the desired volume of espresso is reached (typically 25-30 seconds for a double shot).
- Remove Portafilter: Carefully remove the portafilter, discard the used coffee grounds, and rinse the basket.

Figure 3: Espresso extraction into a glass, showcasing the crema.
3.2 Frothing Milk
- Activate Steam: Press the steam button (steam icon). Wait for the 'steam ready' indicator light to illuminate.
- Purge Steam Wand: Place an empty container under the steam wand. Open the steam knob briefly to purge any condensed water. Close the knob.
- Froth Milk: Immerse the tip of the steam wand just below the surface of cold milk in a frothing pitcher. Open the steam knob fully.
- Texture Milk: Lower the pitcher slightly to introduce air, creating a hissing sound. Once the milk volume increases, lower the wand deeper to heat the milk to desired temperature (around 140-150°F or 60-65°C).
- Stop Steaming: Close the steam knob, then remove the pitcher.
- Clean Wand: Immediately wipe the steam wand with a damp cloth. Briefly open the steam knob again to clear any milk residue from inside the wand.

Figure 4: The professional steam wand, designed for creating microfoam for milk-based beverages.
4. Maintenance
Regular maintenance ensures optimal performance and longevity of your machine.
4.1 Daily Cleaning
- Empty and rinse the drip tray and water reservoir.
- Clean the portafilter and filter baskets after each use.
- Wipe down the exterior of the machine.
4.2 Weekly Cleaning (Backflushing)
- Insert a blind filter basket (without holes) into the portafilter.
- Add a small amount of espresso machine cleaner (e.g., Cafiza) to the blind filter.
- Attach the portafilter to the group head.
- Press the brew button for 10 seconds, then release for 5 seconds. Repeat 5 times.
- Remove the portafilter, rinse, and repeat the backflushing process with plain water to remove any cleaner residue.
4.3 Descaling
Descale your machine every 2-3 months, or more frequently if you have hard water. Use a descaling solution specifically designed for espresso machines.
- Prepare the descaling solution according to the manufacturer's instructions and fill the water reservoir.
- Place a large container under the group head and steam wand.
- Turn on the machine and allow it to heat up.
- Run approximately one-third of the solution through the group head by pressing the brew button.
- Run another third of the solution through the steam wand by opening the steam knob.
- Turn off the machine and let it sit for 15-20 minutes to allow the descaler to work.
- Repeat steps 4-6 until all the descaling solution has passed through the machine.
- Rinse the water reservoir thoroughly and fill it with fresh water.
- Run several full reservoirs of fresh water through the group head and steam wand to rinse out any descaling residue.

Figure 5: The internal brass boiler, a key component for heating water and steam.
5. Troubleshooting
This section addresses common issues you might encounter. For more detailed troubleshooting, refer to the full user manual PDF.
| Problem | Possible Cause | Solution |
|---|---|---|
| No water flow from group head | Water reservoir empty; machine not primed; pump issue; clogged group head. | Fill reservoir; prime machine; descale; contact support if pump fails. |
| Espresso flows too fast (under-extraction) | Coffee ground too coarse; insufficient coffee dose; tamping too light. | Use finer grind; increase coffee dose; tamp more firmly. |
| Espresso flows too slow or not at all (over-extraction) | Coffee ground too fine; excessive coffee dose; tamping too hard; clogged filter. | Use coarser grind; reduce coffee dose; tamp lighter; clean filter basket. |
| No steam from wand | Steam button not activated; steam wand clogged; machine not at steam temperature. | Ensure steam button is on and light is illuminated; clean steam wand; allow more time to heat. |
6. Specifications
Detailed technical specifications for the Gaggia Classic Evo Pro Espresso Machine.
| Feature | Detail |
|---|---|
| Brand | Gaggia |
| Model Name | Gaggia Classic Pro E24 |
| Item Model Number | RI9380/50 |
| Color | Classic Blue |
| Product Dimensions (D x W x H) | 8"D x 9.5"W x 14.2"H (20.3cm D x 24.1cm W x 36.1cm H) |
| Item Weight | 20 pounds (9.07 kg) |
| Voltage | 120V |
| Operation Mode | Semi-Automatic |
| Included Components | Espresso Machine, Water Reservoir, Reservoir Lid, Drip Tray, Drip Tray Cover, Decompression Duct Tube, Portafilter, Pressurized Double Shot Basket, Commercial Single Shot Basket, Commercial Double Shot Basket, Tamper, Coffee Scoop |
| Special Features | 9 Bar Extractions, Commercial Components, Made in Italy, Self Serviceable, Steel Housing |

Figure 6: Product dimensions for placement and planning.
7. Warranty and Support
For warranty information, technical support, or service inquiries, please refer to the official Gaggia documentation or contact Gaggia customer service.
- User Manual (PDF): A detailed user manual is available for download here.
- Manufacturer: Gaggia
- Contact: Refer to the official Gaggia website for current contact information and support resources.


