
1. Product Overview
The Wisenet TNU-X6320E2F2WT1-Z is a high-performance 2-megapixel explosion-proof positioning camera designed for demanding surveillance environments. It features a 32x optical zoom with auto-focus, delivering clear 1080p video at 60 frames per second. This camera is built to withstand extreme temperatures ranging from -40°C to +60°C (-40°F to +140°F) and includes advanced functionalities such as intelligent video analytics, a built-in wiper, and Wide Dynamic Range (150dB) for optimal image quality in varying light conditions. It also supports multiple streaming options and includes dual micro SD/SDHC/SDXC memory slots for local storage.
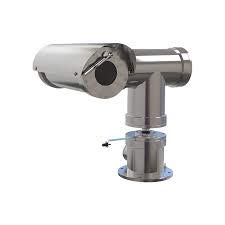
Figure 1: Front view of the Wisenet TNU-X6320E2F2WT1-Z camera.
2. Setup Instructions
2.1 Unpacking and Inspection
- Carefully remove all components from the packaging.
- Verify that all items listed in the packing list are present.
- Inspect the camera and accessories for any signs of damage. If damage is found, contact your supplier immediately.
2.2 Mounting the Camera
Due to the specialized nature of this explosion-proof camera, professional installation is highly recommended. Ensure that the mounting location complies with all local safety regulations and standards for hazardous environments.
- Select a stable mounting surface capable of supporting the camera's weight and resisting environmental factors.
- Securely attach the camera mounting bracket using appropriate hardware (not included).
- Mount the camera onto the bracket, ensuring it is firmly fastened and correctly oriented.
2.3 Power and Network Connection
The camera supports AC/DC power input and Wi-Fi wireless connectivity. For optimal performance and security in hazardous environments, consult the detailed wiring diagrams in the full technical manual.
- Power Connection: Connect the appropriate AC/DC power supply to the camera's power input port. Ensure the power source meets the camera's voltage and current requirements.
- Network Connection (Wireless): Configure the camera's Wi-Fi settings via the initial setup interface. Refer to the network configuration guide for detailed steps on connecting to your wireless network.
- Network Connection (Wired, if applicable): If a wired connection is preferred or required, connect an Ethernet cable to the camera's network port and to your network switch or router.
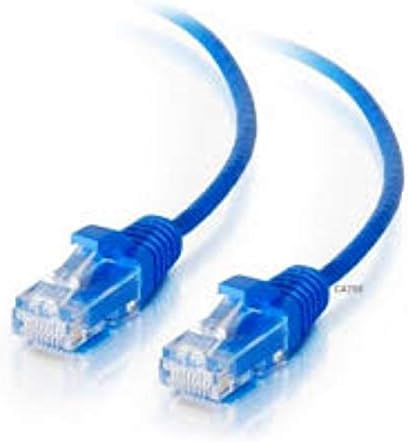
Figure 2: Side view of the camera showing potential connection points.
3. Operating Instructions
3.1 Initial Configuration
After successful installation and power-up, access the camera's web interface using a web browser on a computer connected to the same network. The default IP address and login credentials can be found in the separate Quick Start Guide.
- Enter the camera's IP address into your web browser.
- Log in using the default username and password. Change these immediately for security.
- Follow the on-screen prompts to set up basic network settings, date/time, and video resolution (1080p @ 60fps recommended).
3.2 Pan, Tilt, and Zoom (PTZ) Control
The camera features PTZ technology with 32x optical zoom. Control is typically performed through the camera's web interface or compatible VMS (Video Management Software).
- Pan: Adjust the camera's horizontal view.
- Tilt: Adjust the camera's vertical view.
- Zoom: Use the optical zoom to magnify distant objects. The auto-focus feature will automatically adjust for clarity.
- Presets: Configure and save specific camera positions for quick recall.
3.3 Intelligent Video Analytics
The camera includes intelligent video analytics features to enhance surveillance capabilities. These can be configured via the web interface.
- Motion Detection: Set up zones for detecting movement.
- Tampering Detection: Receive alerts if the camera's view is obstructed or altered.
- Line Crossing/Intrusion Detection: Define virtual lines or areas to trigger alarms when crossed or entered.
3.4 Local Storage (Micro SD)
The camera is equipped with dual micro SD/SDHC/SDXC memory slots for on-board recording. This provides a backup or primary recording solution.
- Insert compatible micro SD cards into the designated slots.
- Format the cards through the camera's web interface before use.
- Configure recording schedules and event-triggered recording settings.
4. Maintenance
Regular maintenance ensures optimal performance and longevity of your Wisenet camera, especially in harsh environments. Always disconnect power before performing any physical maintenance.
4.1 Cleaning
- Exterior: Wipe the camera body with a soft, damp cloth. Do not use abrasive cleaners or solvents.
- Lens and Wiper: The camera features a built-in wiper. For manual cleaning, use a soft, lint-free cloth specifically designed for optical lenses. Avoid touching the lens directly with fingers.
4.2 Firmware Updates
Periodically check the Wisenet official website for firmware updates. Keeping the firmware up-to-date ensures access to the latest features, security patches, and performance improvements.
- Download the latest firmware from the official Wisenet support page.
- Follow the instructions provided with the firmware update package for safe installation via the camera's web interface.
4.3 Environmental Checks
Regularly inspect the camera's mounting and cabling for any signs of wear, corrosion, or damage, particularly in explosion-proof installations. Ensure all seals and gaskets are intact to maintain the explosion-proof rating.
5. Troubleshooting
| Problem | Possible Cause | Solution |
|---|---|---|
| No video output | No power, network issue, incorrect IP address, camera malfunction. | Check power connection. Verify network cable/Wi-Fi connection. Confirm correct IP address and network settings. Restart camera. |
| Poor image quality | Dirty lens, incorrect focus, low light, network bandwidth. | Clean the lens/wiper. Adjust focus (if not auto-focusing correctly). Ensure adequate lighting. Check network bandwidth for streaming. |
| PTZ controls unresponsive | Network latency, software issue, motor malfunction. | Check network connection. Restart camera and control software. Contact support if issue persists. |
| Cannot connect to Wi-Fi | Incorrect Wi-Fi password, out of range, interference. | Verify Wi-Fi password. Ensure camera is within range of the access point. Check for potential signal interference. |
6. Technical Specifications
| Feature | Detail |
|---|---|
| Model | TNU-X6320E2F2WT1-Z |
| Brand | Wisenet |
| Resolution | 2 Megapixel (1080p @ 60fps) |
| Optical Zoom | 32x with auto focus |
| Special Features | PTZ Technology, Explosion Proof, Intelligent Video Analytics, Wiper, Thermal Camera, Wide Dynamic Range (150dB) |
| Connectivity | Wireless (Wi-Fi), Fiber support |
| Power Source | AC/DC |
| Operating Temperature | -40°C ~ +60°C (-40°F ~ +140°F) |
| Storage | Built-in dual micro SD/SDHC/SDXC memory slots |
7. Warranty Information
Wisenet products are covered by a limited warranty. The specific terms and duration of the warranty may vary by region and product type. Please refer to the official Wisenet warranty policy document available on their website or contact your local distributor for detailed information.
- Keep your proof of purchase for warranty claims.
- Unauthorized repairs or modifications may void the warranty.
8. Customer Support
For technical assistance, product inquiries, or service requests, please contact Wisenet customer support.
- Online Support: Visit the official Wisenet website for FAQs, downloads, and support resources.
- Contact Information: Refer to the Wisenet website for regional contact numbers and email addresses.
- When contacting support, please have your camera model (TNU-X6320E2F2WT1-Z) and serial number ready.


