
1. Product Overview
The Alecto WS-1560 is a wireless weather station designed to provide accurate indoor and outdoor environmental data. Featuring a clear color display and a remote outdoor sensor, it offers comprehensive weather information and additional useful functions for your home.
Key Features:
- Measures indoor and outdoor temperature and humidity.
- Long-range wireless outdoor sensor (up to 100 meters).
- 5.7-inch well-lit color display with animated weather forecast icons.
- Temperature and ice alarm functions.
- Alarm clock with snooze function.
- Memory function for latest and highest readings.
- Moon phase indicator, date, day, and time display.
- Battery-operated main unit and outdoor sensor with backup batteries.

Figure 1.1: Alecto WS-1560 Main Unit and Wireless Outdoor Sensor.
2. Package Contents
Ensure all components are present and in good condition upon unpacking:
- Alecto WS-1560 Main Unit (Indoor Display)
- Wireless Outdoor Sensor
- User Manual
- (Power adapter and batteries may be included depending on package)
Video 2.1: Illustrative video showing typical weather station components and basic setup. (Note: This video is for a related product and may not show the exact Alecto WS-1560 model.)
3. Setup and Installation
3.1. Battery Installation
Both the main unit and the outdoor sensor require batteries for operation. Ensure you use the correct type and polarity.
- Outdoor Sensor:
- Open the battery compartment on the back of the wireless outdoor sensor.
- Insert 2x AA batteries (not included) according to the polarity markings (+/-).
- Close the battery compartment securely.
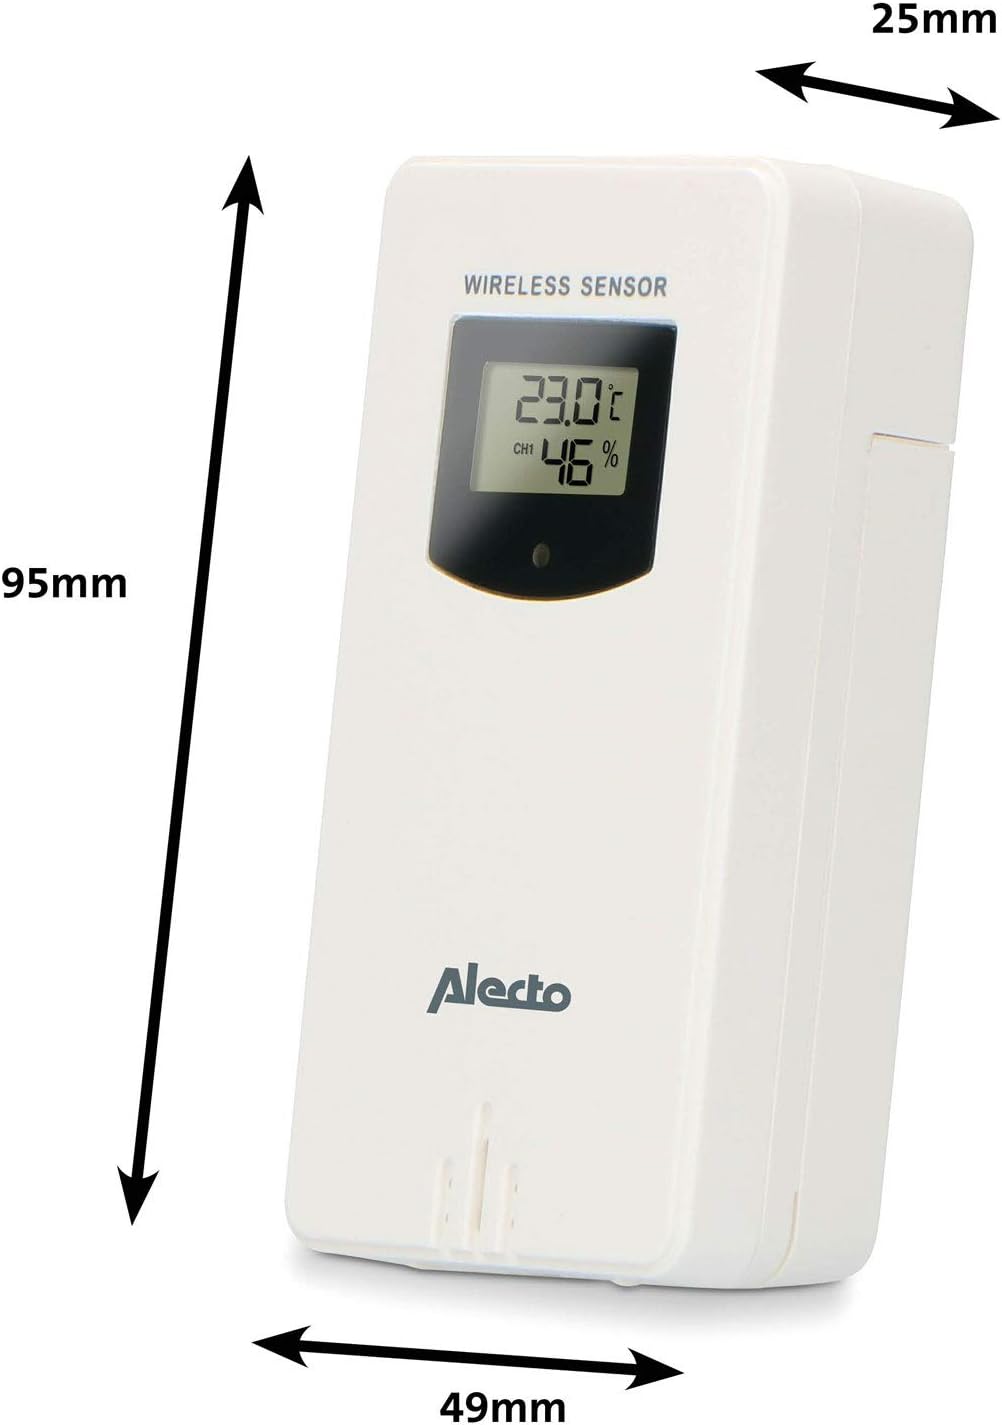
Figure 3.1: Wireless Outdoor Sensor dimensions and battery compartment location.
- Main Unit:
- Open the battery compartment on the back of the main unit.
- Insert 2x AA batteries (not included) according to the polarity markings (+/-). These serve as backup batteries.
- Close the battery compartment securely.
- Connect the main unit to a power outlet using the provided power adapter (if included).

Figure 3.2: Main Unit dimensions and power input.
3.2. Sensor Placement
For accurate outdoor readings, proper placement of the wireless sensor is crucial:
- Place the sensor in a shaded area, away from direct sunlight, to prevent inaccurate temperature readings.
- Ensure good air circulation around the sensor.
- Mount the sensor vertically, approximately 1.5 to 2.5 meters (5 to 8 feet) above the ground.
- Avoid placing the sensor near heat sources (e.g., vents, windows) or moisture sources.
- The maximum transmission range is 100 meters (328 feet) in open air. Walls and other obstacles will reduce this range.

Figure 3.3: Example of outdoor sensor placement on a wall.
3.3. Pairing the Sensor with the Main Unit
The main unit and sensor should automatically pair once both are powered on. If pairing does not occur:
- Ensure both units have fresh batteries and are within range.
- Press the "TX" button inside the outdoor sensor's battery compartment to manually send a signal.
- On the main unit, you may need to initiate a search for the outdoor sensor (refer to the "Operation" section for specific button functions).
4. Operation
4.1. Display Layout
The 5.7-inch color display provides a clear overview of all measured data. Key areas include:
- Outdoor Temperature & Humidity: Displays current outdoor conditions.
- Indoor Temperature & Humidity: Displays current indoor conditions.
- Animated Weather Forecast: Icons predict upcoming weather (sunny, partly cloudy, cloudy, rainy, snowy).
- Time & Date: Current time, day, and date.
- Barometric Pressure: Current atmospheric pressure.
- Moon Phase: Graphical representation of the current moon phase.
- Temperature/Ice Alarm Indicators: Alerts for specific temperature thresholds or potential ice conditions.

Figure 4.1: Detailed view of the main unit's color display.
4.2. Button Functions
The main unit features several buttons for setting and adjusting functions. Common buttons include:
- SET: Enters setup mode for time, date, and other settings.
- MODE: Switches between display modes or confirms settings.
- UP/DOWN (or +/-): Adjusts values during setup or cycles through channels.
- ALARM: Sets or activates the alarm function.
- MEM: Displays maximum/minimum temperature and humidity records. Long press to clear records.
- SNOOZE/LIGHT: Activates snooze during an alarm or adjusts backlight brightness.
Video 4.2: Illustrative video demonstrating various features and settings of a weather station. (Note: This video is for a related product and may not show the exact Alecto WS-1560 model.)
4.3. Setting Time and Date
- Press and hold the "SET" button until the time display starts flashing.
- Use the "UP" or "DOWN" buttons to adjust the hour, then press "SET" to confirm and move to minutes.
- Repeat for minutes, year, month, and day.
- Press "SET" again to exit the setting mode.
4.4. Alarm Settings
- Press the "ALARM" button once to view the alarm time.
- Press and hold the "ALARM" button until the alarm time starts flashing.
- Use the "UP" or "DOWN" buttons to set the desired alarm hour and minute.
- Press "ALARM" to confirm.
- To activate/deactivate the alarm, press the "ALARM" button briefly when the alarm time is displayed. An alarm icon will appear/disappear.
4.5. Max/Min Records
The weather station automatically records the maximum and minimum temperature and humidity values over a 24-hour period.
- Press the "MEM" button briefly to view the maximum recorded values.
- Press "MEM" again to view the minimum recorded values.
- Press "MEM" a third time to return to current readings.
- To clear the records, press and hold the "MEM" button for a few seconds.
5. Maintenance
- Cleaning: Wipe the display and unit surfaces with a soft, damp cloth. Do not use abrasive cleaners or solvents.
- Battery Replacement: Replace batteries in both the main unit and the outdoor sensor when the low battery indicator appears on the display. Always replace all batteries at the same time with new ones of the same type.
- Sensor Care: Periodically check the outdoor sensor for debris or obstructions that might affect its readings. Ensure it remains in a shaded, well-ventilated area.
6. Troubleshooting
| Problem | Possible Cause | Solution |
|---|---|---|
| No outdoor temperature/humidity reading (or "---" displayed) |
|
|
| Inaccurate temperature/humidity readings |
|
|
| Display is dim or blank |
|
|
7. Specifications
| Model Number | WS-1560 |
| Brand | Alecto |
| Power Source (Main Unit) | Power Adapter (if included) + 2x AA batteries (backup) |
| Power Source (Outdoor Sensor) | 2x AA batteries |
| Product Dimensions (Main Unit) | 5.1 x 16.5 x 12.3 cm |
| Product Weight | 440 g |
| Wireless Sensor Range | Up to 100 meters (open air) |
| Display Size | 5.7 inches / 14.5 cm |
| Origin | China |
8. Warranty and Support
For warranty information, technical support, or service inquiries, please refer to the warranty card included with your product or visit the official Alecto website. Keep your purchase receipt as proof of purchase.
Alecto Website: www.alecto.nl (General Alecto website, specific support page may vary)


