
WilTec 62552
WilTec Electric Impact Wrench User Manual
Model: 62552
1. Safety Instructions
Please read and understand all safety warnings and instructions before operating this electric impact wrench. Failure to follow the warnings and instructions may result in electric shock, fire, and/or serious injury.
- Work Area Safety: Keep your work area clean and well-lit. Cluttered or dark areas invite accidents. Do not operate power tools in explosive atmospheres, such as in the presence of flammable liquids, gases, or dust.
- Electrical Safety: Power tool plugs must match the outlet. Never modify the plug in any way. Do not expose power tools to rain or wet conditions. Water entering a power tool will increase the risk of electric shock.
- Personal Safety: Always wear eye protection. Use safety glasses, goggles, or a face shield. Wear hearing protection when operating the tool for extended periods. Dress properly; do not wear loose clothing or jewelry. Keep hair, clothing, and gloves away from moving parts.
- Tool Use and Care: Do not force the power tool. Use the correct power tool for your application. Disconnect the plug from the power source before making any adjustments, changing accessories, or storing power tools.
2. Product Overview
The WilTec Electric Impact Wrench is a powerful 450W tool designed for efficient tightening and loosening of fasteners. It features a 1/2-inch drive, an ergonomic handle, and a robust metal housing for durability.

Figure 2.1: The WilTec Electric Impact Wrench, its durable carrying case, power cord, and four included sockets.

Figure 2.2: The impact wrench neatly stored inside its durable carrying case, alongside its power cord and sockets, ready for transport or storage.
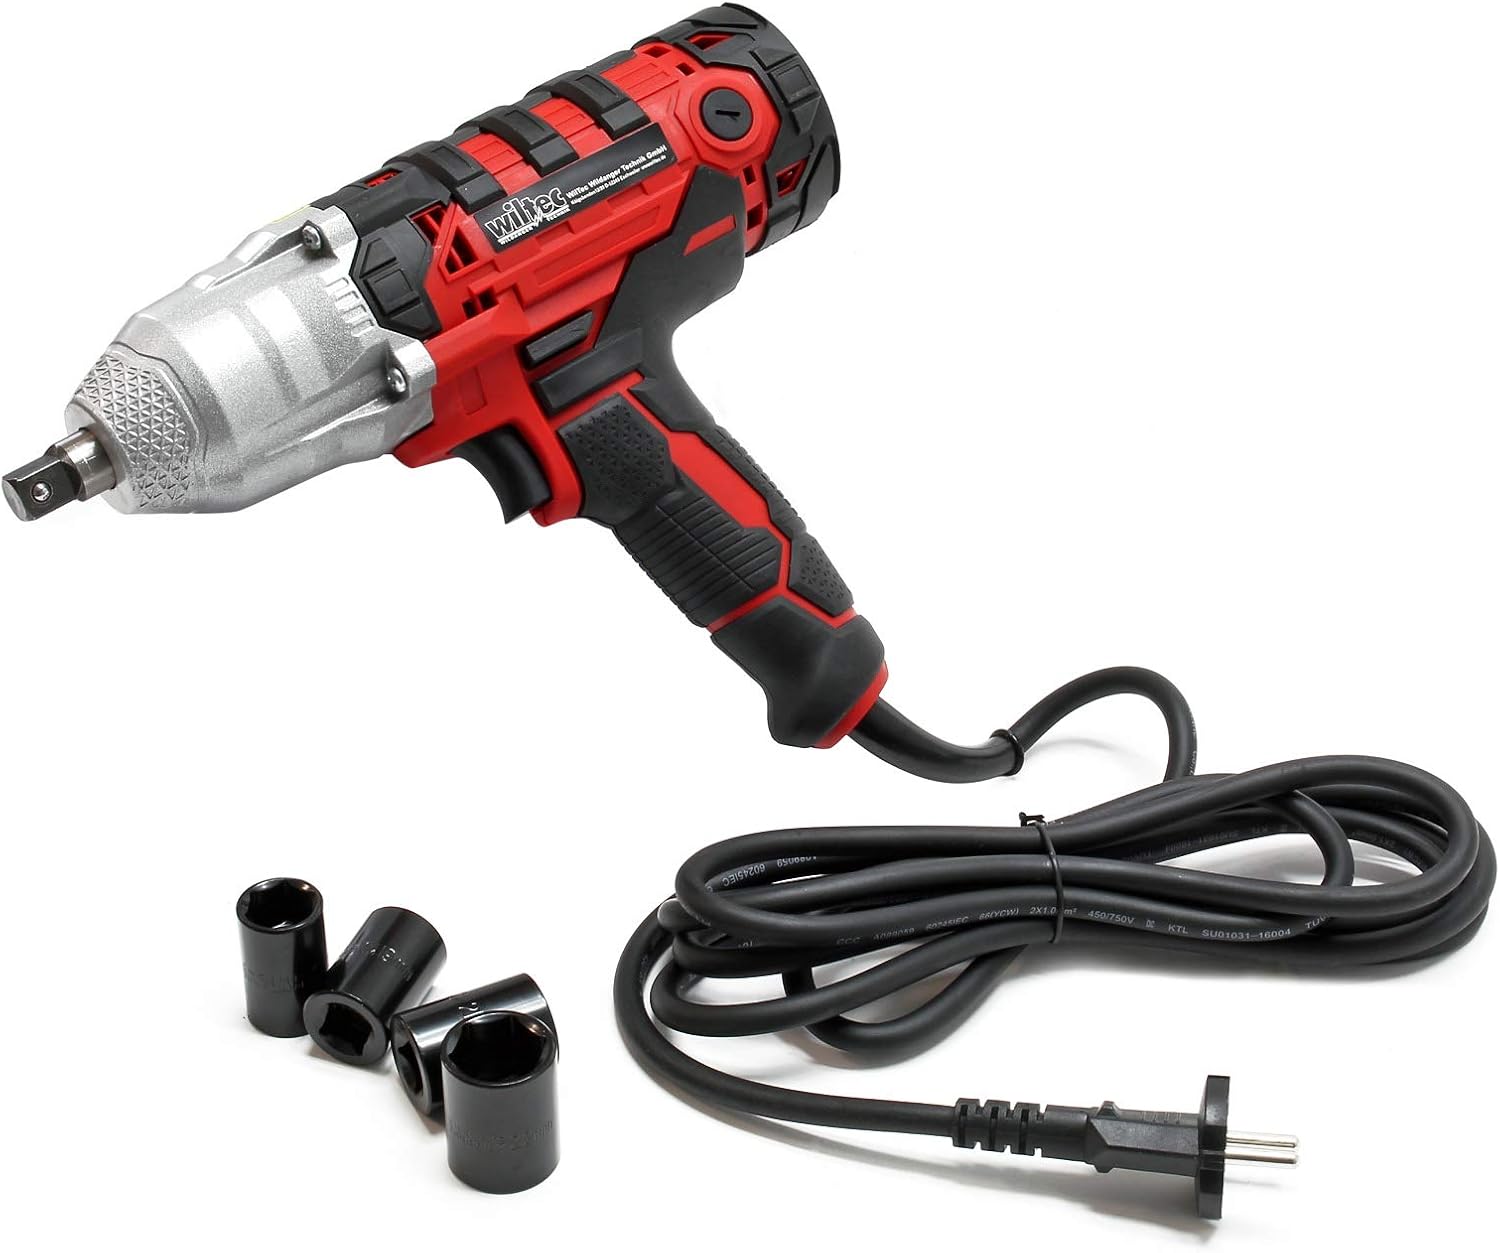
Figure 2.3: The impact wrench with its power cord and the four included sockets (17mm, 19mm, 21mm, 22mm) laid out, showcasing the complete set.

Figure 2.4: A side view of the impact wrench, highlighting its ergonomic design and the attached power cord, which ensures comfortable and secure handling.

Figure 2.5: A close-up view of the 1/2-inch square drive, showing its robust construction and textured grip area, designed for secure socket attachment.

Figure 2.6: A detailed shot of the rocker switch, which allows for easy and quick selection between forward and reverse rotation during operation.

Figure 2.7: The four included impact sockets (17mm, 19mm, 21mm, 22mm) along with spare carbon brushes, essential components for tool operation and maintenance.
3. Technical Specifications
| Specification | Value |
|---|---|
| Manufacturer | WilTec |
| Model Number | 62552 |
| Material | Rubber (for grip), Metal (housing) |
| Power | 450 Watts |
| Maximum Power | 450 Watt |
| Torque (Forward) | 100 Newton-meters (approx.) |
| Torque (Reverse) | 320 Newton-meters |
| Quantity of Items | 1 |
| Head Type | Square Fixed (1/2 inch drive) |
| Is Electric | Yes |
4. Setup
4.1 Unpacking
- Carefully remove the impact wrench and all accessories from the packaging.
- Check for any signs of damage during transit. If damage is found, do not use the tool and contact your supplier.
- Verify that all components are present: electric impact wrench, power cord, carrying case, and four impact sockets (17mm, 19mm, 21mm, 22mm).
4.2 Attaching Sockets
- Ensure the impact wrench is unplugged from the power source before attaching or removing any accessories.
- Select the appropriate impact socket size (17mm, 19mm, 21mm, or 22mm) for your application.
- Align the square opening of the socket with the 1/2-inch square drive on the tool.
- Push the socket firmly onto the drive until it clicks into place, ensuring it is securely seated.
- To remove, pull the socket off the drive while holding the tool firmly.
5. Operating Instructions
5.1 Powering On
- Ensure the tool is properly set up with the desired socket.
- Plug the power cord into a suitable electrical outlet.
- Hold the tool firmly with both hands, utilizing the ergonomic rubber-coated handle for a secure grip.
5.2 Forward/Reverse Operation
The impact wrench features a convenient rocker switch for easy selection of rotation direction.
- To select Forward (tightening) rotation, press the rocker switch on one side. The tool will rotate clockwise. This mode provides approximately 100 Nm of torque.
- To select Reverse (loosening) rotation, press the rocker switch on the opposite side. The tool will rotate counter-clockwise. This mode provides up to 320 Nm of torque, ideal for stubborn fasteners.
5.3 Tightening and Loosening Fasteners
- Place the socket firmly onto the fastener (nut or bolt head).
- Ensure the tool is set to the correct rotation direction (forward for tightening, reverse for loosening).
- Press the trigger to start the tool. Apply steady pressure to keep the socket engaged with the fastener.
- For tightening, stop when the desired tightness is achieved. For loosening, continue until the fastener is free.
- Release the trigger to stop the tool.
6. Maintenance
Regular maintenance ensures the longevity and optimal performance of your WilTec Electric Impact Wrench.
6.1 Cleaning
- Always unplug the tool before cleaning.
- Wipe the tool's exterior with a clean, damp cloth. Do not use harsh chemicals or abrasive cleaners.
- Keep the ventilation openings clear of dust and debris to prevent overheating. Use compressed air if necessary.
6.2 Carbon Brush Replacement
The carbon brushes are wear parts and should be inspected periodically. Replace them when they are worn down to approximately 1/4 inch (6mm) or if the tool experiences reduced power or intermittent operation.
- Unplug the tool from the power source.
- Locate the brush caps on the sides of the motor housing.
- Unscrew the brush caps using a flathead screwdriver.
- Carefully remove the old carbon brushes and springs.
- Insert new carbon brushes (like those shown in Figure 2.7) and springs, ensuring they are oriented correctly.
- Screw the brush caps back on securely.
6.3 Storage
- Store the impact wrench in its original carrying case in a dry, secure location, away from direct sunlight and extreme temperatures.
- Keep out of reach of children.
7. Troubleshooting
This section addresses common issues you might encounter with your electric impact wrench.
| Problem | Possible Cause | Solution |
|---|---|---|
| Tool does not start | No power supply Faulty power cord/plug Worn carbon brushes | Check power outlet and circuit breaker Inspect cord for damage; replace if necessary Inspect and replace carbon brushes (see Section 6.2) |
| Insufficient torque | Worn carbon brushes Overheating Incorrect socket size | Replace carbon brushes Allow tool to cool down Ensure correct socket size is used and fully engaged |
| Excessive sparking from motor | Worn or damaged carbon brushes Dirty commutator | Replace carbon brushes Have the tool serviced by a qualified technician to clean the commutator |
| Unusual noise or vibration | Loose internal components Damaged bearings | Discontinue use immediately and have the tool inspected by a qualified technician |
8. Warranty and Support
For warranty information, technical support, or spare parts inquiries, please contact the manufacturer, WilTec, or your point of purchase. Keep your proof of purchase for any warranty claims.
Information regarding spare parts availability for this specific model (62552) is currently unavailable. Please contact WilTec directly for the most up-to-date information.
Ask a question about this manual
Ask about setup, troubleshooting, compatibility, parts, safety, or missing instructions. Manuals+ will review the question and use this page’s manual context to help answer it.