Introduction
The Behringer Eurorack Go is a robust and versatile Eurorack case designed to house your modular synthesizer modules. Featuring a generous 2x140 HP (280 HP total) of mounting space and a powerful, low-noise power supply with 32 keyed connectors, it provides a stable and expansive environment for your modular system. Its design includes adjustable legs for flexible positioning and sliding nuts for easy module installation. This manual will guide you through the essential steps for setting up, operating, maintaining, and troubleshooting your Eurorack Go case.
Setup
1. Unpacking and Inspection
Carefully remove the Eurorack Go case from its packaging. Inspect the case for any signs of damage that may have occurred during transit. Ensure all components, including the power supply and any included accessories, are present.
2. Positioning the Case
The Eurorack Go features an adjustable back leg, allowing you to position the case flat or at a 50-degree tilt for optimal ergonomic use. Ensure the case is placed on a stable, level surface.
3. Module Installation
The Eurorack Go is equipped with sliding nuts, which simplify the process of mounting your Eurorack modules. Align the mounting holes of your module with the sliding nuts in the rails. Secure the module using appropriate screws (typically M3 screws, not included with the case but usually provided with modules). The sliding nuts allow for precise positioning of modules along the rails.

Figure 1: Top-down view of the Eurorack Go case with modules installed, showcasing the ample space and internal power distribution.
4. Powering Modules
The Eurorack Go features a powerful, low-noise power supply with 32 keyed power connectors. Connect each module's power cable to an available keyed connector on the internal power distribution board. Ensure the red stripe on the power cable aligns with the corresponding pin on the power header (typically indicated by a white line or '1' on the module and power board). Incorrect connection can damage your modules.
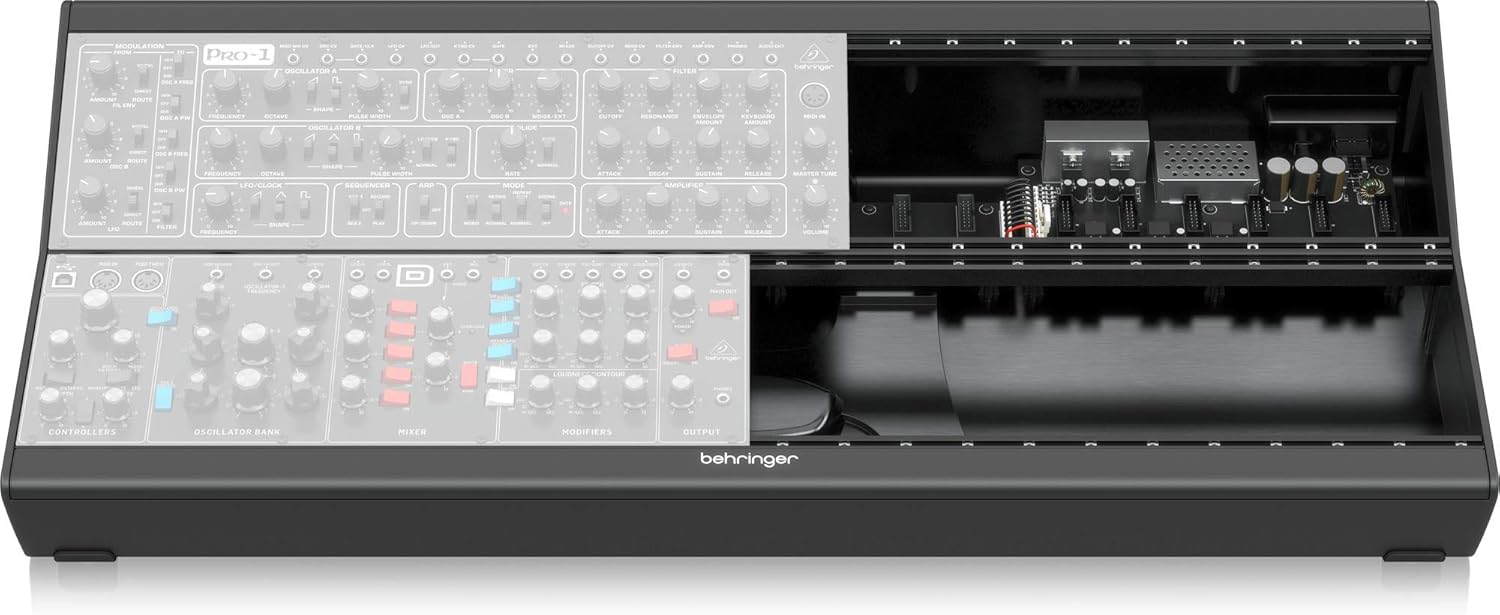
Figure 2: Front view of the Eurorack Go case, illustrating the internal power supply and connections for modular components.
Operating
1. Powering On
Once all modules are securely installed and correctly powered, connect the provided power cord to the Eurorack Go case and then to a suitable electrical outlet. Locate the power switch (usually on the rear or side of the unit) and turn it to the 'ON' position. Observe the power indicator lights on the internal power supply board to confirm proper operation.
2. Connecting Audio and Control Voltage (CV)
Use standard 3.5mm (1/8-inch) patch cables to connect the inputs and outputs of your Eurorack modules. This allows you to route audio signals, control voltages, and gate/trigger signals between modules to create complex patches and sounds. Refer to the individual module manuals for specific patching instructions.
Maintenance
1. Cleaning
To maintain the appearance and functionality of your Eurorack Go case, regularly wipe down the exterior with a soft, dry cloth. For stubborn marks, a slightly damp cloth can be used, followed by immediate drying. Avoid using abrasive cleaners, solvents, or excessive moisture, as these can damage the finish or internal components.
2. Dust Prevention
Dust can accumulate inside the case and on module components, potentially affecting performance. When not in use, consider covering the case with a dust cover to minimize dust ingress. Periodically, gently use compressed air to clear dust from the interior, ensuring the power is disconnected before doing so.
3. Storage
Store the Eurorack Go case in a cool, dry environment away from direct sunlight, extreme temperatures, and high humidity. If transporting the case, ensure it is properly secured to prevent physical damage to the case or installed modules.
Troubleshooting
1. No Power to Modules
- Check Power Connection: Ensure the power cord is securely connected to both the case and a working electrical outlet.
- Power Switch: Verify that the power switch on the case is in the 'ON' position.
- Internal Power Indicator: Look for the power indicator lights on the internal power supply board. If they are not illuminated, there may be an issue with the power supply or the external power source.
- Module Power Cables: Confirm that all module power cables are correctly and securely connected to the power distribution board, paying attention to the red stripe orientation.
2. Module Not Functioning Correctly
- Power Connection: Double-check the power cable connection for the specific module.
- Patch Cables: Ensure all patch cables are correctly inserted into the appropriate inputs and outputs.
- Module Compatibility: Verify that the module is compatible with Eurorack standards and the power requirements of the Eurorack Go case.
3. Unexpected Noise or Instability
- Grounding: Ensure all audio equipment connected to your Eurorack system is properly grounded.
- Power Supply Load: If you have many high-current modules, you might be approaching the maximum power output of the supply. Consult the specifications for power limits.
- Cable Management: Tidy internal power cables to prevent interference with audio signals.
Specifications
| Feature | Specification |
|---|---|
| Model Name | EURORACK GO |
| Brand | Behringer |
| HP (Horizontal Pitch) | 2x140 HP (280 HP total) |
| Number of Power Connectors | 32 (keyed) |
| Item Weight | 12.08 pounds |
| Product Dimensions (L x W x H) | 33.9 x 15.15 x 6.6 inches |
| Power Source | Corded Electric |
| Finish Type | Painted |
| Color | Black, Grey, White |
| Special Feature | Portable |
| Date First Available | March 18, 2020 |
| UPC | 653341345431 |
Warranty and Support
Warranty Information
The Behringer Eurorack Go Mobile 2x140 HP Eurorack Case comes with a 3-Year Warranty. Please retain your proof of purchase for warranty claims.

Figure 3: Behringer 3-Year Warranty information.
Customer Support
For further assistance, technical support, or warranty inquiries, please visit the official Behringer Store or contact their customer service directly.


