
1. Introduction
This instruction manual provides detailed guidance for the installation, operation, and maintenance of your UpStart Components D7824706Q Refrigerator Ice Maker replacement. This part is designed to be compatible with various refrigerator models, including Magic Chef RB19KA-4A (CG65A) and those using the W10190978 icemaker. Please read this manual thoroughly before beginning installation to ensure proper function and safety.
2. Safety Information
- Disconnect Power: Always disconnect power to the refrigerator before attempting any installation, repair, or maintenance. Failure to do so can result in electric shock or serious injury.
- Water Supply: Turn off the water supply to the refrigerator before beginning installation to prevent water leaks.
- Wear Protective Gear: Wear appropriate protective gear, such as gloves, to prevent cuts or scrapes during installation.
- Professional Assistance: If you are unsure about any step of the installation process, consult a qualified appliance technician.
- Compatibility: Ensure this replacement part is compatible with your specific refrigerator model before installation. Refer to the product specifications and your refrigerator's manual.
3. Package Contents
Verify that all components are present before beginning installation:
- 1x D7824706Q Refrigerator Ice Maker Assembly
- 2x Wiring Harnesses (various lengths for compatibility)
- 1x Mounting Bracket
- 1x Mounting Screw
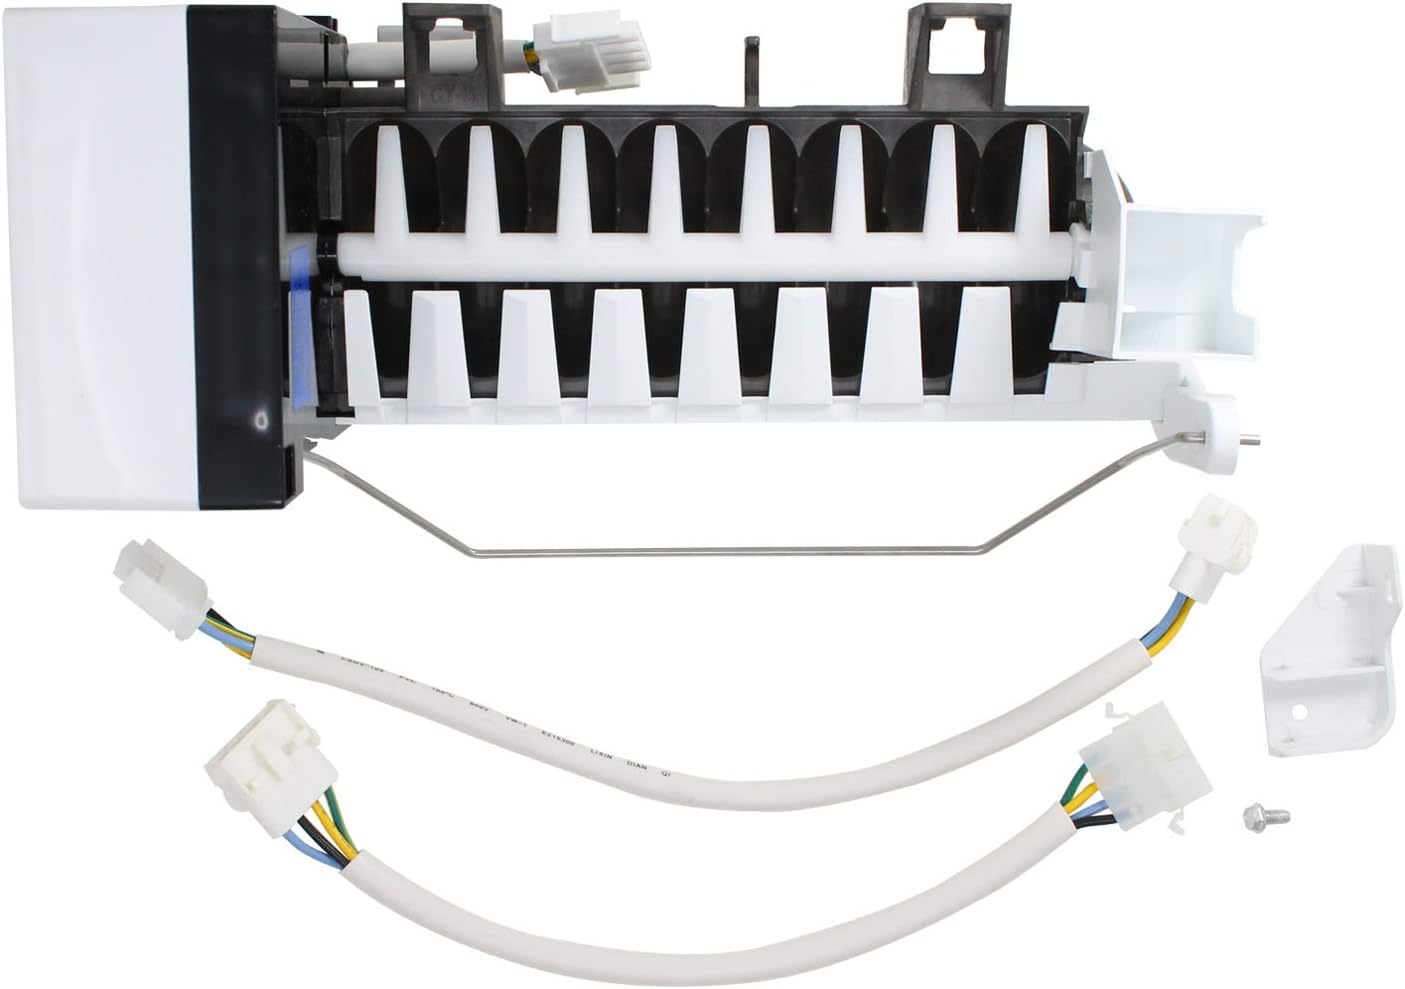
Figure 3.1: Complete package contents including the ice maker assembly, two wiring harnesses, a mounting bracket, and a screw.

Figure 3.2: Close-up view of the included wiring harnesses, mounting bracket, and screw.
4. Setup and Installation
This section outlines the general steps for replacing your refrigerator's ice maker. Specific steps may vary slightly depending on your refrigerator model. Always refer to your refrigerator's service manual for detailed instructions.
- Prepare for Installation:
- Disconnect the refrigerator from the power supply.
- Turn off the water supply to the refrigerator.
- Empty the freezer compartment, especially the ice bin.
- Remove the Old Ice Maker:
- Locate the existing ice maker in the freezer.
- Carefully disconnect any wiring harnesses and water lines attached to the old ice maker.
- Unscrew or unclip the old ice maker from its mounting position. Note how it was installed for reference.
- Remove the old ice maker from the freezer.
- Install the New Ice Maker:
- Position the new D7824706Q ice maker in the same location as the old unit.
- Secure the new ice maker using the existing mounting points and the provided screw/bracket if necessary. Ensure it is firmly in place.
- Connect the appropriate wiring harness from the package to the ice maker and the refrigerator's electrical connection. Ensure a secure fit.
- Reconnect the water supply line to the ice maker if it was disconnected from the unit itself.

Figure 4.1: The ice maker assembly, showing the ice mold and the metal bail arm that controls ice production.

Figure 4.2: The rear of the ice maker, illustrating the motor and control box where electrical connections are made.
- Final Steps:
- Turn on the water supply to the refrigerator. Check for any leaks around the water line connections.
- Reconnect the refrigerator to the power supply.
- Listen for the ice maker to fill with water. This may take a few minutes.
- Allow several hours for the first batch of ice to be produced. Discard the first few batches of ice to ensure cleanliness.
5. Operating Instructions
Once installed and connected, the D7824706Q ice maker operates automatically. It will fill with water, freeze the water into cubes, and then eject them into the ice bin. The metal bail arm acts as a sensor:
- When the ice bin is full, the bail arm will be pushed up by the ice, stopping ice production.
- When ice is removed and the bail arm drops, ice production will resume.
Ensure the bail arm is not obstructed for continuous ice production.
6. Maintenance
Regular maintenance helps ensure optimal performance and longevity of your ice maker.
- Cleaning the Ice Bin: Periodically remove and wash the ice bin with mild soap and warm water. Rinse thoroughly and dry completely before returning it to the freezer.
- Water Filter: If your refrigerator has a water filter, ensure it is replaced regularly according to your refrigerator manufacturer's recommendations. A clogged filter can reduce water flow to the ice maker.
- Check Water Line: Occasionally inspect the water supply line for kinks, leaks, or blockages.
- Defrosting: If ice builds up around the ice maker, manually defrost the freezer or use a hairdryer on a low setting to melt the ice, ensuring not to overheat plastic components.
7. Troubleshooting
If your ice maker is not functioning correctly, try the following troubleshooting steps:
| Problem | Possible Cause | Solution |
|---|---|---|
| No ice production | Refrigerator not powered; water supply off; bail arm up; clogged water filter; freezer temperature too high. | Check power connection; ensure water supply is on; lower bail arm; replace water filter; set freezer to 0°F (-18°C). |
| Small or hollow ice cubes | Low water pressure; partially clogged water filter; kinked water line. | Check water pressure; replace water filter; inspect water line for kinks. |
| Ice maker making unusual noises | Normal operation sounds; loose components; motor issue. | Some sounds are normal during fill/eject cycles. Ensure ice maker is securely mounted. If persistent or loud, contact support. |
| Water leaking | Loose water line connection; cracked water line; clogged drain tube. | Tighten water line connections; inspect water line for damage; clear drain tube if applicable. |
If these steps do not resolve the issue, please refer to the Warranty and Support section for further assistance.
8. Specifications
- Brand: UpStart Components
- Model Name: Refrigerator Ice Maker
- Part Number: AP-D7824706Q-DL5812 (Replacement for D7824706Q)
- Compatible with: Magic Chef RB19KA-4A (CG65A), W10190978, and other listed part numbers.
- Material: Ultra durable, high quality material
9. Warranty and Support
This UpStart Components replacement part is designed for durability and ease of installation. Any warranties for this product are offered solely by UpStart Components. This product is not affiliated with any original equipment manufacturers (OEMs) and is not covered under any warranties offered by the original manufacturers of the appliances it is compatible with.
For warranty claims, technical support, or further assistance, please contact UpStart Components directly through their official support channels. Please have your product model number (D7824706Q) and purchase information ready when contacting support.
For general inquiries or to find contact information, you may visit the UpStart Components brand page on Amazon.