
Important Safety Information
Before beginning any installation or maintenance, ensure the refrigerator is unplugged from the power source to prevent electrical shock. Always wear appropriate safety gear, such as gloves and eye protection. If you are unsure about any step, consult a qualified technician. This replacement part is designed for specific models; verify compatibility before installation.
Product Overview
This manual provides instructions for the installation and operation of the UpStart Components D7824706Q Refrigerator Ice Maker. This unit is a direct replacement for the original ice maker in Amana ACD2234KRS refrigerators and is compatible with W10190978 icemakers. It is designed to produce ice cubes automatically within your refrigerator's freezer compartment.

Figure 1: Front view of the UpStart Components D7824706Q Refrigerator Ice Maker. This image shows the main ice tray and the ice level sensor arm.

Figure 2: Rear view of the UpStart Components D7824706Q Refrigerator Ice Maker, showing the motor housing and electrical connections.
Setup and Installation
This section outlines the steps required to replace your existing ice maker with the new UpStart Components D7824706Q unit. Ensure you have basic tools such as a screwdriver and pliers.
- Disconnect Power: Unplug the refrigerator from the wall outlet.
- Access Freezer Compartment: Open the freezer door and locate the existing ice maker.
- Remove Old Ice Maker:
- Carefully disconnect any electrical connectors attached to the old ice maker.
- Unscrew any mounting screws holding the ice maker in place.
- Gently remove the old ice maker from the freezer compartment.
- Prepare New Ice Maker:
- Inspect the new D7824706Q ice maker for any damage.
- If necessary, attach the included wiring harnesses and mounting bracket as shown in Figure 3.

Figure 3: Included wiring harnesses and mounting bracket. These components facilitate connection and secure installation.
- Install New Ice Maker:
- Position the new ice maker in the freezer compartment, aligning it with the mounting holes.
- Secure the ice maker with the screws removed earlier or new ones if provided.
- Connect the electrical harnesses to the corresponding ports in the freezer. Ensure connections are firm.
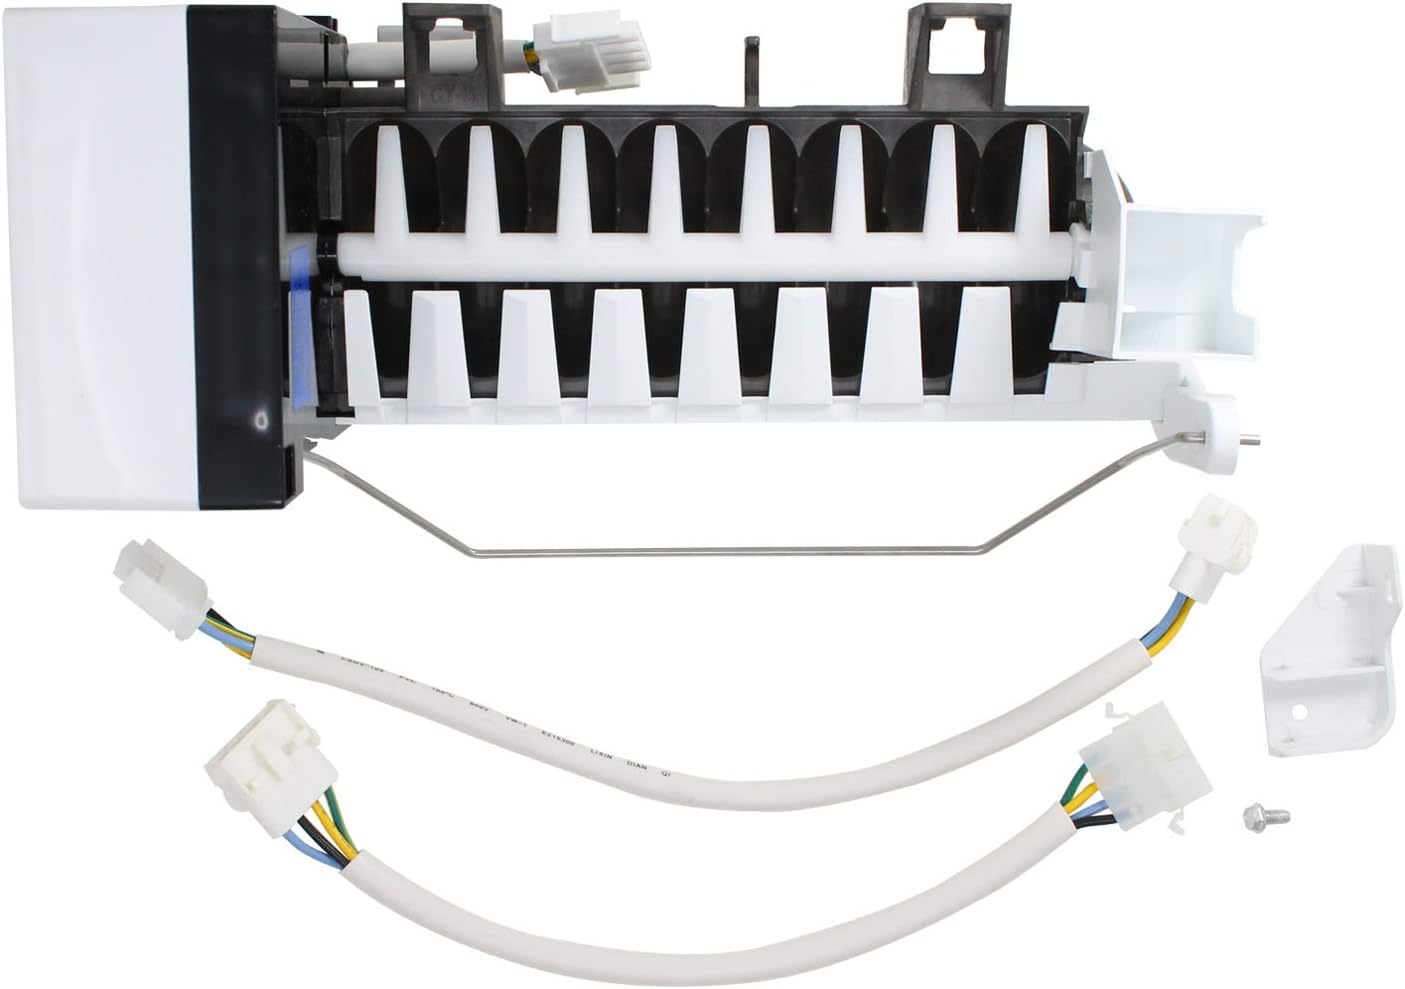
Figure 4: The D7824706Q ice maker with wiring harnesses and bracket attached, ready for installation or showing a fully assembled unit.
- Restore Power: Plug the refrigerator back into the wall outlet.
Operating Instructions
After installation, the ice maker will begin producing ice automatically once the freezer reaches the correct temperature and the water supply is connected and flowing.
- Initial Ice Production: It may take 12 to 24 hours for the ice maker to produce its first batch of ice. Discard the first few batches to ensure the water lines are flushed.
- Ice Level Sensor: The metal arm on the side of the ice maker acts as an ice level sensor. When the ice bin is full, the arm will be pushed up, stopping ice production. When ice is removed, the arm will drop, and production will resume.
- Turning Off Ice Production: To temporarily stop ice production, lift the metal sensor arm into its upright, locked position. Ensure it clicks into place.
- Water Filter: For optimal ice quality, ensure your refrigerator's water filter is regularly replaced according to the manufacturer's recommendations.
Maintenance
Regular maintenance helps ensure the longevity and efficient operation of your ice maker.
- Cleaning the Ice Bin: Periodically remove and clean the ice storage bin with mild soap and warm water. Rinse thoroughly and dry completely before returning it to the freezer.
- Inspecting the Ice Maker: Occasionally check the ice maker for any ice buildup on the components or blockages in the water fill tube. If ice buildup occurs, defrost the freezer or carefully remove the ice.
- Water Line Check: Ensure the water supply line to the refrigerator is free of kinks or leaks.
Troubleshooting
Refer to the table below for common issues and their potential solutions.
| Problem | Possible Cause | Solution |
|---|---|---|
| Ice maker not producing ice. |
|
|
| Small or hollow ice cubes. |
|
|
| Ice tastes bad or has odor. |
|
|
Specifications
- Model Number: AP-D7824706Q-DL991
- Part Number: D7824706Q
- Brand: UpStart Components
- Compatibility: Amana ACD2234KRS, W10190978, and other listed compatible part numbers.
- Material: Ultra durable, high quality material.
Warranty Information
This UpStart Components replacement part is not an OEM product. Any warranties for this product are offered solely by UpStart Components. Please refer to the packaging or the UpStart Components website for specific warranty terms and conditions. Typically, products are eligible for return or replacement within 30 days of purchase, subject to seller policies.
Customer Support
For further assistance, technical support, or inquiries regarding this product, please contact UpStart Components customer service. Refer to your purchase documentation or the UpStart Components official website for contact details.