1. Introduction
This manual provides instructions for the installation, operation, and maintenance of the UpStart Components D7824706Q Refrigerator Ice Maker. This replacement part is compatible with Maytag MBF2258XEW1 and W10190978 icemakers. Please ensure to verify compatibility with your original part before proceeding with installation.
2. Safety Information
- Disconnect Power: Always unplug the refrigerator from the power outlet before attempting any installation, maintenance, or repair to prevent electrical shock.
- Personal Protective Equipment: Wear appropriate personal protective equipment, such as work gloves, to prevent injury from sharp edges or moving parts.
- Professional Assistance: If you are unsure about any step or uncomfortable performing the installation, consult a qualified appliance technician.
- Water Supply: Ensure the water supply valve to the refrigerator is turned off before disconnecting any water lines.
3. Package Contents
Verify that all components are present in the package before beginning installation.
- 1x D7824706Q Ice Maker Assembly
- 2x Wiring Harnesses (as needed for compatibility)
- 1x Mounting Bracket
- 1x Mounting Screw
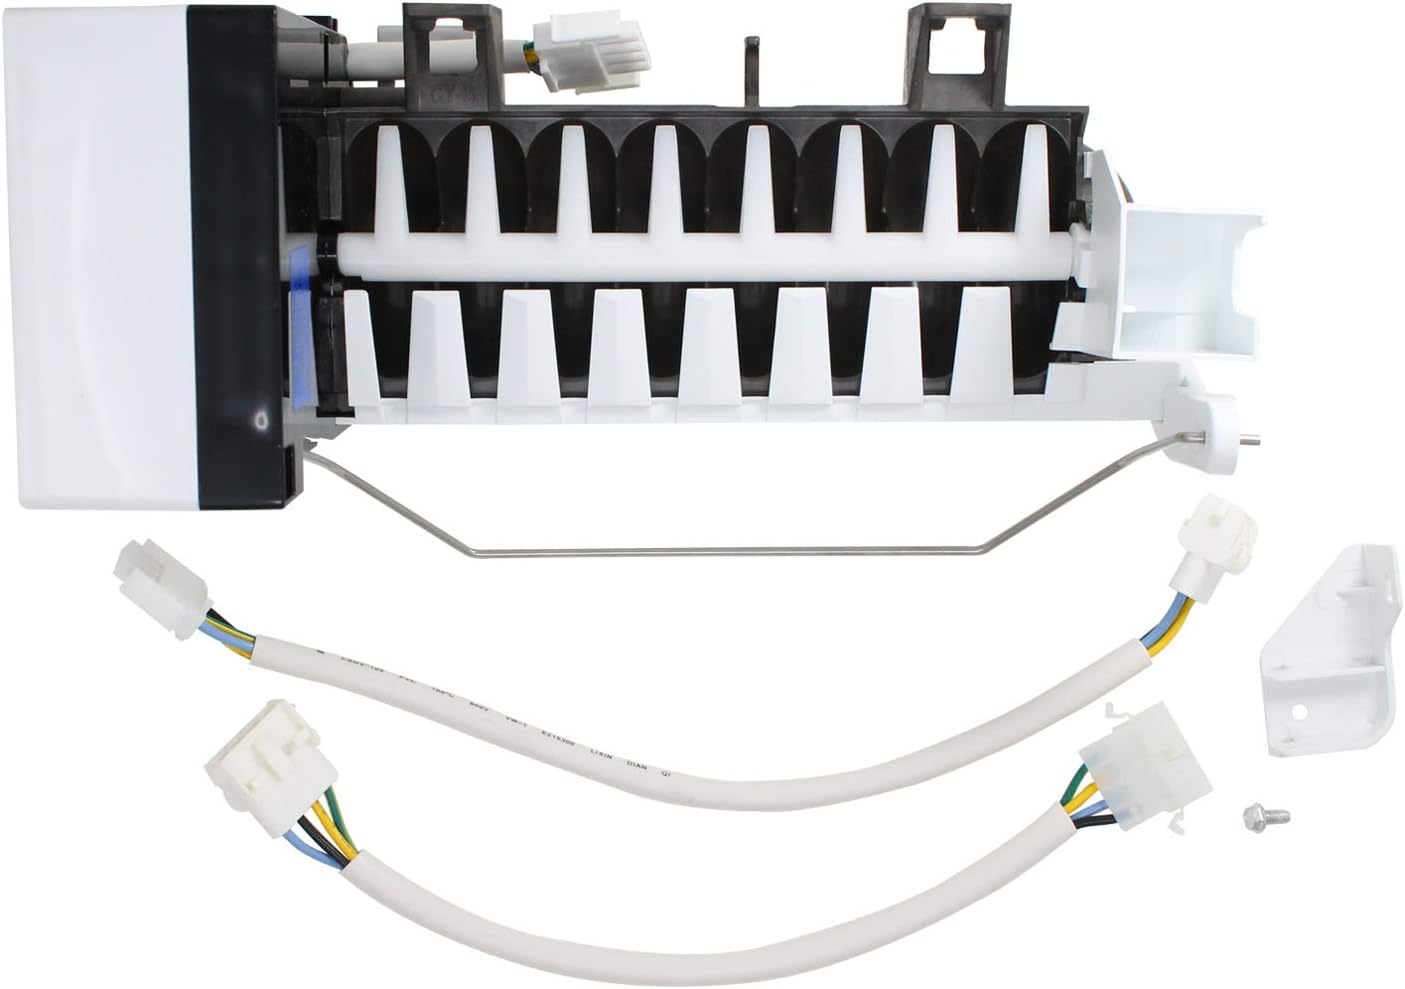
Image: The complete D7824706Q ice maker assembly, including two wiring harnesses and a white mounting bracket with a screw.
4. Setup and Installation
Follow these steps to replace your refrigerator's ice maker.
- Prepare the Refrigerator: Disconnect the refrigerator from the power supply. Turn off the water supply valve to the refrigerator.
- Access the Old Ice Maker: Open the freezer door. Locate the existing ice maker. It is typically mounted to the side or top wall of the freezer compartment.
- Remove Old Ice Maker: Carefully disconnect the wiring harness from the old ice maker. Unscrew any mounting screws holding the ice maker in place. Gently remove the old ice maker assembly. Be mindful of any remaining water in the fill cup.
- Install New Ice Maker: Connect the appropriate wiring harness from the new D7824706Q ice maker to the refrigerator's electrical connection. Ensure the connection is secure.
- Mount the New Ice Maker: Position the new ice maker assembly in the freezer compartment. Align it with the mounting holes and secure it with the provided screws or existing hardware. Ensure the water fill tube is properly aligned with the ice maker's fill cup to prevent leaks.
- Reconnect Water and Power: Turn the water supply valve back on. Plug the refrigerator back into the power outlet.

Image: Front view of the D7824706Q ice maker, showing the ice mold and shut-off arm.

Image: Side view of the D7824706Q ice maker, highlighting the motor and electrical connections.
5. Operating Instructions
After successful installation, the ice maker will begin operation.
- Initial Operation: Allow several hours for the freezer compartment to reach the correct operating temperature (typically 0°F / -18°C) and for the ice maker to begin producing ice.
- Discard First Batches: The first few batches of ice produced may contain air or impurities from the water line and should be discarded.
- Shut-Off Arm: Ensure the ice maker's shut-off arm is in the down position to allow ice production. Raising the arm will stop ice production.
- Test Button (if applicable): Some ice makers include a test button. If present, pressing this button can initiate an ice harvest cycle to verify functionality.
6. Maintenance
Regular maintenance helps ensure optimal performance and longevity of your ice maker.
- Cleaning the Ice Bucket: Periodically remove and clean the ice storage bucket with mild soap and warm water. Rinse thoroughly and dry before returning it to the freezer.
- Inspect for Ice Buildup: Regularly check the ice maker and fill tube for any excessive ice buildup that could obstruct operation. If buildup occurs, disconnect power and allow it to melt, then dry the area.
- Water Filter: If your refrigerator has a water filter, replace it according to the refrigerator manufacturer's recommendations to ensure clean water supply to the ice maker.
- Water Line: Ensure the water supply line to the refrigerator is not kinked or obstructed, which can affect water flow to the ice maker.
7. Troubleshooting
Refer to the following common issues and solutions before contacting support.
- No Ice Production:
- Ensure the refrigerator is plugged in and receiving power.
- Verify the freezer temperature is set correctly (typically 0°F / -18°C).
- Check that the ice maker's shut-off arm is in the down position.
- Confirm the water supply valve to the refrigerator is fully open.
- Inspect the water fill tube for any ice blockages.
- Small or Hollow Ice Cubes:
- This may indicate low water pressure to the refrigerator.
- A partially clogged water filter can also cause this issue; consider replacing it.
- Ice Maker Not Cycling:
- Ensure the freezer door is closing properly and sealing tightly.
- If the issue persists, disconnect power to the refrigerator for a few minutes, then reconnect to reset the system.
8. Specifications
| Brand | UpStart Components |
| Model Number | AP-D7824706Q-DL5096 |
| Compatible Part Numbers | D7824706Q, W10190978, AP4135008, 68111-1, 68972-1, 68972-4, 8170937, 915772, 95091-1, 95098-1, 95109-1, AH2121513, D7767601, D7824701, D7824702, D7824703, D7824704, D7824705, D7824705Q, D7824706, D7824706QVP, EA2121513, PS2121513, R0154025, R0156629, R0161059, R0161061, R0183135, R0194462, R0194462A, R0194666, R0950064, W10122519, Y0056504, Y0056599, Y0056606, Y0312578, Y0312738, Y0312740, Y689724, YR0161061 |
9. Warranty and Support
This product is a replacement part manufactured by UpStart Components. Any warranties for this product are provided solely by UpStart Components. For support or warranty inquiries, please contact UpStart Components directly through their official channels.


