
KAISAI KPPD-12HRN29
KAISAI KPPD-12HRN29 Mobile Air Conditioner User Manual
Model: KPPD-12HRN29
1. Introduction
This manual provides essential information for the safe and efficient operation of your KAISAI KPPD-12HRN29 Mobile Air Conditioner. Please read this manual thoroughly before using the appliance and keep it for future reference.
The KAISAI KPPD-12HRN29 is a versatile mobile air conditioning unit designed for cooling, heating, and dehumidifying indoor spaces up to 30m². Its portability makes it an ideal solution for areas where permanent air conditioning installation is not feasible or where flexible placement is desired.
2. Safety Instructions
Always follow basic safety precautions when using electrical appliances to reduce the risk of fire, electric shock, or injury.
- Ensure the power supply matches the voltage specified on the unit's rating label.
- Do not operate the unit with a damaged cord or plug.
- Do not block air inlets or outlets. Maintain adequate clearance around the unit for proper airflow.
- Do not insert fingers or foreign objects into the air inlets/outlets.
- This appliance features a fireproof casing to enhance user safety in case of an electrical short circuit.
- Unplug the unit before cleaning or performing any maintenance.
- Keep the unit away from flammable materials and direct sunlight.
- This appliance is not intended for use by persons (including children) with reduced physical, sensory or mental capabilities, or lack of experience and knowledge, unless they have been given supervision or instruction concerning use of the appliance by a person responsible for their safety.
3. Product Overview
Familiarize yourself with the main components of your mobile air conditioner.

Figure 3.1: Front view of the KAISAI KPPD-12HRN29 Mobile Air Conditioner, showing the control panel and air outlet grille.
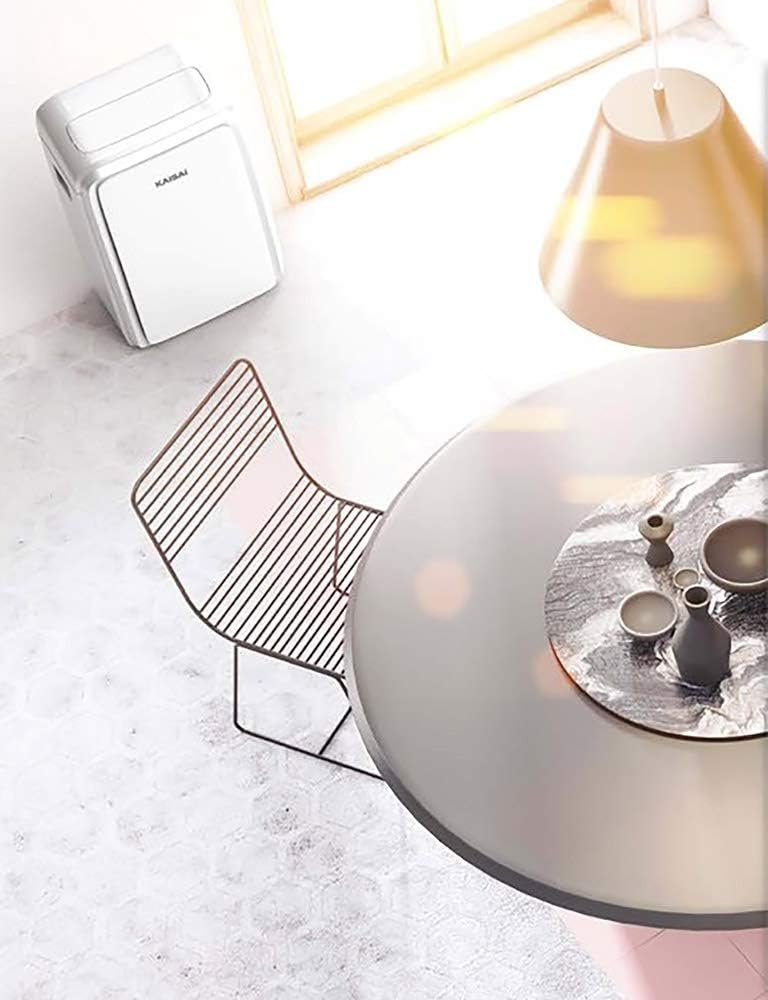
Figure 3.2: The KAISAI KPPD-12HRN29 Mobile Air Conditioner positioned in a modern room, demonstrating its compact design and portability.
Key Components:
- Control Panel: For setting modes, temperature, and timer.
- Air Outlet: Where conditioned air is discharged.
- Air Inlet: Where air is drawn into the unit.
- Exhaust Hose Connection: For expelling hot air (cooling mode) or cold air (heating mode).
- Drainage Port: For condensate removal during dehumidifying or cooling.
- 360° Wheels: For easy mobility.
4. Setup
Follow these steps for initial setup of your mobile air conditioner.
- Unpacking: Carefully remove the unit from its packaging. Retain packaging for future storage or transport.
- Positioning: Place the unit on a flat, stable surface. Ensure there is at least 30 cm (12 inches) of space around the unit for proper air circulation. The 360° wheels allow for easy positioning.
- Exhaust Hose Installation: Connect the exhaust hose to the designated port on the unit. Extend the hose to a window or other suitable opening to vent air outside. Ensure the hose is as straight and short as possible to maximize efficiency.
- Window Kit Installation (if applicable): If a window kit is provided, install it in your window to seal the opening around the exhaust hose, preventing outside air from entering.
- Power Connection: Plug the power cord into a grounded electrical outlet.
5. Operating Instructions
Your KAISAI KPPD-12HRN29 offers multiple operating modes for optimal comfort.
Control Panel Functions:
- Power Button: Turns the unit ON/OFF.
- Mode Button: Cycles through Cooling, Heating, Dehumidifying, and Fan modes.
- Temperature Adjustment Buttons (Up/Down): Adjusts the desired temperature.
- Fan Speed Button: Selects fan speed (Low, Medium, High).
- Timer Button: Sets the auto-on or auto-off time (up to 24 hours).
- Swing Button: Activates or deactivates the automatic swing of the air louvers.
- Sleep Mode Button: Activates Sleep Mode.
Operating Modes:
- Cooling Mode: Reduces room temperature. Set desired temperature using the adjustment buttons. The unit will expel hot air through the exhaust hose.
- Heating Mode: Increases room temperature. The unit provides efficient heating, serving as an alternative to traditional electric heating systems with lower energy consumption.
- Dehumidifying Mode: Removes excess moisture from the air. Condensate will collect and may need to be drained. This unit features condensate evaporation, reducing the need for frequent manual draining.
- Fan Mode: Circulates air without cooling or heating.
Special Functions:
- Sleep Mode: When activated, the programmed temperature will increase by 1°C per hour for two hours (in heating mode, it will decrease) and the fan will operate at a low speed, ensuring comfortable sleep.
- Timer Function: Use to program the unit to turn on or off automatically after a set period.
- Auto-Swing Mode: Ensures even distribution of air throughout the room.
- Auto-Restart: In case of a power outage, the unit will automatically restart with the last settings once power is restored.
- Self-Diagnosis: The unit is equipped with a self-diagnosis system to detect and indicate operational issues.
6. Maintenance
Regular maintenance ensures optimal performance and extends the lifespan of your air conditioner.
- Cleaning the Air Filter: The air filter should be cleaned every two weeks or more frequently depending on usage.
- Unplug the unit from the power outlet.
- Remove the air filter from its housing.
- Wash the filter with lukewarm water and a mild detergent. Rinse thoroughly.
- Allow the filter to air dry completely before reinserting it.
- Draining Condensate: While the unit features condensate evaporation, in high humidity conditions or prolonged use in dehumidifying mode, the internal water tank may fill.
- Turn off and unplug the unit.
- Place a shallow pan or container under the drainage port.
- Remove the drain plug to allow water to flow out.
- Once drained, replace the drain plug securely.
- Cleaning the Unit Exterior: Wipe the exterior with a soft, damp cloth. Do not use harsh chemicals or abrasive cleaners.
- Storage: If storing the unit for an extended period, ensure it is completely dry, clean the filter, and cover it to protect from dust.
7. Troubleshooting
Refer to this section for common issues and their solutions.
| Problem | Possible Cause | Solution |
|---|---|---|
| Unit does not turn on. | No power supply; Power cord not plugged in; Circuit breaker tripped. | Check power outlet; Ensure cord is securely plugged in; Reset circuit breaker. |
| Unit not cooling/heating effectively. | Air filter dirty; Exhaust hose blocked or improperly installed; Room too large; Doors/windows open. | Clean air filter; Check exhaust hose for kinks/blockages and proper installation; Close doors/windows; Ensure unit is suitable for room size. |
| Unit is noisy. | Unit not on a level surface; Air filter dirty; Obstruction in fan. | Place unit on a level surface; Clean air filter; Check for obstructions. |
| Water leakage. | Drain plug loose; Internal water tank full (in high humidity). | Ensure drain plug is secure; Drain the internal water tank. |
| Error code displayed. | Self-diagnosis system detected an issue. | Refer to the specific error code in the full manual (if available) or contact customer support. |
If the problem persists after attempting these solutions, please contact customer support.
8. Specifications
| Feature | Detail |
|---|---|
| Model Name | KPPD 12HRN29 |
| Manufacturer Reference | KPPD-12HRN29 |
| Brand | KAISAI |
| Product Dimensions (L x W x H) | 46.7 x 39.7 x 76.5 cm |
| Cooling Capacity | 12000 BTU (3.5 kW) |
| Capacity (Tons) | 1 Ton |
| Power Source | Corded Electric |
| Special Features | Dehumidifier, Self-diagnosis, Timer, Auto-swing, Condensate evaporation, Sleep mode, 360° wheels, Auto-restart, Fireproof casing. |
| Material Type | Polypropylene |
9. Warranty and Support
Your KAISAI KPPD-12HRN29 Mobile Air Conditioner comes with a Limited Warranty. Please refer to the warranty card included with your purchase for specific terms and conditions, including coverage period and what is covered.
For technical support, service, or warranty claims, please contact KAISAI customer service or the authorized dealer from whom you purchased the product. Keep your proof of purchase for warranty validation.
First Available Date: January 15, 2020
Related documentsKPPD-12HRN29


Ask a question about this manual
Ask about setup, troubleshooting, compatibility, parts, safety, or missing instructions. Manuals+ will review the question and use this page’s manual context to help answer it.