
Introduction
Welcome to your new AT&T EL52119 Cordless Answering System. This system is designed to provide reliable communication with advanced features for your home or office. It offers an unsurpassed range, ensuring clear calls throughout your property, and includes a digital answering system with up to 22 minutes of recording time to manage your calls efficiently. The large, backlit LCD screen enhances visibility, and the simulated full-duplex handset speakerphone allows for natural, two-way conversations. This manual will guide you through the setup, operation, and maintenance of your new cordless phone system.
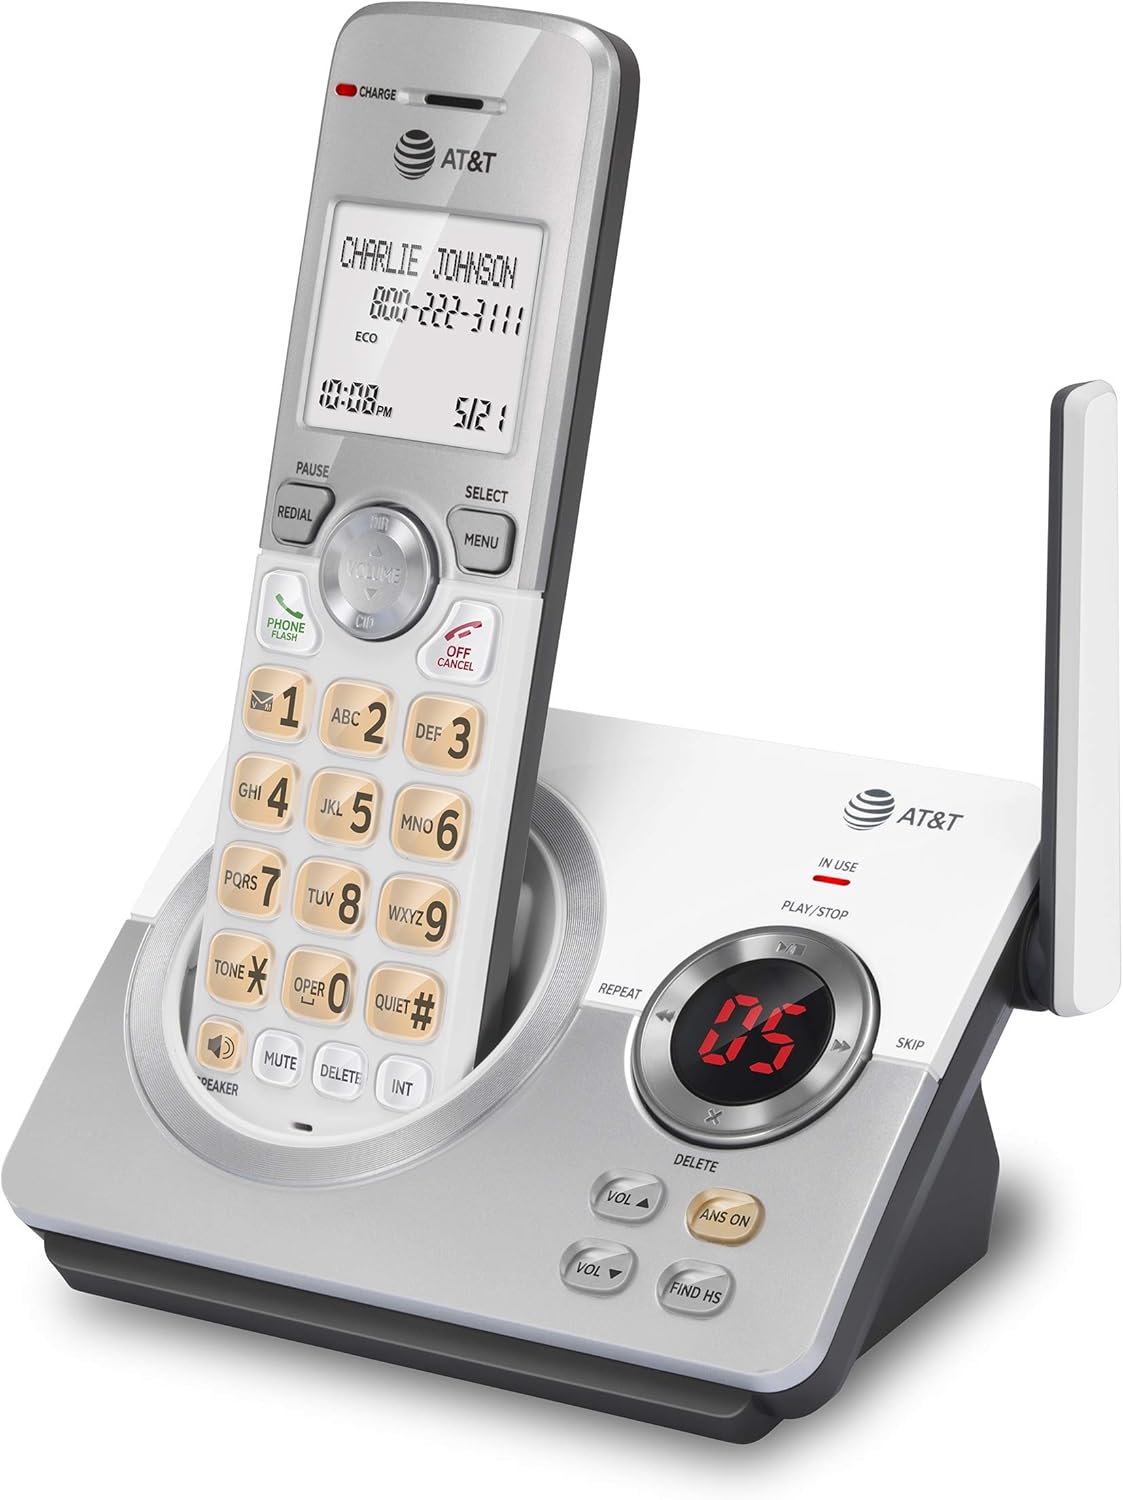
Figure 1: The AT&T EL52119 Cordless Answering System, showing the handset docked in its base unit.
Setup
Package Contents
Ensure all items are present in your package:
- Cordless Handset
- Base Unit with Digital Answering System
- AC Power Adapter for Base Unit
- Telephone Line Cord
- 2 AAA Rechargeable Batteries
- User's Manual (this document)
Installation
Battery Installation: Open the battery compartment on the back of the handset. Insert the two AAA rechargeable batteries, observing the correct polarity (+ and -). Close the battery compartment cover securely.

Figure 2: The AT&T EL52119 handset and base, illustrating the components for setup.
Connect the Base Unit:
- Plug the small end of the AC power adapter into the power jack on the back of the base unit.
- Plug the large end of the AC power adapter into a standard electrical outlet.
- Plug one end of the telephone line cord into the TEL LINE jack on the back of the base unit.
- Plug the other end of the telephone line cord into a telephone wall jack.
Charge the Handset: Place the handset in the base unit's charging cradle. The CHARGE indicator light on the handset should illuminate, indicating that the handset is charging. Allow the handset to charge for at least 16 hours before initial use to ensure optimal battery performance.
Initial Setup (Date and Time)
After the handset is charged, you will need to set the date and time. This is crucial for the Caller ID and answering system features to function correctly.
- Press MENU/SELECT on the handset.
- Scroll to SET DATE/TIME and press MENU/SELECT.
- Enter the month, day, and year using the dial pad. Press MENU/SELECT after each entry.
- Enter the hour and minute. Press MENU/SELECT.
- Select AM or PM and press MENU/SELECT.
- A confirmation tone will sound, indicating the date and time are set.
Operating Your Phone System

Figure 3: Key features of the AT&T EL52119, including digital answering system, speakerphone, call block, and extra large display.
Making and Receiving Calls
- To Make a Call: Press PHONE/FLASH or any dial pad key, then dial the number.
- To Answer a Call: When the phone rings, press PHONE/FLASH or any dial pad key.
- To End a Call: Press OFF/CANCEL or place the handset back in the base unit.
- Speakerphone: During a call, press SPEAKER to activate the simulated full-duplex speakerphone. Press SPEAKER again to return to handset mode.
Digital Answering System
Your EL52119 system includes a digital answering system with up to 22 minutes of recording time for incoming messages, announcements, and memos.
- Turning On/Off: Press ANS ON on the base unit to turn the answering system on or off. The indicator light will show its status.
- Playing Messages: Press PLAY/STOP on the base unit to listen to new messages. The message counter will display the number of messages.
- Skipping Messages: During message playback, press SKIP to skip to the next message.
- Repeating Messages: During message playback, press REPEAT to repeat the current message. Press twice to go to the previous message.
- Deleting Messages: During message playback, press DELETE on the base unit to delete the current message.
- Recording an Outgoing Announcement: Refer to the detailed instructions in the full user manual for recording a personalized outgoing message.
Caller ID
The system stores up to 50 Caller ID entries. The large, backlit LCD screen displays the caller's name and number, along with the date and time of the call.
- Reviewing Caller ID Log: Press CID on the handset to scroll through the Caller ID log.
- Calling Back from Caller ID: When viewing a Caller ID entry, press PHONE/FLASH to dial the number.
Call Block
The call block feature allows you to block unwanted calls. Consult the full user manual for detailed instructions on how to add numbers to the block list.
Maintenance
- Cleaning: Clean the phone and base unit with a soft, slightly damp cloth. Do not use cleaning sprays or harsh chemicals.
- Battery Care: To maintain optimal battery life, fully charge the handset for 16 hours before first use. If the phone will not be used for an extended period, remove the batteries.
- Environmental Conditions: Avoid placing the phone in direct sunlight, near heating appliances, or in areas with excessive moisture or dust.
Troubleshooting
| Problem | Solution |
|---|---|
| No dial tone. |
|
| Handset does not charge. |
|
| Poor sound quality or static. |
|
| Answering system not recording messages. |
|
Specifications
- Model: EL52119
- Technology: DECT 6.0 Digital Technology
- Answering System: Digital, up to 22 minutes recording time
- Caller ID Memory: Up to 50 entries
- Handset Display: Large, backlit LCD
- Speakerphone: Simulated Full-Duplex Handset Speakerphone
- Batteries: 2 x AAA rechargeable batteries (included)
- Dimensions (Base Unit): Approximately 7.01 x 4.8 x 3.78 inches (L x W x H)
- Weight (Item): Approximately 1.12 pounds
- Color: Silver
- Material: Plastic
Warranty and Support
For detailed warranty information, please refer to the warranty card included with your product or visit the official AT&T website.
If you require technical assistance or have questions about your AT&T EL52119 Cordless Answering System, please contact AT&T customer support. Support contact details are typically available on the AT&T website or in the product packaging.
You can also visit the AT&T Store for more information: AT&T Store on Amazon.


