
TESmart HSW0801A1U
TESmart 8x1 HDMI Switch User Manual
Model: HSW0801A1U
1. Product Overview
The TESmart 8x1 HDMI Switch is a high-performance device designed to connect up to eight HDMI source devices to a single HDMI display. It supports resolutions up to 4K@60Hz, ensuring a crisp and clear visual experience. This switch offers versatile control methods, including front panel buttons, IR remote control, RS232 serial commands, and LAN (IP) commands, providing flexible integration into various environments. Its intelligent features like EDID emulation, auto-scan, and auto-detection ensure stable and convenient operation.
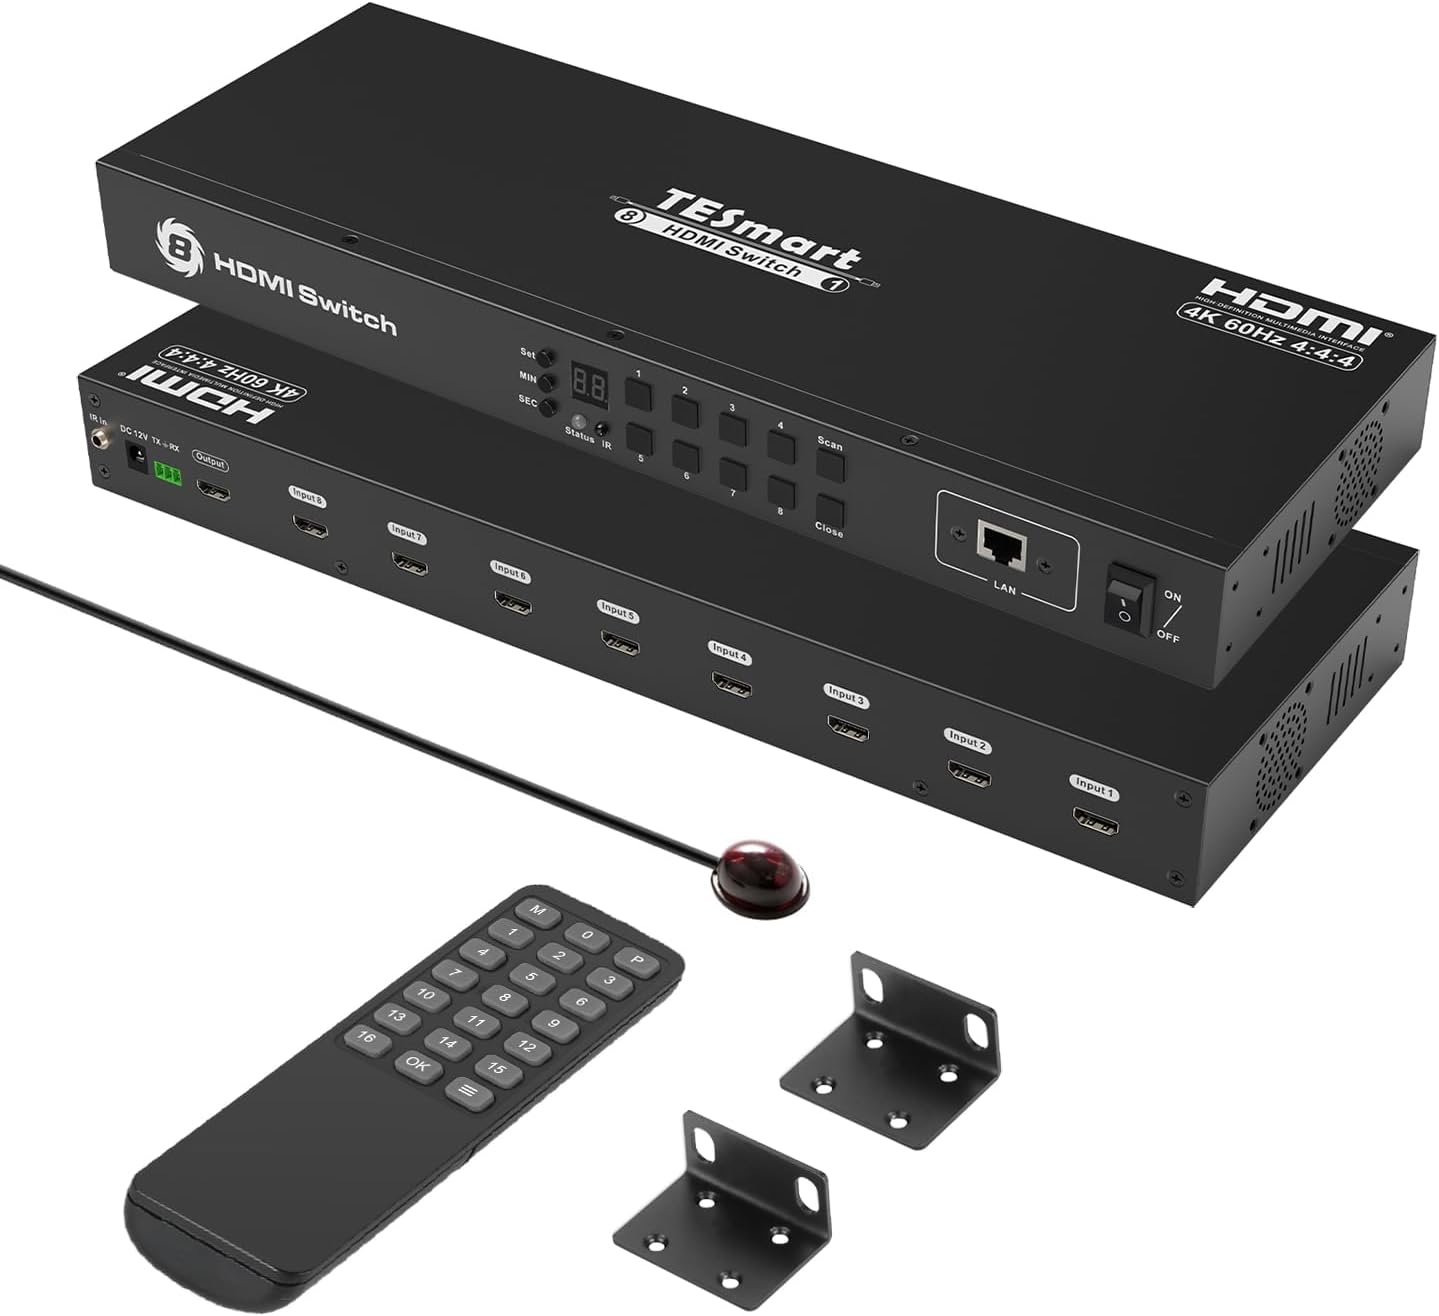
Image: The TESmart 8x1 HDMI Switch unit, showing the front and rear panels, along with the included IR remote control and rack-mounting ears.
2. Key Features
- 4K@60Hz Resolution: Supports resolutions up to 3840x2160@60Hz, with HDCP2.2 compliance.
- Multiple Control Modes: Easily switch inputs using front panel buttons, wireless IR remote control, RS232 serial commands, or IP commands via LAN.
- 8 Port Switch Timing Switching: Features an auto-scan function to automatically switch video among connected devices at preset intervals (0-3600 seconds) via the OSD menu.
- Standard 1U 19-inch Rack Mount: Designed for easy integration into standard 1U height and 19-inch cabinets or racks, including two rack ears for secure mounting.
- Built-in Intelligent EDID Emulator: Ensures display information remains accurate across all input ports, preventing resolution resets or desktop icon shifts during switching.
- Plug and Play (Hot Swap): Allows for disconnecting and reconnecting devices without interruption.
- Auto Detect and Switch Function: Automatically detects newly connected devices and switches to that input source.

Image: An overview diagram highlighting key features such as 4K@60Hz, HDCP2.2, Auto Scan, IR remote control, RS232 port, LAN port, IR extension, and EDID emulation.

Image: A visual comparison demonstrating the superior clarity and detail of 4K@60Hz high-resolution video compared to 2K@30Hz.
3. Package Contents
Please verify that all items are present and in good condition upon opening the package:
- 1 x TESmart 8x1 HDMI Switch Unit (Model: HSW0801A1U)
- 1 x IR Remote Control
- 1 x DC 12V Power Adapter
- 2 x 19-inch Rack Ears
- 1 x IR Receiver Cable
- 1 x User Manual (This document)
4. Setup Instructions
Follow these steps to set up your TESmart 8x1 HDMI Switch:
- Connect HDMI Sources: Connect your HDMI source devices (e.g., gaming consoles, PCs, Blu-ray players) to the HDMI Input ports (Input 1-8) on the rear panel of the switch using high-quality HDMI cables.
- Connect HDMI Display: Connect your HDMI display (e.g., TV, monitor, projector) to the HDMI Output port on the rear panel of the switch.
- Connect Power: Plug the DC 12V power adapter into the 'DC 12V' port on the switch, then plug the adapter into a power outlet.
- Optional - IR Extension: If using the IR remote control and the switch is out of direct line of sight, connect the IR receiver cable to the 'IR Extension In' port and place the IR receiver in a visible location.
- Optional - RS232/LAN Control: For advanced control, connect an RS232 cable to the 3-pin RS232 port or an Ethernet cable to the LAN port. Refer to the RS232/LAN control section for detailed setup.
- Power On: Turn on the power switch on the front panel of the HDMI switch. Power on all connected HDMI source devices and your display.

Image: A detailed diagram illustrating the various ports on the TESmart HDMI Switch, including DC 12V, HDMI output, HDMI inputs, IR Extension In, RS232 Port, IR Receiver, and LAN Port.
5. Operation
5.1 Switching Inputs
The TESmart 8x1 HDMI Switch offers several methods for switching between connected HDMI sources:
- Front Panel Buttons: Press the corresponding input button (1-8) on the front panel to select the desired HDMI source.
- IR Remote Control: Use the included IR remote control to directly select inputs (buttons 1-8) or navigate through options.
- RS232 Control: Connect a control system via the RS232 port and send serial commands to switch inputs. Refer to the RS232 command set in the advanced user guide for details.
- LAN (IP) Control: Connect the switch to your network via the LAN port and send IP commands to switch inputs. Refer to the IP command set in the advanced user guide for details.

Image: Visual representation of the four primary switching options: Front Panel Buttons, IR Remote Control, RS232 port control, and LAN (TCP/IP command) control.
5.2 Auto-Scanning Function
The auto-scanning function allows the switch to cycle through active HDMI inputs automatically at a set time interval.
- Setting Interval: Use the 'Set', 'MIN', and 'SEC' buttons on the front panel to adjust the auto-scan time interval (0-3600 seconds).
- Start/Stop Scan: Press the 'Scan' button to initiate or stop the auto-scanning process.
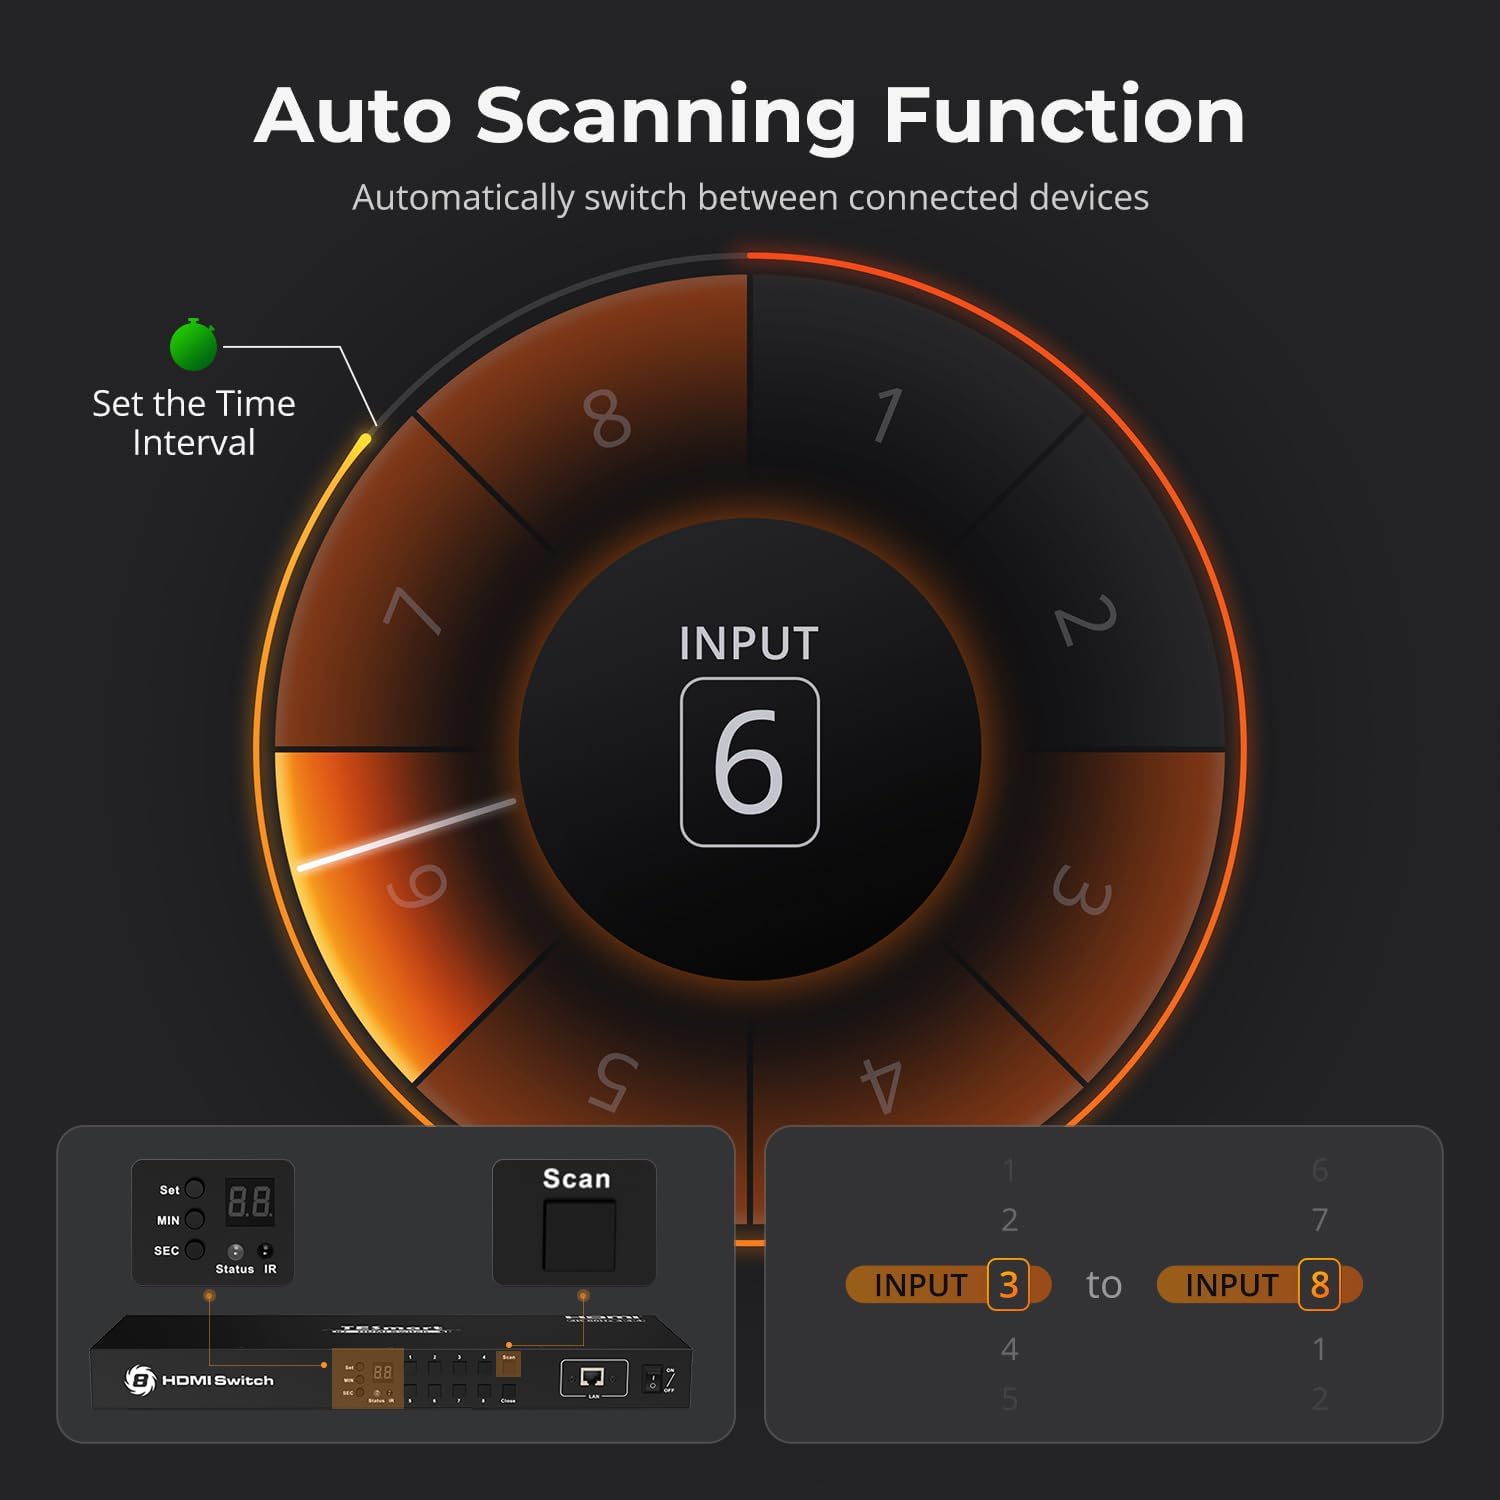
Image: A graphic illustrating the auto-scanning function, showing how to set the time interval and how the switch cycles through inputs.
5.3 Auto-Detection Function
The auto-detection feature allows the switch to automatically switch to a newly connected or powered-on HDMI source.
- When a new HDMI input source is plugged in or powered on, the switch will automatically select that input port.
- If an HDMI input source is unplugged or powered off, the switch will revert to the last active input.

Image: A visual explanation of the auto-detection function, showing the switch instantly recognizing and switching to an active input device.
5.4 EDID Emulation
The built-in EDID emulators in each input port ensure that connected PCs always receive correct display information, preventing issues like screen resolution resets or desktop icon shifts when switching between sources.

Image: A comparison demonstrating how EDID emulation prevents screen resolution changes and desktop icon shifts, ensuring a stable display.
6. Troubleshooting
If you encounter issues with your TESmart 8x1 HDMI Switch, please refer to the following common problems and solutions:
- No Display/Signal:
- Ensure all HDMI cables are securely connected to both the switch and the source/display devices.
- Verify that the correct input is selected on the switch.
- Check if the power adapter is properly connected and the switch is powered on.
- Try connecting the HDMI source directly to the display to confirm the source and display are working correctly.
- Test with different HDMI cables, especially for 4K@60Hz signals, as cable quality can impact performance.
- Resolution/Display Issues:
- Ensure your source and display devices support the desired resolution (e.g., 4K@60Hz).
- The built-in EDID emulator should prevent most resolution issues. If problems persist, try power cycling all devices.
- Switching Delays or Failures:
- Ensure the IR remote control has fresh batteries and is pointed directly at the IR receiver.
- For RS232/LAN control, verify the commands are correct and the connection is stable.
- Disable auto-scan or auto-detection temporarily to see if it resolves manual switching issues.
- Audio Problems:
- Check audio settings on your source device and display.
- Ensure the HDMI cables support audio transmission.
For more detailed troubleshooting, please refer to the official TESmart Troubleshooting Guide (PDF) available at: Troubleshooting Guide (PDF)
7. Specifications
| Attribute | Value |
|---|---|
| Model Number | HSW0801A1U |
| Product Dimensions | 17.32 x 5.91 x 1.75 inches |
| Item Weight | 3.26 pounds |
| Brand | TESmart |
| Color | HDMI Switch 8 ports 4K@60Hz (Black) |
| Connector Type | HDMI |
| Compatible Devices | Camera, Gaming Console, Laptop, Projector, VCR |
| Cable Type | HDMI |
| Max Resolution | 3840x2160@60Hz |
| HDCP Compliance | HDCP2.2 |
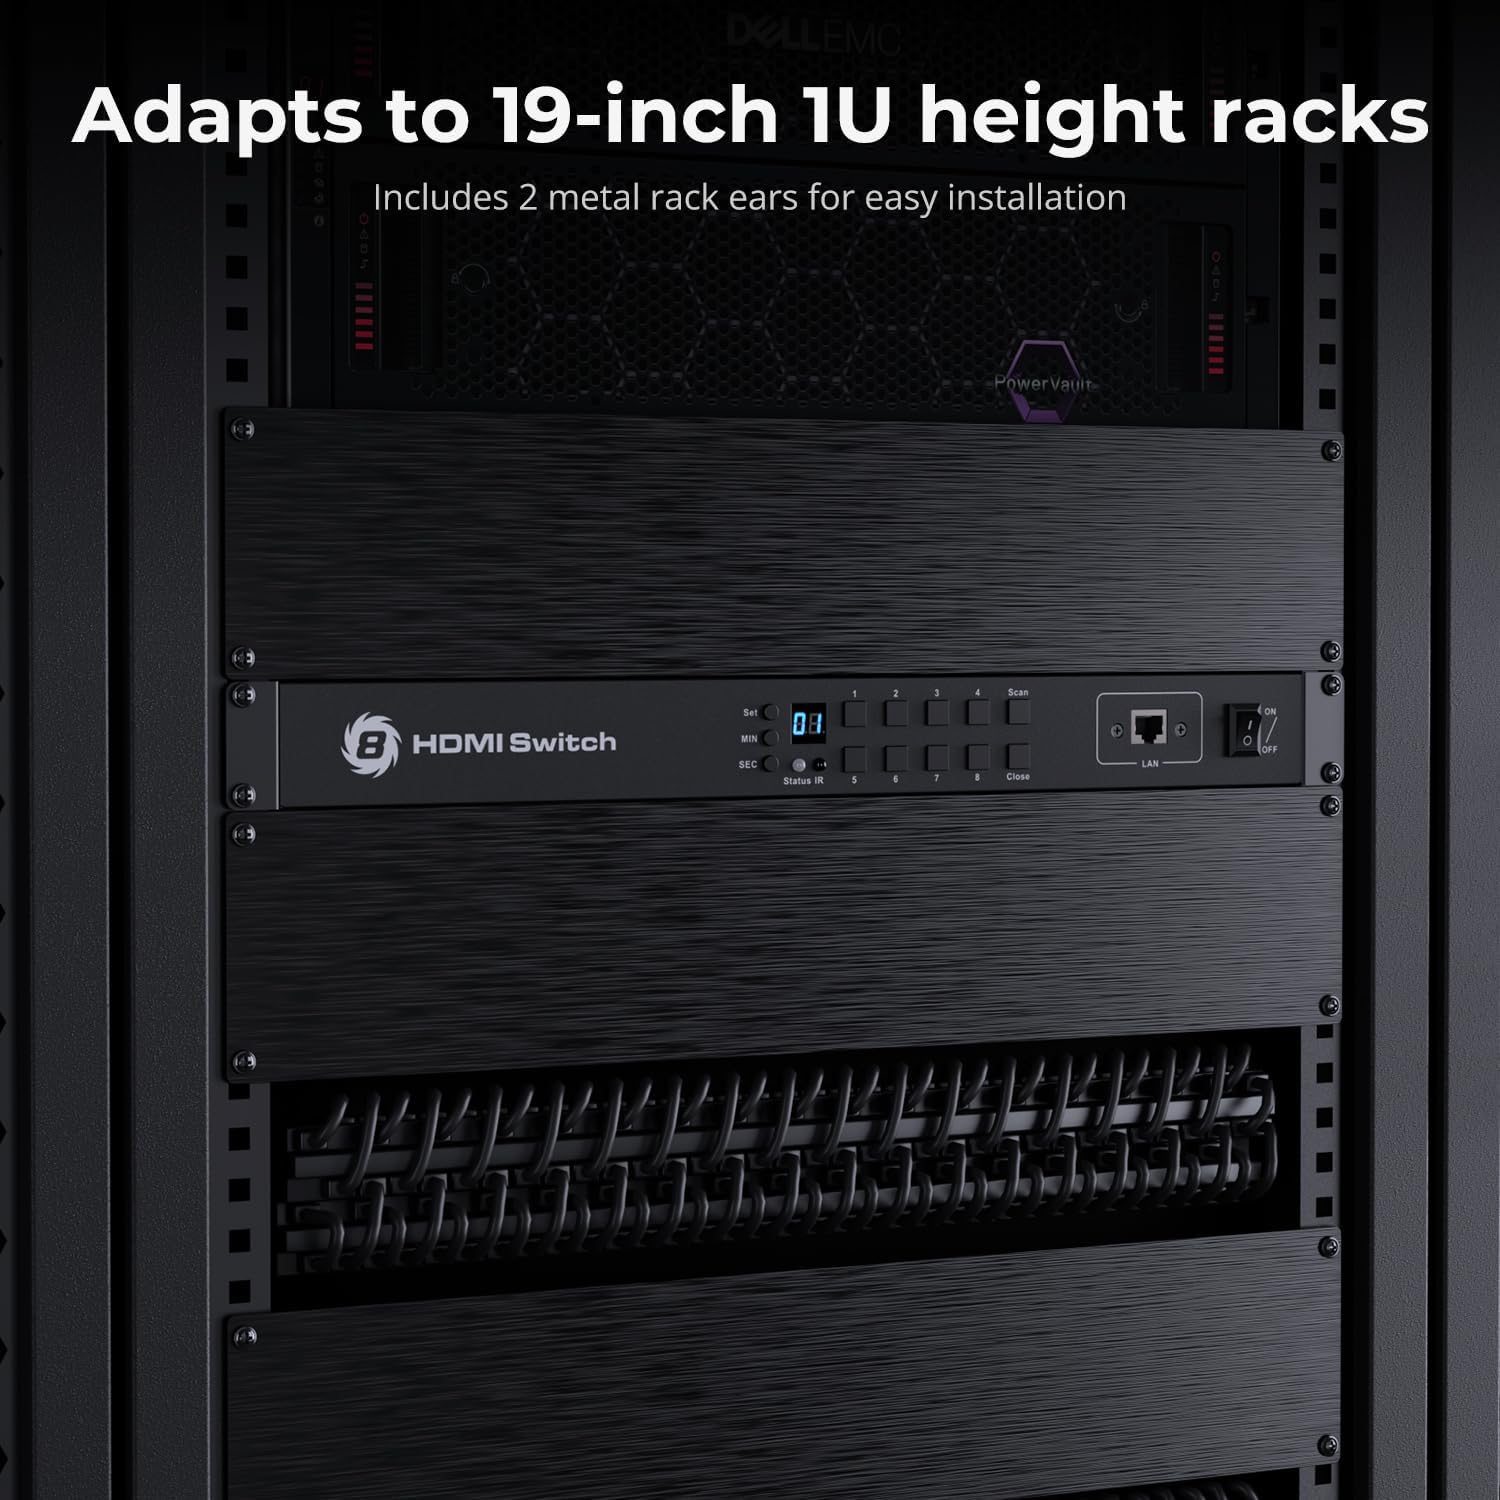
Image: The TESmart HDMI Switch installed in a 19-inch rack, demonstrating its compatibility with standard rack systems.
8. Warranty and Support
TESmart products are designed for reliability and performance. We stand by the quality of our products and offer comprehensive support.
8.1 Warranty Information
This product comes with a standard 1-year warranty, which can be extended by an additional 2 years for a total of 3 years. Please refer to your purchase documentation for specific warranty terms and conditions.
8.2 Customer Support
For technical assistance, troubleshooting, or any inquiries regarding your TESmart 8x1 HDMI Switch, our 24/7 technical support team is available to help.
How to Contact Support:
- If you purchased through Amazon, the most efficient way to get support is to find your order in your Amazon account and click the "Contact Seller" option.
- Visit the official TESmart website for additional support resources, FAQs, and contact information.

Image: An example of TESmart customer service interaction, demonstrating how to reach out for assistance.
9. Important Notes
- This device is an HDMI switch and does not support KVM (Keyboard, Video, Mouse) functionality or USB signals.
- Always use high-quality HDMI cables, especially for 4K@60Hz resolutions, to ensure optimal performance and signal integrity.
- Ensure proper ventilation around the unit to prevent overheating.
10. Official Product Videos
No relevant official product videos from the seller were found in the provided data to embed in this manual.
Related documentsHSW0801A1U


Ask a question about this manual
Ask about setup, troubleshooting, compatibility, parts, safety, or missing instructions. Manuals+ will review the question and use this page’s manual context to help answer it.