Introduction
This manual provides essential instructions for the setup, operation, maintenance, and troubleshooting of the Juniper Networks EX3300-24P 24-Port Gigabit PoE+ Network Switch. This device is designed for reliable network connectivity and Power over Ethernet (PoE+) capabilities, suitable for various network environments.
Please read this manual thoroughly before installing or operating the switch to ensure proper functionality and safety.
1. Setup and Installation
1.1 Unboxing and Inspection
Carefully remove the switch from its packaging. Inspect the device for any signs of physical damage that may have occurred during shipping. Verify that all components listed in the packing slip are present. If any items are missing or damaged, contact your supplier immediately.
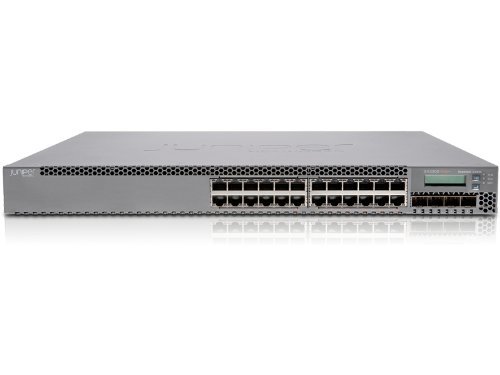
Figure 1: Front view of the Juniper Networks EX3300-24P 24-Port Gigabit PoE+ Network Switch. The image shows the grey metal casing with 24 RJ45 ports and an LCD display on the right side.
1.2 Physical Installation
The EX3300-24P switch can be installed on a desktop or mounted in a standard 19-inch equipment rack. Ensure adequate ventilation around the switch to prevent overheating. Maintain a minimum clearance of 5 cm (2 inches) on all sides for proper airflow.
- Rack Mounting: Attach the provided rack-mount brackets to the sides of the switch using the included screws. Secure the switch into the rack using appropriate rack screws.
- Desktop Placement: Place the switch on a flat, stable surface. Ensure the rubber feet are attached to prevent slipping and provide minor elevation for airflow.
1.3 Power Connection
Connect the power cord to the AC power inlet on the rear of the switch and then to a grounded electrical outlet. The switch supports 240 Volts AC. Ensure the power source meets the switch's requirements.
1.4 Initial Power-On
After connecting the power, the switch will automatically power on. Observe the system status LEDs on the front panel. The Power LED should illuminate, indicating that the switch is receiving power. Allow a few minutes for the switch to complete its boot sequence.
2. Operation
2.1 Network Connections
Connect network devices (computers, servers, access points) to the RJ45 ports on the front panel using standard Ethernet cables. The EX3300-24P supports Gigabit Ethernet speeds. For devices requiring power, connect them to the PoE+ enabled ports. The switch will automatically detect and provide power to compatible devices.
2.2 Management Access
The switch can be managed via a console port, a web-based interface (J-Web), or a command-line interface (CLI) using SSH or Telnet. Refer to the Juniper Networks documentation for detailed instructions on initial configuration and management access.
- Console Port: Connect a serial cable from your management workstation to the console port on the switch.
- Web Interface (J-Web): Access the switch's IP address through a web browser. The default IP address and login credentials can be found in the official Juniper documentation.
- CLI (SSH/Telnet): Use an SSH or Telnet client to connect to the switch's IP address.
2.3 Basic Configuration
Upon first access, it is recommended to configure basic network settings such as the management IP address, subnet mask, default gateway, and administrative passwords. Further configurations may include VLANs, port security, QoS, and other advanced features as required by your network design.
3. Maintenance
3.1 Cleaning
Regularly inspect the switch for dust accumulation, especially around ventilation openings. Use a soft, dry cloth to clean the exterior. For internal cleaning, if necessary, consult a qualified technician. Ensure the switch is powered off and disconnected from the power source before any cleaning procedures.
3.2 Firmware Updates
Keeping the switch's firmware up-to-date is crucial for optimal performance, security, and access to new features. Periodically check the Juniper Networks support website for the latest firmware releases for the EX3300-24P model. Follow the provided instructions carefully when performing firmware upgrades.
4. Troubleshooting
This section provides solutions to common issues you might encounter with your EX3300-24P switch.
4.1 No Power
- Check Power Cord: Ensure the power cord is securely connected to both the switch and the electrical outlet.
- Verify Power Outlet: Test the electrical outlet with another device to confirm it is functional.
- Power Supply: If the Power LED remains off after verifying connections and outlet, the internal power supply may be faulty. Contact support.
4.2 No Network Connectivity
- Cable Connection: Ensure Ethernet cables are securely connected to both the switch port and the connected device. Check for damaged cables.
- Link/Activity LEDs: Verify that the Link/Activity LEDs on the switch ports are illuminated, indicating a valid connection and data activity.
- Port Configuration: Check the switch's configuration to ensure the ports are enabled and correctly configured (e.g., VLAN assignments).
- Device Configuration: Ensure the connected device's network settings (IP address, subnet mask) are correct.
4.3 PoE+ Issues
- Device Compatibility: Ensure the connected device is PoE+ compatible (IEEE 802.3at or 802.3af).
- Power Budget: Verify that the switch's total PoE power budget is not exceeded. The EX3300-24P has a specific power budget for all PoE+ ports.
- Cable Quality: Use high-quality Ethernet cables (Cat5e or higher) for PoE+ connections.
5. Product Specifications
| Feature | Specification |
|---|---|
| Brand | Juniper Networks |
| Model | EX3300-24P |
| Number of Ports | 24 |
| Interface Type | RJ45 |
| Item Weight | 12 Pounds (5.44 kg) |
| Product Dimensions | 17 x 2 x 12 inches (43.18 x 5.08 x 30.48 cm) |
| Voltage | 240 Volts |
| Case Material | Metal |
| Upper Temperature Rating | 167 Degrees Fahrenheit (75 Degrees Celsius) |
| Color | Grey |
| ASIN | B085PQV5RW |
| GTIN/UPC | 751889050401 |
6. Warranty and Support
This product is offered as an Amazon Renewed item. Amazon Renewed products are professionally inspected and tested to work and look like new. They are eligible for replacement or refund under the Amazon Renewed Guarantee if you are not satisfied with your purchase.
The return policy for this item specifies a duration of 90 days for refund/replacement.
For specific support inquiries or issues, please contact the seller, Network Hardware Depot, directly through the Amazon platform. Additional warranty length options may be available; contact the seller for more details.
Please note that this product may be End-of-Life (EOL) from Juniper Networks, meaning direct support from Juniper may be limited. However, the device is confirmed to be functional and can be updated to the newest released firmware for this model.


