1. Introduction
Thank you for purchasing the iHome IBTW20BX. This digital alarm clock combines multiple functionalities, including wireless charging, USB charging, and a Bluetooth speaker, designed for convenience in your bedroom, home office, or dorm. This manual provides detailed instructions for setup, operation, maintenance, and troubleshooting to ensure optimal performance of your device.
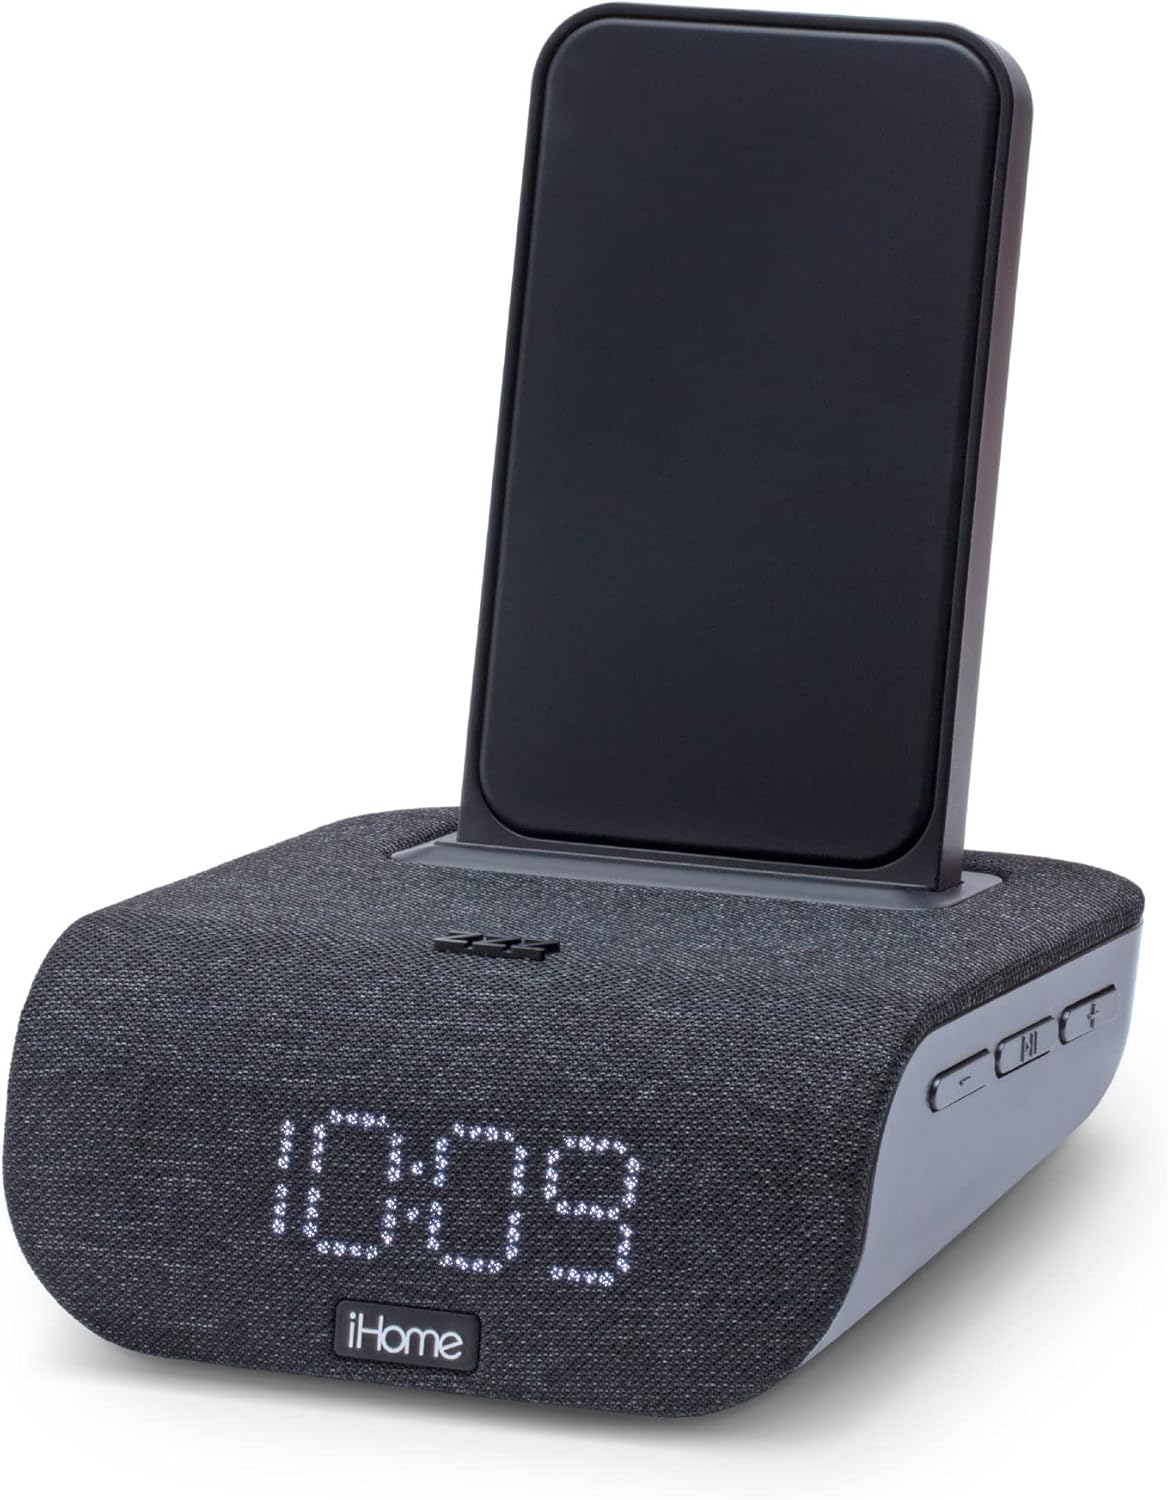
Figure 1: iHome IBTW20BX Digital Alarm Clock with Wireless Charging
2. Package Contents
Please verify that all items are present in the package:
- iHome IBTW20BX Alarm Clock Unit
- Universal Voltage AC Adapter (100V-240V)
- User Manual (this document)
Note: Charging cables for USB devices are not included.
3. Device Overview
Familiarize yourself with the various components and controls of your iHome IBTW20BX.

Figure 2: Front and Rear View of the iHome IBTW20BX with Labeled Components
- Wireless Charging Stand: For Qi-compatible smartphones.
- Dimmable LED Clock: Displays time and alarm status.
- Designer Fabric Grill: Covers the integrated speaker.
- Alarm Buttons: Set and manage alarms.
- Programmable Snooze: Temporarily silences the alarm.
- USB Charging Port: For charging non-wireless devices.
- Daylight Savings Time Switch: Adjusts time for DST.
- Speaker: For audio playback and speakerphone function.
- Bluetooth Pairing Button: Initiates Bluetooth connection.
4. Setup
- Power Connection: Connect the included AC adapter to the DC input jack on the back of the unit and plug it into a working wall outlet. The unit will power on and the clock display will illuminate.
- Time Setting: The clock may automatically set the time via pre-programmed settings. If not, refer to the "Setting the Clock" section in Operating Instructions.
- Battery Backup (Optional): For maintaining time settings during power outages, insert 1 Lithium Ion battery (not included) into the battery compartment on the bottom of the unit.
5. Operating Instructions
5.1. Setting the Clock
To manually set the time:
- Press and hold the "Time Set" button (refer to Figure 2 for location) until the time display flashes.
- Use the "+" or "-" buttons to adjust the hour. Press "Time Set" again to confirm.
- Use the "+" or "-" buttons to adjust the minute. Press "Time Set" again to confirm.
- Press "Time Set" one last time to save the settings.
5.2. Setting Alarms
The iBTW20BX supports two independent alarms. To set an alarm:
- Press and hold either "Alarm 1" or "Alarm 2" button until the alarm time flashes.
- Use the "+" or "-" buttons to adjust the alarm hour, then press the corresponding "Alarm" button to confirm.
- Use the "+" or "-" buttons to adjust the alarm minute, then press the corresponding "Alarm" button to confirm.
- Select the alarm source (Bluetooth audio or 4 preset tones) using the "+" or "-" buttons, then press the "Alarm" button.
- Choose the alarm schedule (weekdays, weekends, or 7 days a week) using the "+" or "-" buttons, then press the "Alarm" button to save.
To snooze, press the large "Zzzz" button on top of the unit. To turn off an alarm, press the corresponding "Alarm" button.
5.3. Wireless Charging
The top surface of the iBTW20BX features a Qi wireless charging pad. To charge a compatible smartphone:
- Place your Qi-compatible smartphone vertically on the charging stand.
- Ensure the phone is centered on the charging pad for optimal contact.
- The charging indicator on your phone should confirm charging has begun.
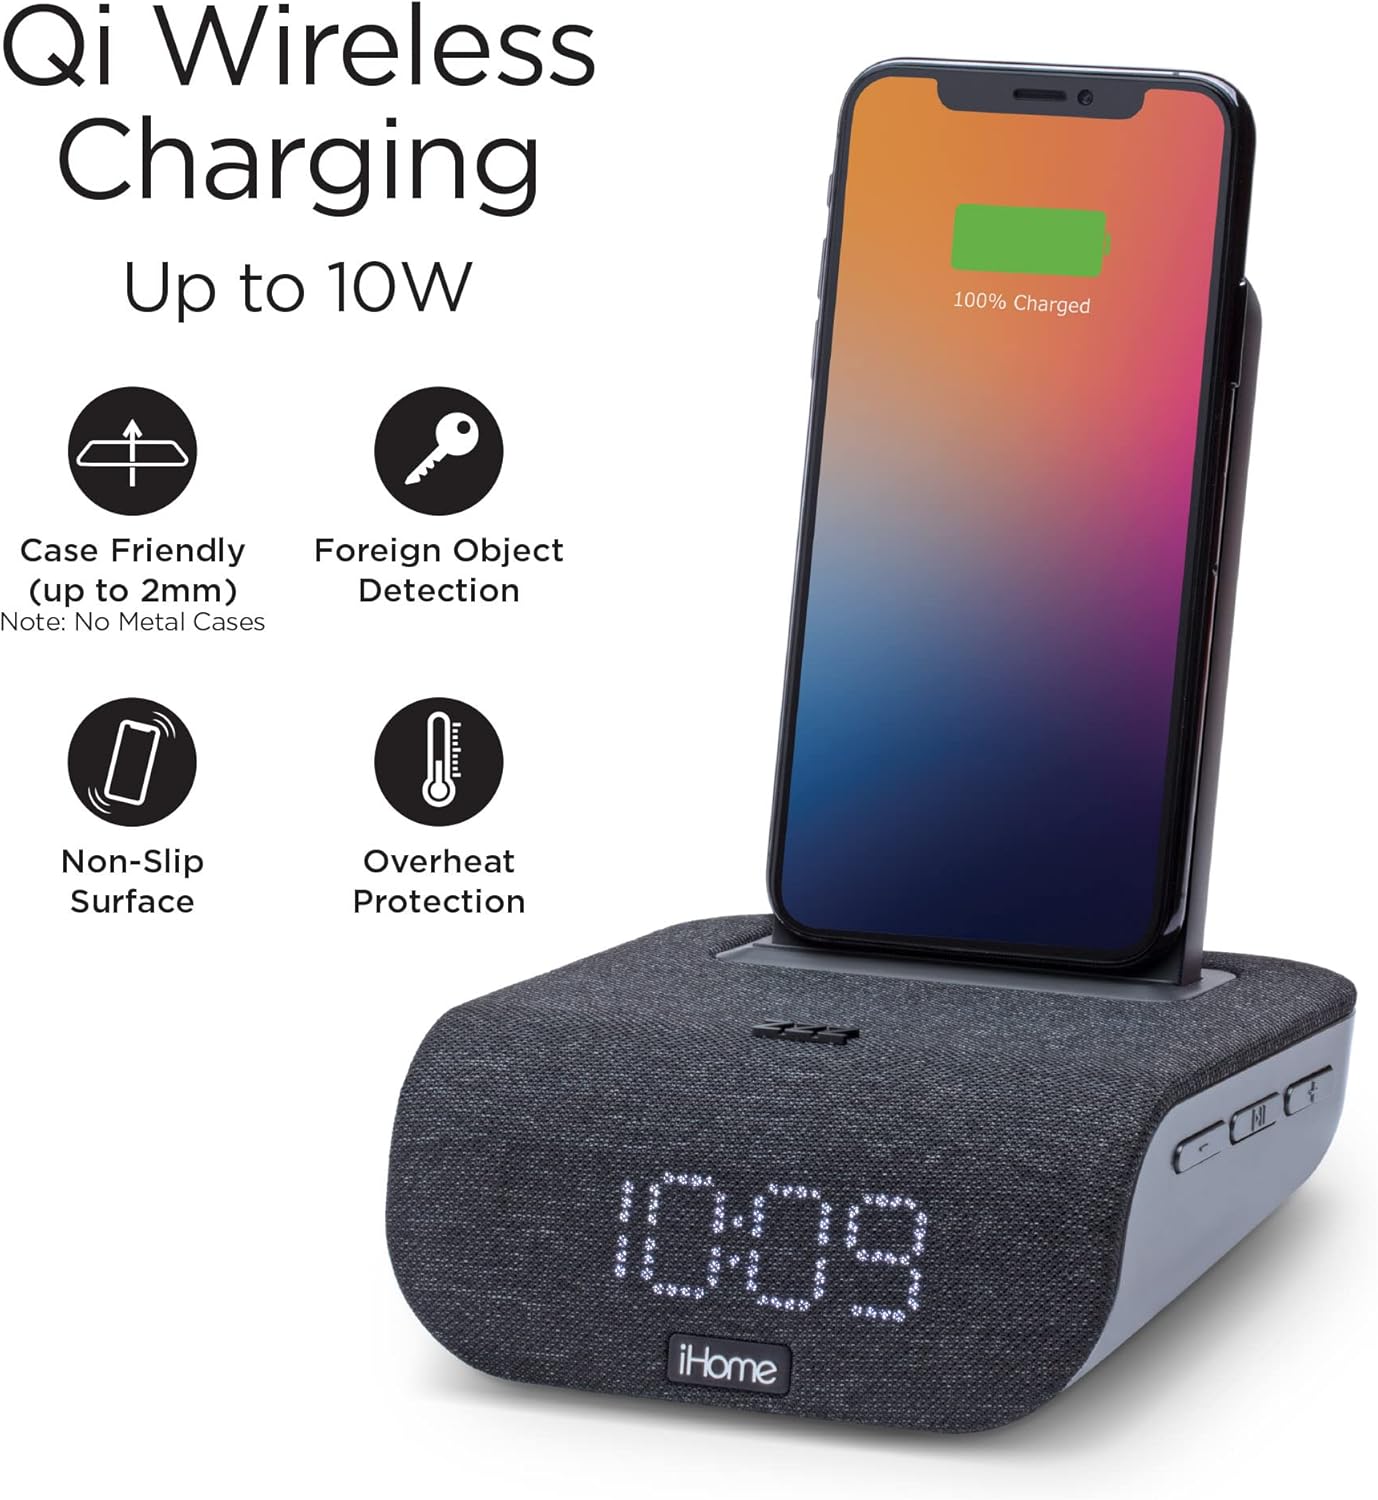
Figure 3: Qi Wireless Charging up to 10W
Note: For best results, remove any metal cases or foreign objects from your phone before charging. The device features foreign object detection and overheat protection.
5.4. USB Charging
A 5W USB charging port is located on the back of the unit for charging additional devices.
- Connect your device (e.g., smartwatch, tablet) to the USB port using its charging cable (not included).
- The device will begin charging automatically.

Figure 4: USB Charging Port in Use
5.5. Bluetooth Speaker Functionality
Stream audio wirelessly from your Bluetooth-enabled devices.
- Press and hold the Bluetooth pairing button (refer to Figure 2) until the Bluetooth indicator flashes.
- On your device, enable Bluetooth and select "iHome IBTW20BX" from the list of available devices.
- Once paired, the Bluetooth indicator will glow solid, and you can begin streaming audio.

Figure 5: Bluetooth Audio Streaming and Speakerphone
The built-in speakerphone features digital voice echo cancellation for clear hands-free calls.
6. Maintenance
- Cleaning: Use a soft, dry cloth to clean the exterior of the unit. Do not use liquid cleaners or abrasive sprays.
- Storage: If storing the unit for an extended period, disconnect it from the power source and remove any battery backup. Store in a cool, dry place.
- Fabric Care: The fabric grill can be gently wiped with a slightly damp cloth if necessary. Avoid excessive moisture.
7. Troubleshooting
| Problem | Possible Cause | Solution |
|---|---|---|
| Unit does not power on. | Power adapter not connected or outlet is faulty. | Ensure AC adapter is securely plugged into the unit and a working wall outlet. Try a different outlet. |
| Wireless charging not working. | Phone not Qi-compatible, not aligned, or has a metal case/foreign object. | Verify phone compatibility. Re-position phone on the charging stand. Remove metal cases or objects. |
| Bluetooth pairing fails. | Device too far, Bluetooth not enabled, or unit not in pairing mode. | Ensure device is within range. Enable Bluetooth on your device. Press and hold the Bluetooth button on the unit to enter pairing mode. |
| Clock display is dim or segments are missing. | Dimmer setting is too low or LED failure. | Press the "Zzzz" button to cycle through dimmer settings. If segments are permanently missing, contact customer support. |
8. Specifications
- Brand: iHome
- Model: IBTW20BX
- Color: Black
- Display Type: Digital LED
- Power Source: Corded Electric (100V-240V universal adapter)
- Product Dimensions: 5.59"W x 6.38"H
- Item Weight: 1.85 pounds (839 Grams)
- Wireless Charging Output: Up to 10W (Qi-compatible)
- USB Charging Output: 5W
- Battery Backup: 1 Lithium Ion battery required (not included)

Figure 6: Product Dimensions
9. Warranty and Support
iHome products are designed for reliability and performance. For warranty information and customer support, please refer to the official iHome website or contact their customer service directly. Keep your purchase receipt as proof of purchase for warranty claims.
Note: The 1-year warranty typically applies to products purchased in the United States. Please check specific warranty terms for your region.
For further assistance, visit the iHome Store on Amazon.


