1. Introduction
This manual provides instructions for the proper assembly, operation, and maintenance of your SWIFT S7-TP520-EA10-56 Trinocular Zoom Stereo Microscope. This microscope is designed for industrial and electronic board inspection, offering a versatile magnification range and stable construction. It features a Greenough optical system, providing a standard 7x-45x zoom range, expandable to 3.5x-90x with included auxiliary lenses, making it suitable for detailed observation of electronic components and precision parts.
2. Safety Information
- Always handle the microscope with care to prevent damage to optical components.
- Ensure the microscope is placed on a stable, level surface to prevent tipping.
- Disconnect the power cord before cleaning or performing any maintenance.
- Avoid direct exposure of eyes to the LED light source for extended periods.
- Keep the microscope away from direct sunlight, high temperatures, dust, and moisture.
- Only use the provided power adapter.
3. Package Contents
Verify that all items listed below are present in your package:
- SWIFT S7-TP520-EA10-56 Trinocular Zoom Stereo Microscope Main Unit
- Head Holder
- Table Pillar Stand
- WF10x Eyepieces (x2)
- Eyecups (x2)
- 0.5x Auxiliary Objective Lens
- 2x Auxiliary Objective Lens
- 56-LED Ring Light
- φ23.2mm Trinocular Camera Adapter
- Black/White Stage Plate
- Instruction Manual (this document)
- Stage Clips (x2)
- Dust Cover

Image: All components included in the SWIFT S7-TP520-EA10-56 package.
4. Setup Instructions
4.1 Assembling the Stand and Head
- Place the metal base on a stable, flat surface.
- Insert the vertical pillar into the designated hole on the metal base and secure it with the locking screw.
- Attach the head holder to the vertical pillar. Adjust its height and tighten the locking knob to secure it.
- Carefully mount the trinocular head onto the head holder. Ensure it is seated firmly.

Image: Diagram showing the main parts of the microscope and their assembly points.
4.2 Installing Eyepieces and Eyecups
- Remove the protective caps from the eyepiece tubes on the trinocular head.
- Gently insert the WF10x eyepieces into the eyepiece tubes.
- Place the rubber eyecups over the eyepieces for comfortable viewing and to block ambient light.
4.3 Attaching the LED Ring Light
- Slide the 56-LED ring light onto the objective lens housing.
- Secure the ring light using its integrated screws, ensuring it is centered and stable.
- Connect the ring light's power cable to the provided AC adapter, then plug the adapter into a power outlet.

Image: Close-up of the 56-LED ring light attached to the microscope objective.
4.4 Installing Auxiliary Objective Lenses (Optional)
The microscope comes with 0.5x and 2x auxiliary objective lenses to extend the magnification range and working distance.
- To install, carefully screw the desired auxiliary lens onto the bottom of the main objective housing.
- Ensure it is securely fastened but do not overtighten.
5. Operating Instructions
5.1 Basic Observation
- Place the specimen on the black/white stage plate. Use the stage clips to hold it in place if necessary.
- Adjust the height of the microscope head using the coarse focus knob until the objective lens is a suitable distance from the specimen (working distance).
- Turn on the LED ring light and adjust its brightness for optimal illumination.
- Look through the eyepieces and adjust the interpupillary distance by moving the eyepiece tubes until you see a single, circular field of view.
- Use the coarse and fine focus knobs to bring the specimen into sharp focus.
- Adjust the diopter on one eyepiece (usually the left one) to compensate for differences in vision between your eyes.
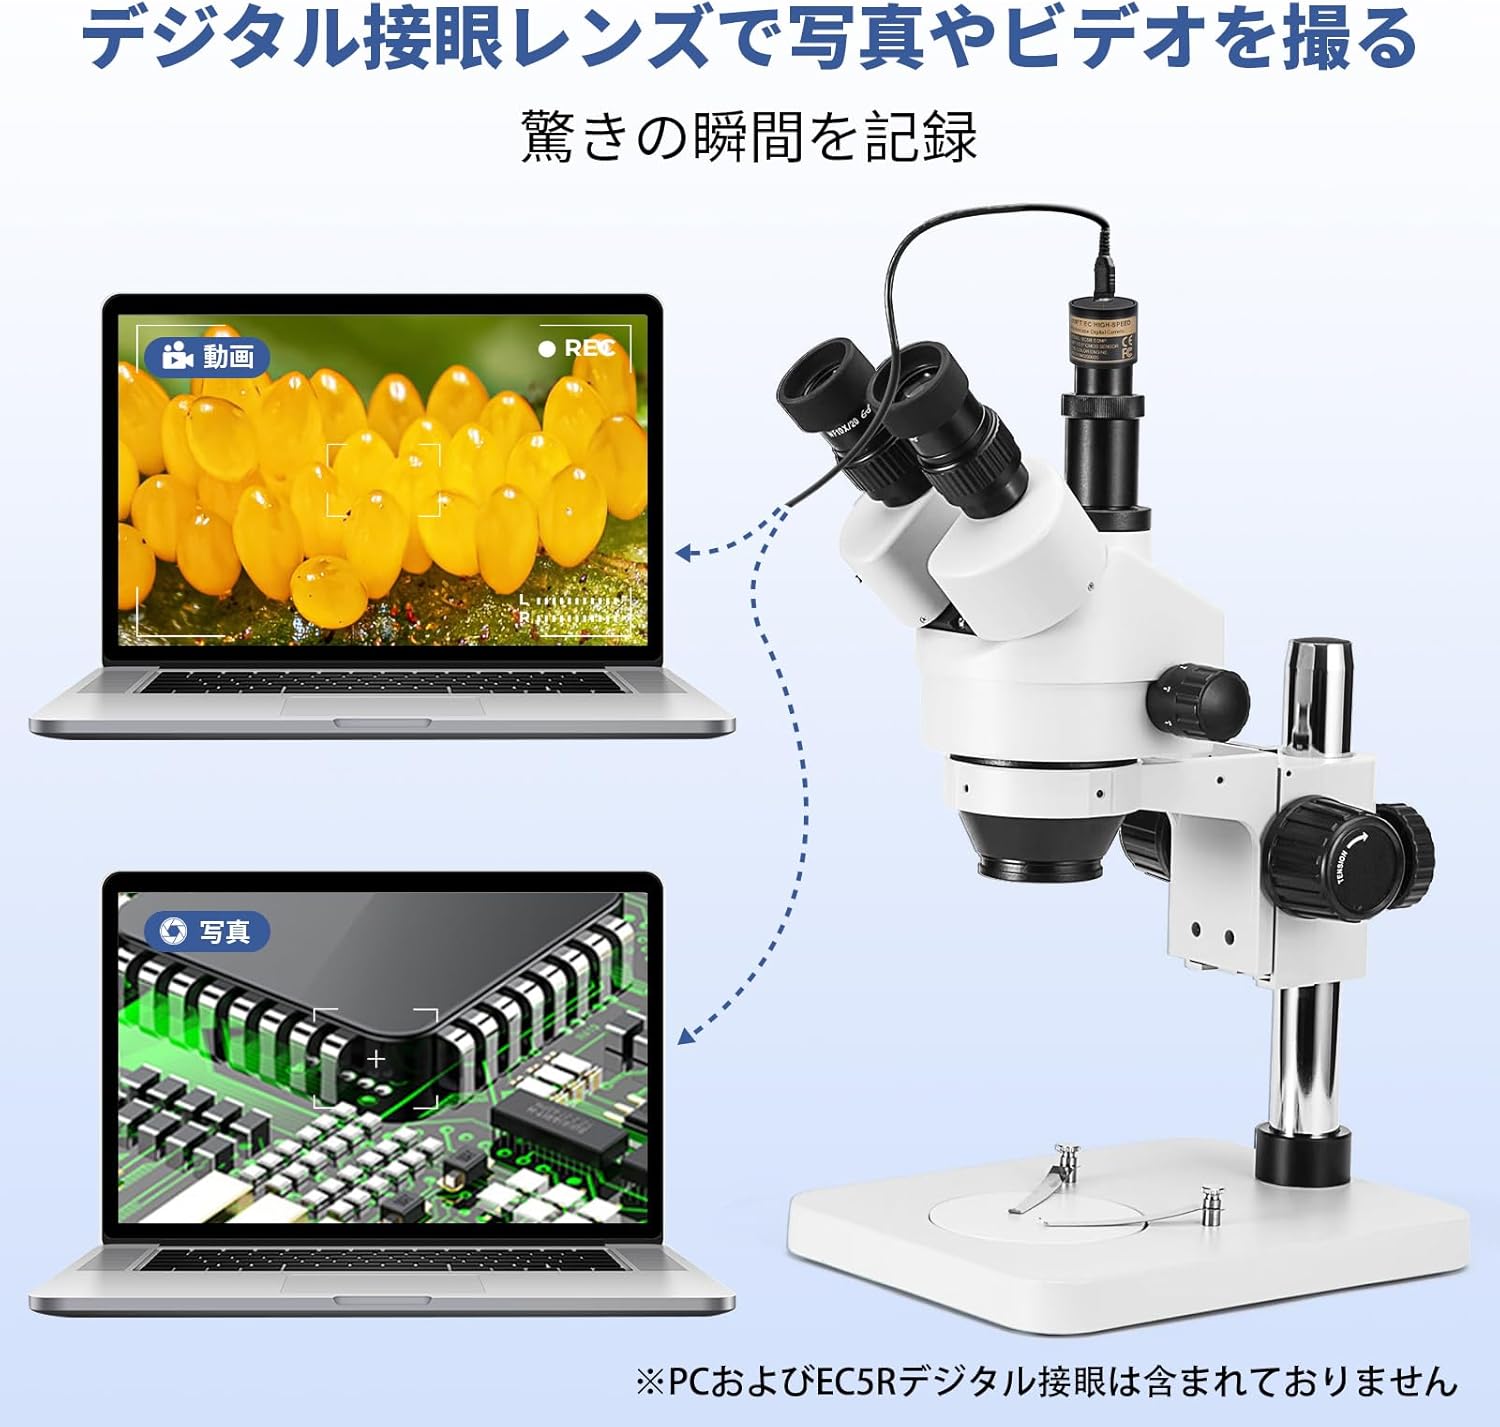
Image: A user demonstrating proper observation technique with the microscope.
5.2 Adjusting Magnification
The microscope offers a continuous zoom range. Rotate the zoom knob on the microscope head to change the magnification from 7x to 45x (or 3.5x to 90x with auxiliary lenses).

Image: Close-up of the microscope head showing the 45° inclination, 360° rotation, diopter adjustment, and zoom knob (0.7x-4.5x objective zoom).
5.3 Using the Trinocular Port for Camera Connection
The trinocular port allows for connecting a camera (not included) to capture images or videos of your observations. The forward-facing trinocular tube is 45° inclined and 360° rotatable, adopting a 20:80 light splitter for binocular/trinocular viewing. The trinocular port includes a φ23.2mm camera adapter.
- Remove the protective cap from the trinocular port.
- Insert the φ23.2mm camera adapter into the trinocular port.
- Attach your compatible microscope camera to the adapter.
- Adjust the focus for the camera independently if necessary, using the camera's software or dedicated focus mechanism.

Image: The trinocular microscope connected to a laptop, demonstrating its capability for image and video recording. (PC and SWIFTCAM not included).
6. Maintenance
6.1 Cleaning the Optics
- Use a soft brush or air blower to remove dust from lenses.
- For smudges or fingerprints, use a lens cleaning solution and lens paper. Apply a small amount of solution to the paper, not directly to the lens.
- Clean eyepieces and objective lenses gently in a circular motion from the center outwards.
6.2 General Cleaning
- Wipe the microscope body with a soft, damp cloth. Avoid using harsh chemicals or solvents.
- Keep the microscope covered with the dust cover when not in use.
6.3 Storage
Store the microscope in a cool, dry, and dust-free environment. Avoid areas with extreme temperature fluctuations or high humidity.
7. Troubleshooting
| Problem | Possible Cause | Solution |
|---|---|---|
| No image visible | Eyepiece caps still on; specimen not in focus; objective lens too far/close; LED light off. | Remove caps; adjust focus knobs; adjust working distance; turn on LED light. |
| Image is blurry or unclear | Not properly focused; dirty lenses; diopter not adjusted. | Refocus; clean lenses; adjust diopter for individual eyes. |
| Uneven illumination | LED ring light not centered or partially obstructed. | Adjust the position of the LED ring light. |
| Difficulty adjusting interpupillary distance | Eyepiece tubes are stiff. | Apply gentle, even pressure. Avoid forcing. |
8. Specifications
| Feature | Detail |
|---|---|
| Brand | SWIFT |
| Model Number | S7-TP520-EA10-56 |
| Optical System | Greenough Stereo |
| Eyepieces | WF10x/20mm (Pair) |
| Objective Zoom Range | 0.7x - 4.5x |
| Total Magnification | 7x - 45x (Standard) 3.5x - 90x (with 0.5x and 2x auxiliary lenses) |
| Auxiliary Objective Lenses | 0.5x, 2x |
| Working Distance | 100mm (Standard 1x) ~165mm (with 0.5x auxiliary lens) ~30mm (with 2x auxiliary lens) |
| Head Type | Trinocular, 45° Inclined, 360° Rotatable |
| Interpupillary Distance | 54mm - 76mm |
| Diopter Adjustment | ±5 DP (on both eyepieces) |
| Trinocular Port | φ23.2mm (with camera adapter) |
| Illumination | 56-LED Ring Light |
| LED Color Temperature | 6000K - 7000K |
| Power Input | AC 110V - 240V (via external adapter) |
| Stand Type | Metal Pillar Stand |
| Base Dimensions | 200 x 255 x 22mm |
| Product Dimensions | 32 x 20 x 36 cm |
| Product Weight | 4.2 kg |
| Material | Metal |
9. Warranty and Support
For warranty information and technical support, please refer to the official SWIFT website or contact your local distributor. Keep your purchase receipt as proof of purchase for warranty claims.
SWIFT has been a trusted manufacturer of high-quality microscopes and accessories for over 95 years. They offer a range of accessories and upgrade possibilities, including digital cameras and illumination options.


