
1. Introduction
Thank you for choosing the SoBuy KLS03-SCH Telescopic Clothes Rack. This versatile and robust storage solution is designed to help you organize your garments efficiently. Please read this manual carefully before assembly and use to ensure proper installation and safe operation. Keep this manual for future reference.
2. Product Components
The SoBuy KLS03-SCH telescopic clothes rack includes the following main components:
- Telescopic vertical poles (adjustable height)
- Adjustable horizontal hanging rods
- Plastic connectors and fasteners
- Side hook organizer
- Additional hanging hooks (10 pieces)
- Assembly instructions

Figure 2.1: Product dimensions and adjustable ranges.
3. Setup and Assembly Instructions
This clothes rack is designed for easy, tool-free assembly. Follow these steps for installation:
- Unpack Components: Carefully remove all parts from the packaging and verify against the parts list in the included manual.
- Assemble Vertical Poles: Connect the sections of the vertical telescopic poles. Ensure all connections are secure.
- Position Vertical Poles: Place the assembled vertical poles between the floor and ceiling in your desired location. Adjust the height of each pole by extending the telescopic sections until they firmly press against both surfaces. The retractable base ensures stability without damaging your floor or ceiling.
- Install Horizontal Rods: Attach the horizontal hanging rods to the vertical poles using the plastic connectors. Adjust their height and width as needed. The rods can be extended from 75cm to 126cm.
- Attach Accessories: Install the side hook organizer and any additional hanging hooks to the desired positions on the vertical poles or horizontal rods.

Figure 3.1: Assembly diagram for connecting poles and rods.

Figure 3.2: Retractable pole base for secure, damage-free installation.

Figure 3.3: Easy installation without the need for drilling or wall damage.
Video 3.1: This video demonstrates the quick and easy assembly process of the telescopic clothes rack, showcasing how to install the vertical poles, horizontal rods, and accessories, as well as its adaptability for various room layouts.
4. Operating Instructions
The SoBuy KLS03-SCH offers flexible configuration to suit your needs.
4.1 Adjusting Height and Width
The clothes rack is fully adjustable in both height and width. To adjust, loosen the locking mechanisms on the vertical poles and horizontal rods, reposition them to your desired dimensions, and then securely tighten the locks. The height can be adjusted from 200 cm to 295 cm, and the width from 124 cm to 226 cm.

Figure 4.1: Adjustable height and width for customized storage.
4.2 Utilizing Hanging Rods and Hooks
The rack features multiple horizontal rods for hanging clothes and a side organizer with hooks for accessories like hats, scarves, ties, and bags. Additional hooks are provided for increased hanging capacity.

Figure 4.2: Details of hooks, adjustable features, and hanging rods.
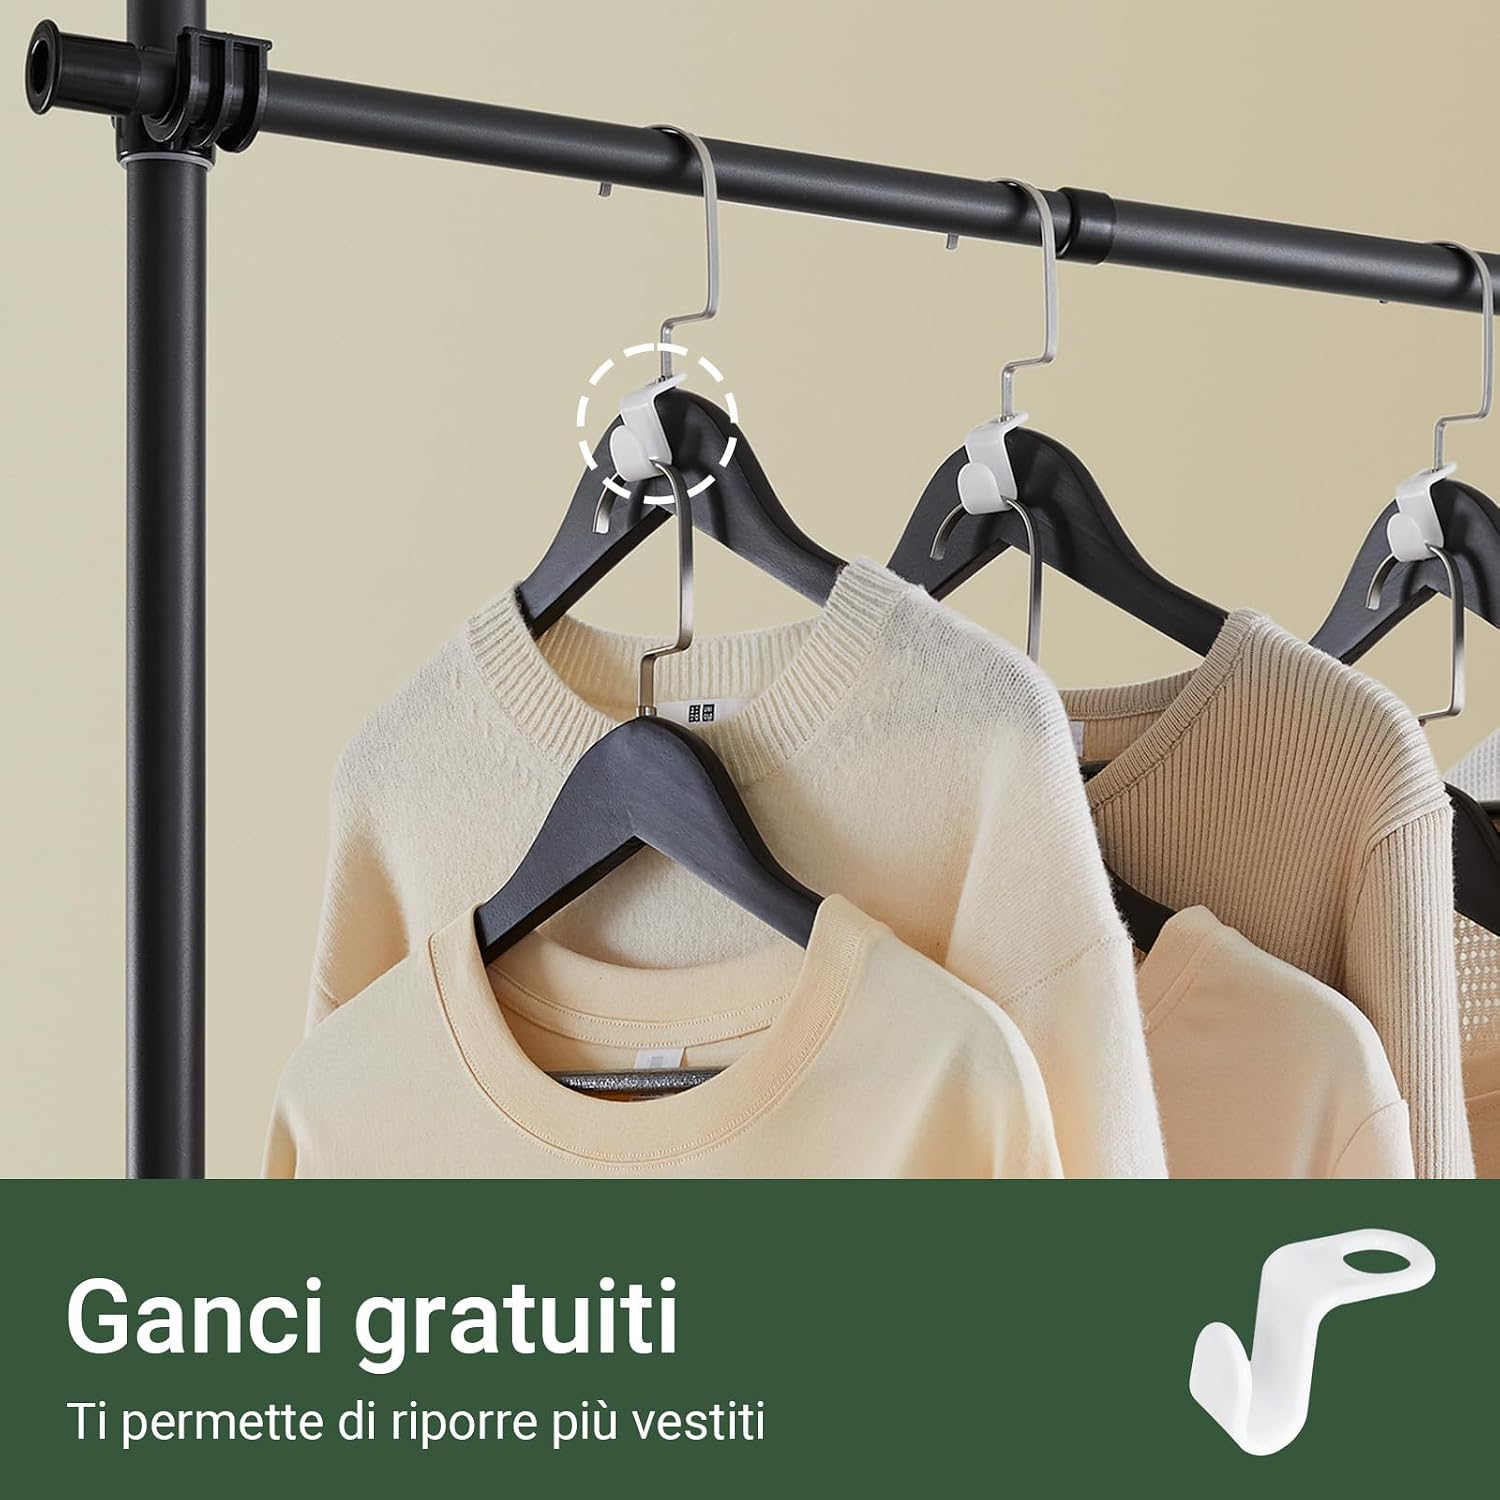
Figure 4.3: Use of additional hooks for maximizing hanging space.
4.3 Configuration Options
The modular design allows for various configurations, including a linear setup or an L-shaped corner setup, adapting to different room layouts and storage needs.

Figure 4.4: Linear and L-shaped configuration options.
5. Maintenance
To ensure the longevity and optimal performance of your SoBuy KLS03-SCH clothes rack, follow these maintenance guidelines:
- Cleaning: Wipe down metal and plastic surfaces with a soft, damp cloth. Avoid abrasive cleaners or harsh chemicals that could damage the finish.
- Stability Check: Periodically check all connections and locking mechanisms to ensure they are tight and secure. Re-tighten if necessary.
- Load Capacity: Do not exceed the maximum load capacity of 65 kg to prevent damage or instability. Distribute weight evenly across the rods.
6. Troubleshooting
If you encounter any issues with your clothes rack, refer to the following common solutions:
- Rack is Unstable:
- Ensure all telescopic poles are fully extended and firmly pressed against the ceiling and floor.
- Check that all locking mechanisms on the poles and rods are securely tightened.
- Verify that the weight on the rack does not exceed the maximum load capacity and is evenly distributed.
- Difficulty Adjusting Height/Width:
- Loosen the locking mechanisms completely before attempting to adjust.
- Ensure no clothes or items are obstructing the movement of the rods or poles.
7. Specifications
| Brand | SoBuy |
| Model Number | KLS03-SCH |
| Material | Iron (Poles), Plastic (Connectors/Frame) |
| Color | Black |
| Adjustable Height | 200 cm - 295 cm |
| Adjustable Width | 124 cm - 226 cm |
| Product Weight | 5.6 kg |
| Maximum Load Capacity | 65 kg |
| Assembly Required | Yes (Tool-free) |
8. Warranty and Support
SoBuy products are designed for quality and durability. For any questions, concerns, or assistance with your KLS03-SCH telescopic clothes rack, please contact SoBuy customer support. Refer to your purchase documentation for specific warranty details and contact information.