1. Introduction
The Panasonic HomeHawk Window Home Monitoring Camera (Model KX-HNC500W) is designed for outdoor monitoring from the interior of your home. This camera adheres to your inside window, providing a secure and discreet solution for surveillance. It offers 1080p Full HD recording, color night vision, and person detection technology, all without requiring monthly cloud fees.
2. Package Contents
- HomeHawk Window Camera (KX-HNC500W)
- Power Adapter (5V/1A)
- USB Cable (6 feet)
- Mounting accessories (suction cup or double-sided tape)
- Note: A local microSDXC card is required for recording and is sold separately.
3. Safety Information
Please read and understand all safety instructions before using this product. Failure to follow these instructions may result in electric shock, fire, or other hazards.
- Ensure the camera is installed indoors, adhering to an interior window.
- Use only the provided power adapter.
- Do not expose the camera to water or excessive moisture.
- Avoid placing the camera in direct sunlight for extended periods, as this may affect performance.
- Keep the camera away from heat sources.
4. Setup Guide
4.1. Physical Installation
The HomeHawk Window camera is designed for easy indoor mounting. It can be attached to your interior window using either a powerful suction cup or double-sided tape, eliminating the need for drilling.
- Clean the interior window surface thoroughly to ensure proper adhesion.
- Attach the chosen mounting accessory (suction cup or tape) to the back of the camera.
- Press the camera firmly against the desired interior window location. Ensure a secure fit.
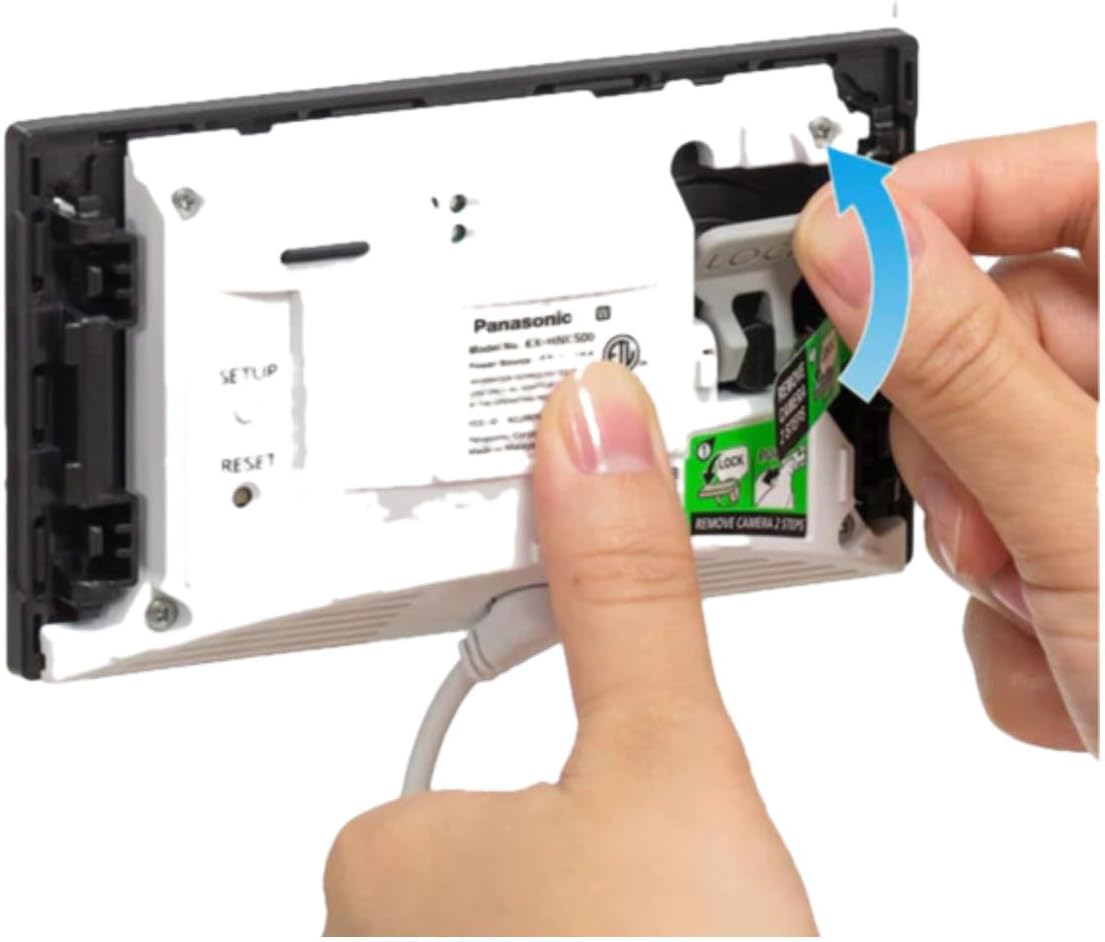
Image: Rear view of the HomeHawk camera, illustrating the location of setup and reset buttons, and the mounting area.

Image: The Panasonic HomeHawk Window Camera, showing its compact design and the components for window mounting.
4.2. Power Connection
The camera operates on continuous power from a standard interior wall outlet.
- Connect the USB cable to the camera's power input port.
- Plug the power adapter into a standard 120V AC, 60 Hz wall outlet.
- Ensure the connection is secure. The camera will power on automatically.

Image: A standard power plug, representing the camera's corded electric power source.
4.3. App Installation and Initial Setup
To control and monitor your camera, download the dedicated HomeHawk app on your mobile device.
- Download the 'HomeHawk' app from the App Store (for iOS) or Google Play Store (for Android).
- Open the app and follow the on-screen instructions to create an account or log in.
- Select 'Add Camera' and follow the in-app guide to connect your KX-HNC500W to your home Wi-Fi network. Ensure your mobile device is near the camera and your Wi-Fi router during this process.
- Once connected, you can customize settings such as detection areas and alert preferences.

Image: Screenshot of the HomeHawk mobile application interface, indicating availability on App Store and Google Play.
5. Operating Instructions
5.1. Live View and Recording
Access the live feed from your camera anytime, anywhere via the HomeHawk mobile app. The camera provides 24/7 Full HD (1080p) recording.
- Open the HomeHawk app on your smartphone or tablet.
- Select your camera from the device list to view the live stream.
- Recordings are automatically saved to the microSDXC card when motion or a person is detected.
5.2. Person Detection and Custom Areas
The camera features Person Detection Technology to minimize unnecessary alerts and recordings.
- The camera distinguishes between human figures and other motion sources like vehicles or trees.
- Within the app, you can define specific detection areas to focus monitoring on critical zones and ignore irrelevant activity.

Image: A screenshot from the HomeHawk app displaying a 'Person Detected' notification within the camera's view.
5.3. Color Night Vision
The HomeHawk camera provides bright color night vision, ensuring clear visibility even in low-light conditions.
- The camera automatically adjusts to low light, providing a full-color image rather than monochrome.
- This feature enhances detail and identification during nighttime monitoring.
5.4. Local Storage (MicroSD Card)
The camera supports local storage via a microSDXC card (sold separately), eliminating the need for cloud subscriptions.
- Insert a compatible microSDXC card into the camera's slot.
- Recordings are saved directly to the card, providing a secure and private storage solution.
- The camera saves 2 seconds of pre-recording after any alert, ensuring you capture the full event.
6. Maintenance
Regular maintenance ensures optimal performance and longevity of your HomeHawk camera.
- Cleaning: Gently wipe the camera lens and body with a soft, dry cloth. Avoid abrasive cleaners or solvents. Regularly clean the interior window surface where the camera is mounted to maintain clear visibility.
- Fan Operation: The unit includes a fan that may activate to cool the camera if it reaches a certain temperature. This is normal operation.
- Firmware Updates: Periodically check the HomeHawk app for available firmware updates to ensure your camera has the latest features and security enhancements.
7. Troubleshooting
If you encounter issues with your HomeHawk camera, refer to the following common solutions:
| Issue | Possible Solution |
|---|---|
| Camera not connecting to Wi-Fi | Ensure your Wi-Fi network is 2.4GHz. Check Wi-Fi signal strength. Restart your router and the camera. Re-attempt setup via the HomeHawk app. |
| No recordings or alerts | Verify a microSDXC card is properly inserted. Check app settings for motion detection and alert preferences. Ensure detection areas are correctly configured. |
| Poor video quality or flickering | Ensure the camera lens and window surface are clean. Check your internet connection speed. Unplug and replug the camera, or close and reopen the app. |
| App not available in my region | The HomeHawk app's availability may vary by region. Please check your local app store for confirmation. |
| Camera is warm to the touch | This is normal. The internal fan will activate to cool the unit if necessary. Ensure adequate ventilation around the camera. |
For additional troubleshooting information, please refer to the Troubleshooting Guide in the product guides and documents section on the Panasonic support website.
8. Specifications
| Feature | Detail |
|---|---|
| Model Number | KX-HNC500W |
| Video Capture Resolution | 1080p (Full HD) |
| Viewing Angle | 150 Degrees |
| Connectivity Technology | Wired, Wi-Fi |
| Power Source | Corded Electric (120 V AC, 60 Hz) |
| Wattage | 6 watts |
| Controller Type | Amazon Alexa, Google Assistant |
| Special Features | Night Vision (Color), Motion Sensor, HD Resolution, Person Detection |
| Mounting Type | Self Adhesive (Window Mount) |
| Item Dimensions (L x W x H) | 5.1 x 2.9 x 1.3 inches |
| Item Weight | 13.8 ounces |
| Recommended Uses | Outdoor Security |
9. Warranty Information
The Panasonic HomeHawk Window Home Monitoring Camera (KX-HNC500W) comes with a 1-year manufacturer's warranty. Please retain your proof of purchase for warranty claims. For detailed terms and conditions, refer to the warranty documentation included with your product or visit the official Panasonic support website.
10. Support
For further assistance, technical support, or to access additional resources such as FAQs and software updates, please visit the official Panasonic support website or contact Panasonic customer service. Contact information can typically be found on the Panasonic website or in the product packaging.


