1. Introduction
This manual provides detailed instructions for the installation, operation, and maintenance of the 10L0L 30 Amp Dual Link Fuse Kit. This fuse kit is designed as a replacement part for various 36V and 48V golf cart Lester Power Drive Chargers, ensuring proper electrical protection for your golf cart's charging system.
2. Product Features
- High Compatibility: Designed to fit a wide range of 36V/48V golf cart Lester Power Drive Chargers.
- Durable Construction: Manufactured with robust materials for reliable performance and longevity.
- Essential Protection: Provides critical overcurrent protection for your charger, preventing damage from electrical surges.
- Easy Installation: Engineered for straightforward replacement, minimizing installation time.
3. Compatibility
The 10L0L 30 Amp Dual Link Fuse Kit is compatible with the following golf cart charger models and OEM part numbers:
- Lester Charger Models: 17910, 16500, 14100, 14390, 13165, 13110, 9800, 9700, 9695, 9611, 9032, 9028, 9027, 8946, 7850, 7710, 6730, 6720, & 6430.
- Replaces OEM Numbers:
- 48V Club Car Powerdrive Charger (OEM# 1012101)
- 36V Columbia/Harley-Davidson Lester Charger (OEM# 66515-76)
- 36V EZGO Lester Charger (OEM# 31567-G1, 603207)
- Other cross-reference numbers: 08776S NO, 31567G1 EZ, 5-060 FP, 66515-76 CO, 66515-76 IMC, 72204 NR, 73844 NR, 7422 PA, 769-62 KA, 79-831-00 TD, 883844 CU, 883845 CU, 9866 LE, CGR-3428 EC, CP1012101 CP, FUS CC0 3428 BU, LV12101 LV, LVN3428 LV, SP603207 FP.
4. Package Contents
The 10L0L 30 Amp Dual Link Fuse Kit typically includes the following components:
- 1 x Dual Link Fuse Block
- 1 x Metal Mounting Bracket
- 1 x Clear Protective Cover
- Mounting Screws and Nuts (quantity may vary)
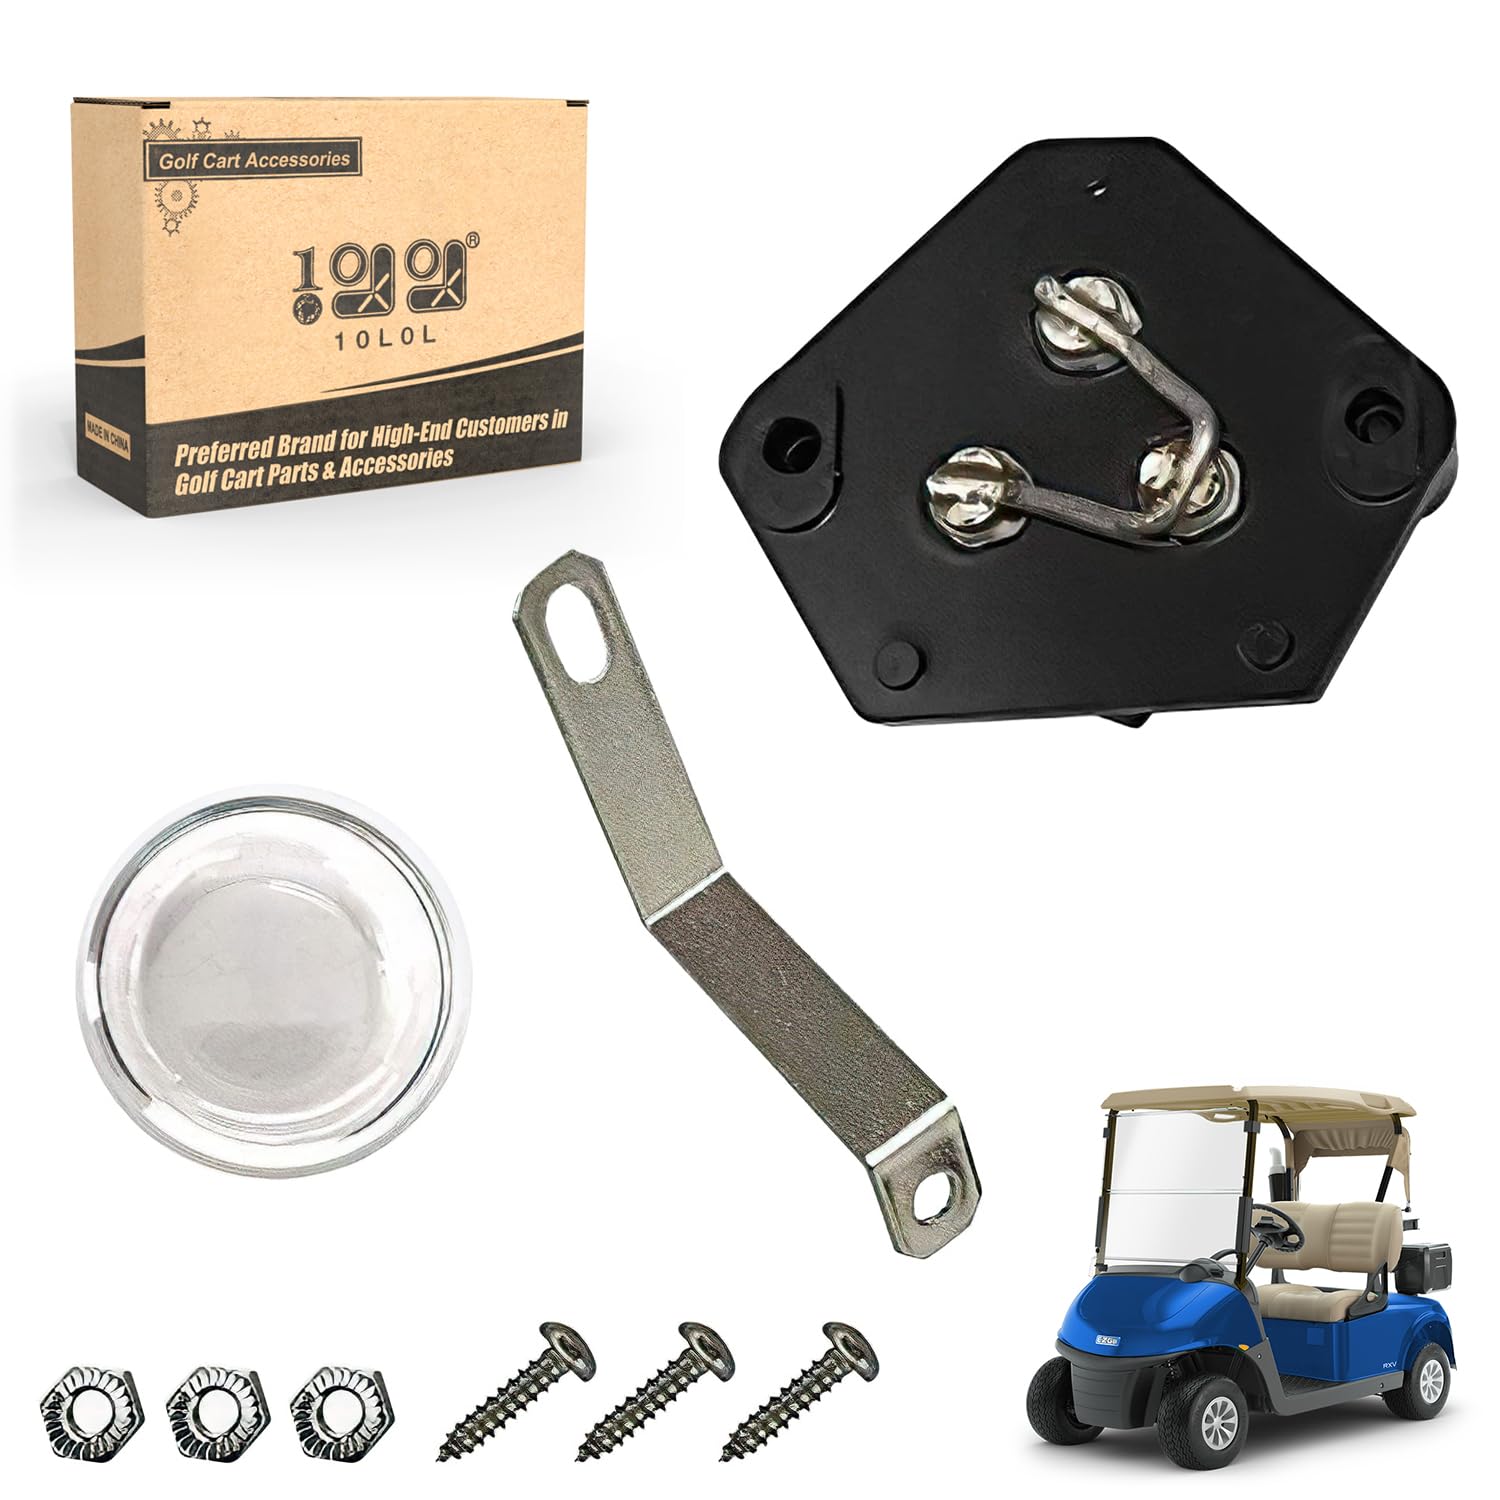
Figure 4.1: Complete 10L0L 30 Amp Dual Link Fuse Kit with packaging and golf cart illustration.

Figure 4.2: Detailed view of the fuse kit components.
5. Installation Guide
Safety First: Before beginning any installation, ensure the golf cart charger is disconnected from all power sources and the golf cart's battery is disconnected to prevent electrical shock or damage.
- Locate the Existing Fuse: Identify the current fuse block within your golf cart's Lester Power Drive Charger. Refer to your charger's specific service manual for exact location if needed.
- Disconnect Wiring: Carefully disconnect the wires attached to the old fuse block. Note the orientation and connection points for reinstallation.
- Remove Old Fuse: Unscrew or unmount the old fuse block from its position.
- Install New Fuse: Position the new 10L0L Dual Link Fuse Kit in the same location. Secure it using the provided mounting screws and nuts.
- Connect Wiring: Reconnect the wires to the new fuse block, ensuring they are securely fastened to the correct terminals. The dual link design requires specific connections; ensure proper polarity and connection as per the original setup.
- Attach Protective Cover: Place the clear protective cover over the fuse block to shield the connections from environmental elements and accidental contact.
- Reconnect Power: Once the fuse kit is securely installed and all connections are verified, reconnect the golf cart battery and the charger to its power source.
- Test Functionality: Verify that the charger operates correctly and charges the golf cart battery as expected.

Figure 5.1: Diagram showing fuse placement within a charger.

Figure 5.2: Rear view of the fuse block showing connections.

Figure 5.3: Dimensions of the fuse kit components.
6. Operation
The 10L0L 30 Amp Dual Link Fuse Kit functions as a critical safety component within your golf cart's Lester Power Drive Charger. Its primary role is to protect the charger and the golf cart's electrical system from excessive current flow. In the event of an electrical overload or short circuit, the fuse's internal links are designed to melt and break the circuit, preventing damage to more expensive components. Once the fuse blows, it must be replaced with an identical 30 Amp dual link fuse kit to restore charger functionality.
7. Maintenance and Care
The 10L0L 30 Amp Dual Link Fuse Kit requires minimal maintenance. However, periodic inspection is recommended:
- Visual Inspection: Periodically check the fuse block and its connections for any signs of corrosion, loose wiring, or physical damage. Ensure the clear protective cover is securely in place.
- Cleanliness: Keep the area around the fuse block clean and free from dirt, debris, or moisture, which can affect electrical conductivity.
- Replacement: If the fuse blows (indicated by a lack of charger function and often a visible break in the fuse links), replace it immediately with a new 10L0L 30 Amp Dual Link Fuse Kit. Do not attempt to repair a blown fuse.
8. Troubleshooting
If your golf cart charger is not functioning after installing the fuse kit, consider the following:
| Problem | Possible Cause | Solution |
|---|---|---|
| Charger not turning on / No power | Blown fuse | Inspect the fuse. If the internal links are broken, replace the fuse kit. Investigate the cause of the overload. |
| Fuse blows immediately after replacement | Short circuit or severe overload in the charger or golf cart's electrical system | Do not replace the fuse again until the underlying electrical issue is identified and resolved. Consult a qualified technician. |
| Loose connections | Wiring not securely fastened to the fuse terminals | Ensure all wires are tightly connected to the fuse block terminals. |
| Incorrect fuse type | Using a fuse with an incorrect amperage rating or design | Ensure you are using the correct 30 Amp Dual Link Fuse Kit as specified for your charger. |
9. Specifications
- Brand: 10L0L
- Item Model Number: 1012101
- AC Adapter Current: 30 Amps
- Voltage Compatibility: 36 Volts (also compatible with 48V systems where specified)
- Mounting Type: Chassis Mount
- Package Dimensions: Approximately 4.2 x 2.3 x 1.2 inches
- Item Weight: Approximately 2.4 ounces
- First Available: March 3, 2020
10. Warranty and Support
For information regarding product warranty, returns, or technical support, please refer to the seller's policy on the platform where the product was purchased or contact 10L0L customer service directly through their official channels. Keep your purchase receipt as proof of purchase for any warranty claims.


