Introduction
This manual provides detailed instructions for the setup, operation, maintenance, and troubleshooting of your La Crosse Technology BBB86088 Atomic Digital Wall Clock. This clock features self-setting atomic time, automatic Daylight Saving Time resets, and displays both indoor and outdoor temperatures with trending indicators.
Product Features
- Atomic time and date (manual set option) with Automatic updates for Daylight Saving Time (ON/OFF option).
- Calendar: Month/Date with Full Weekday view.
- 7 Time zones: AST, EST, CST, MST, PST, AKT, HAT and 12/24 Hour display option with 10 minute snooze time alarm.
- Indoor/outdoor temperature (°F/°C) with trend indicators and sensor signal strength icon.
- Battery operation: Clock requires 2 AA alkaline; Sensor requires 2 AA (batteries not included); 2 year battery life.
Package Contents
- 1 x Atomic Digital Wall Clock (Model: BBB86088)
- 1 x Wireless Outdoor Temperature Sensor (TX141THv3)
- 1 x Quick Setup Guide
Note: 4 AA batteries (2 for clock, 2 for sensor) are required and not included.
Setup
Battery Installation
- Install 2 AA batteries into your Outdoor Sensor.
- Install 2 AA batteries into your Atomic Clock.
For best performance, use fresh brand-name alkaline batteries with an expiration date no more than 6 years in advance of the current year, or registering at least 1.48 volts per battery. Lithium batteries may be used in the outdoor sensor.
Initial Setup
- After installing batteries, let the sensor and clock sit within 10 feet of each other for several minutes to allow the sensor signals to lock to the display.
- The clock will search for the Atomic Time Signal at power up and at UTC 7:00, 8:00, 9:00, 10:00, and 11:00. The Atomic Time Signal icon will flash while searching and be solid when it has connected.
- Enter the Settings Menu to adjust your time and date manually if needed.
Outdoor Sensor Placement
Proper placement of the outdoor sensor is crucial for accurate temperature readings:
- Place your temperature sensor at least 6 feet off the ground.
- For accurate temperature readings, your sensor needs to be shaded from the sun in a well-vented area.
- Mount your sensor vertically to allow moisture to drain out the bottom.
- Preferred location is on a north-facing wall under an eave or deck rail.
- Avoid placing near a metal roof that will cause it to read high on sunny days.
- Avoid other sources of heat such as soffit vents, and window or door frames.
- For accurate humidity readings, avoid placement near vegetation and lakes or other bodies of water when possible.
- Maximum transmission distance from your thermo-hygro sensor to your clock, in open air, is 300 feet (91 meters).
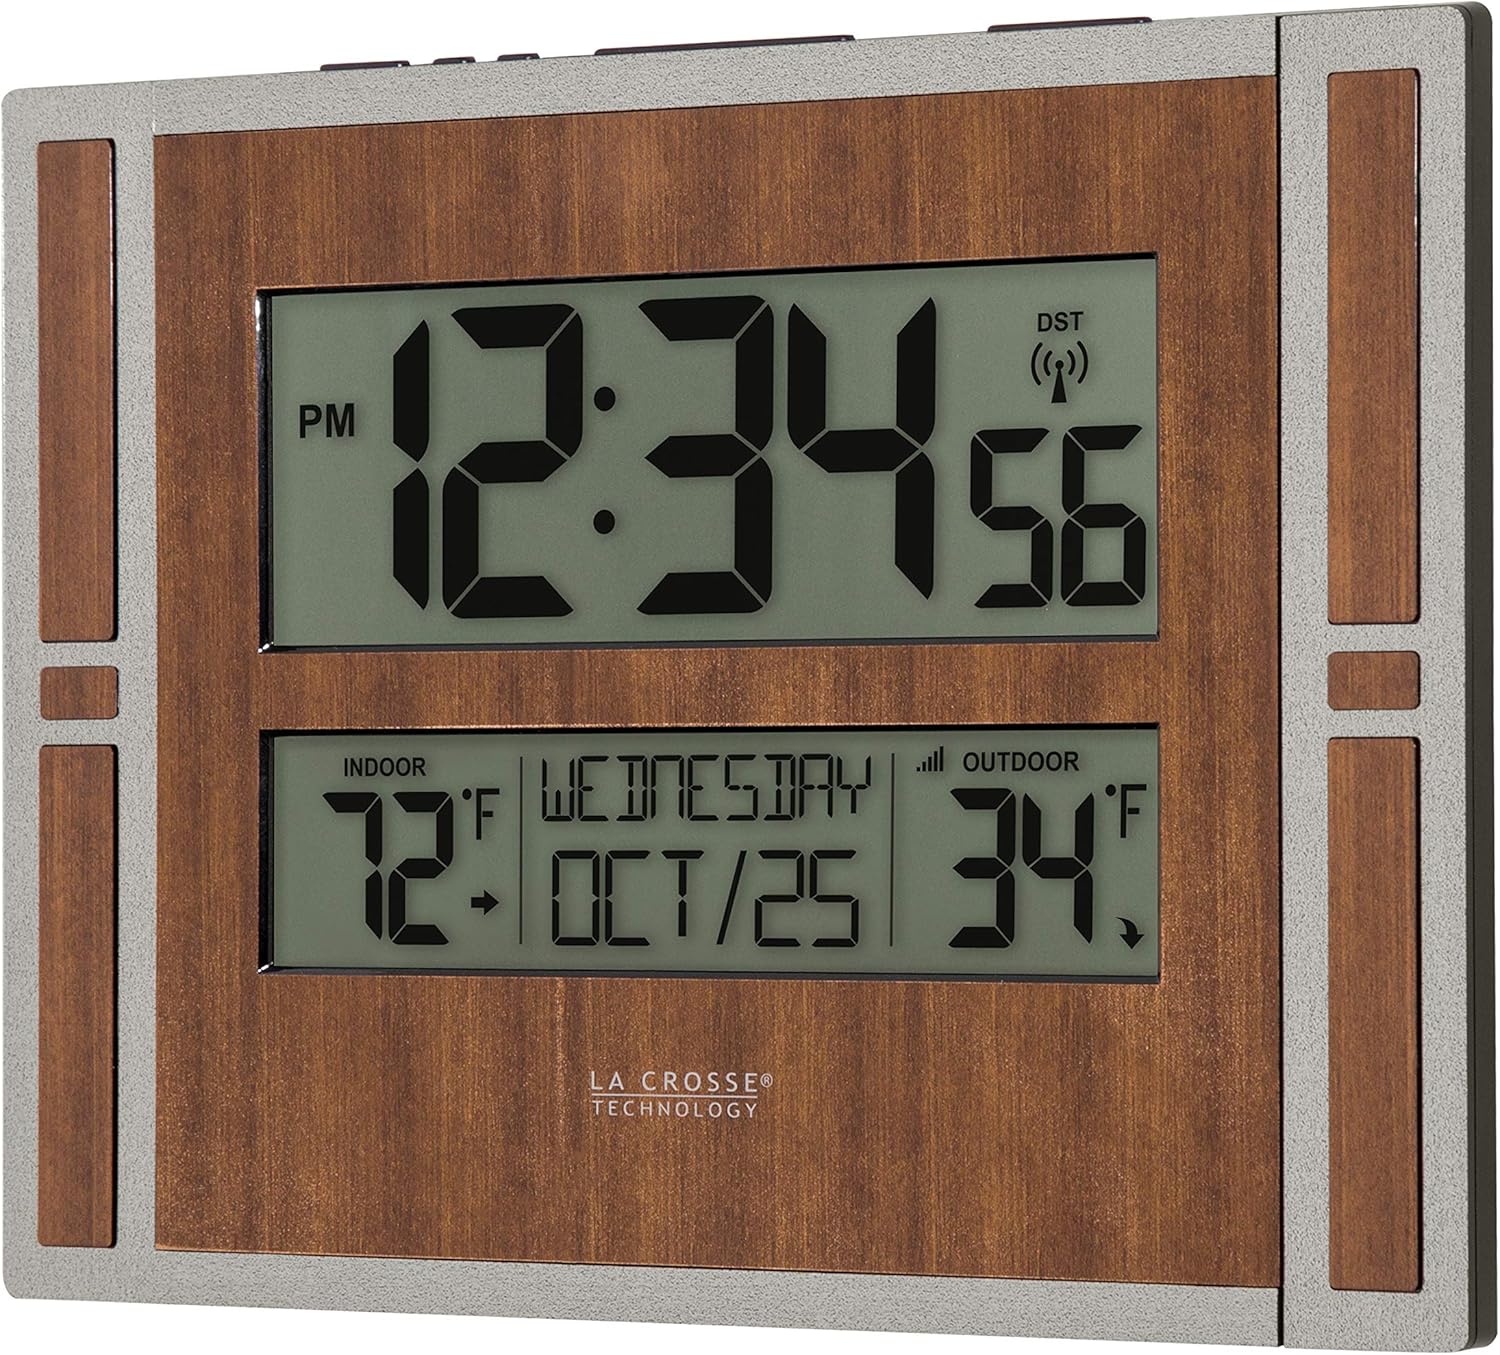
Image: La Crosse Technology Atomic Digital Wall Clock with its remote outdoor temperature sensor.

Image: A close-up view of the wireless outdoor temperature sensor mounted vertically on a wooden post.
Video: A demonstration of the battery-powered atomic wall clock, highlighting its features and ease of setup.
Operating Instructions
Settings Menu
To access the settings menu:
- Hold the SET button until the display changes to enter the Settings Menu.
- Press and release the + or - buttons to adjust values. Hold to adjust quickly.
- Press and release the SET button to confirm values and move to the next setting or exit the menu.
Settings Menu Order:
- Atomic Time ON/OFF
- Time Zone (AST, EST, CST, MST, PST, AKT, HAT)
- Daylight Saving Time ON/OFF
- 12/24 Hour Time Format
- Hour
- Minutes
- Year
- Month
- Date
Notes:
- Atomic Time: If Atomic OFF is selected, the menu will skip the DST and Time Zone settings and move straight to the 12/24-Hour Time Format setting.
- Daylight Saving Time: If you live in an area that follows DST, keep this setting ON. If your area does not follow DST, turn this setting OFF.
- Weekday: Your weekday display will adjust automatically once you have your Year, Month, and Date settings set correctly.
Time Alarm
To set the alarm:
- Hold the ALARM button until the letters "AL" show in the weekday area.
- Press and release the + or - button to adjust the values. Hold to adjust quickly.
- Press and release the ALARM button to confirm and move to the next item or exit.
Activate/Deactivate Alarm:
- Press and release the ALARM button to view the Alarm Time. Press and release again to activate or deactivate the alarm.
- The Alarm icon will show when alarm is active.
Snooze: When the alarm is active, press the SNOOZE button to silence the alarm for 10 minutes. "Zz" will show.
Note: The alarm will sound with increasing frequency for two minutes, then shut off automatically if not silenced.
Temperature Display (°F/°C)
Press and release the SET button to switch between Fahrenheit or Celsius Temperature Display. Your clock will stay on the selection.
Forecast Icons and Trend Arrows
The forecast icons use the clock's internal barometer to predict conditions to come within the next 12 hours. Allow 7-10 days for station calibration for most accurate forecasts.
Forecast Trend Arrows indicate the rising and falling of atmospheric pressure in your area over the past 3 hours:
- ↑ Pressure has risen over the past 3 hours.
- → Pressure has been steady over the past 3 hours.
- ↓ Pressure has fallen over the past 3 hours.
Maintenance
Battery Care
- Always purchase the correct size and grade of battery most suitable for the intended use.
- Always replace the whole set of batteries at one time, taking care not to mix old and new ones, or batteries of different types.
- Clean the battery contacts and also those of the device prior to battery installation.
- Ensure the batteries are installed correctly with regard to polarity (+ and -).
- Remove batteries from product during periods of non-use. Battery leakage can cause corrosion and damage to this product.
- Remove used batteries promptly.
Cleaning and Storage
- Clean the clock and sensor with a soft, damp cloth. Avoid abrasive cleaners.
- Store the device in a cool, dry place when not in use for extended periods.
Troubleshooting
Low Battery Indicator
- Low Battery Icon by Outdoor Temperature: Replace batteries in the Outdoor Sensor.
- Low Battery Icon by Indoor Temperature: Replace batteries in the Clock.
Search for Outdoor Sensor (Dashes for Outdoor Temperature)
If you are seeing dashes for your outdoor readings, try the following steps:
- Hold the PLUS button to search for your outdoor sensor. The Reception Indicator will begin to animate.
- If after 3 minutes the sensor still isn't connected, bring the sensor inside next to the display and remove power from both the sensor and clock.
- Press any button on the clock 20 times and leave the parts sit for a few moments with the power off.
- Install a new set of alkaline batteries into the sensor, then into your clock.
- If your outdoor data is still not appearing after these steps, please contact our support staff via the links below.
Clock Keeps Losing Transmission with Sensor
Consider the following factors:
- Distance: The maximum transmitting range in open air is over 330 feet (100 meters) between your sensor and your clock. Consider the signal path from your clock to your sensor as a straight line.
- Resistance: Each obstacle (walls, windows, vegetation, stucco, concrete, and large metal objects) will reduce the effective signal range by about one-half. Mounting your sensor on a metal fence can significantly reduce the effective signal range.
- Interference: Consider electronics in the signal path between the sensor and your clock. Simple relocation of the sensor or your clock may correct an interference issue. Windows can reflect the radio signal. Metal will absorb the RF (radio frequency) signal. Stucco held to the wall by a metal mesh will cause interference. Transmitting antennas from ham radios, emergency dispatch centers, airports, military bases, etc., may cause interference. Electrical wires, utilities, cables, etc., may create interference if too close.
Factory Reset
- Remove batteries from clock and sensor. Place both units within several feet of each other without anything in-between to avoid interference.
- PRESS ANY BUTTON 20 times on clock (without any batteries) to discharge residual electricity.
- Wait 15 minutes before installing fresh, brand-name alkaline batteries.
Specifications
| Feature | Detail |
|---|---|
| Model Number | BBB86088 |
| Brand | La Crosse Technology |
| Display Type | Digital |
| Power Source | Battery Powered (4 AA batteries required, not included) |
| Atomic Clock Temperature Range | 32°F to 122°F (0°C to 50°C) |
| Outdoor Sensor Temperature Range | -40°F to 140°F (-40°C to 60°C) |
| Outdoor Sensor Transmission Range | Over 330 feet (100 meters) RF 433MHz in open air |
| Update Interval | About every 51 seconds |
| Battery Life | Over 12 months |
| Product Dimensions | 11.00"L x 1.10"W x 8.54"H (27.9 cm L x 2.8 cm W x 21.7 cm H) |
| Material | Plastic |
| Mounting Type | Wall Mount |
| Item Weight | 1.2 Pounds |
Warranty and Support
La Crosse Technology, Ltd. provides a 1-year limited time warranty (from date of purchase) on this product relating to manufacturing defects in materials & workmanship. For full warranty details, visit: www.lacrossetechnology.com/pages/warranty
For additional help and support, you can use the following resources:
- Self-Help: bit.ly/512-1422gry_support
- Online Support: bit.ly/contact_techsupport
- Phone: 608-782-1610 (Available Mon-Fri, 9am-6pm CST)
Follow La Crosse Technology on YouTube, Twitter, Facebook, and Instagram for setup videos and product feedback.
FCC Statement
This equipment has been tested and found to comply with the limits for a Class B digital device, pursuant to part 15 of the FCC Rules. These limits are designed to provide reasonable protection against harmful interference in a residential installation. This equipment generates, uses and can radiate radio frequency energy and, if not installed and used in accordance with the instructions, may cause harmful interference to radio communications. However, there is no guarantee that interference will not occur in a particular installation. If this equipment does cause harmful interference to radio or television reception, which can be determined by turning the equipment off and on, the user is encouraged to try to correct the interference by one or more of the following measures:
- Reorient or relocate the receiving antenna.
- Increase the separation between the equipment and receiver.
- Connect the equipment into an outlet on a circuit different from that to which the receiver is connected.
- Consult the dealer or an experienced radio/TV technician for help.
This device complies with Part 15 of the FCC Rules. Operation is subject to the following two conditions: (1) This device may not cause harmful interference, and (2) This device must accept any interference received, including interference that may cause undesired operation.
Caution:
Any changes or modifications not expressly approved by the party responsible for compliance could void the user's authority to operate the equipment.
California Residents Warning
This product can expose you to chemicals including acrylonitrile, butadiene, and styrene, which are known to the State of California to cause cancer and birth defects or other reproductive harm. For more information, go to: www.P65Warnings.ca.gov


