
1. Introduction
The Gentex Electrochromic Rearview Mirror is designed to enhance driving safety and convenience by automatically dimming to eliminate dangerous glare from rear-approaching headlights. This sophisticated accessory also features an accurate self-calibrating compass and an exterior temperature display with an ICE indicator to warn when outside temperature is at or below 37 degrees Fahrenheit.
1.1 Safety Information
- Read all instructions carefully before installation and operation.
- Installation should be performed by a qualified professional to ensure proper function and safety.
- Do not obstruct the mirror's sensors, as this may impair its auto-dimming function.
- Ensure all wiring is properly secured and routed to prevent interference with vehicle controls or airbags.
- Do not attempt to disassemble or modify the mirror. Refer all servicing to authorized personnel.
2. Package Contents
Verify that all components are present in the package:
- Mirror
- Harness
- Warranty Card
- Installation Manual
- Label
- Box
- Drive Card
3. Setup and Installation
This section provides general guidelines for the installation of your Gentex Electrochromic Rearview Mirror. For detailed, vehicle-specific instructions, always refer to the included installation manual and consult a professional installer.
3.1 Mounting the Mirror
The mirror is designed for windshield mount installation. Ensure the mounting surface is clean and free from obstructions. Secure the mirror firmly to the existing windshield mount or follow instructions for installing a new mount if required.
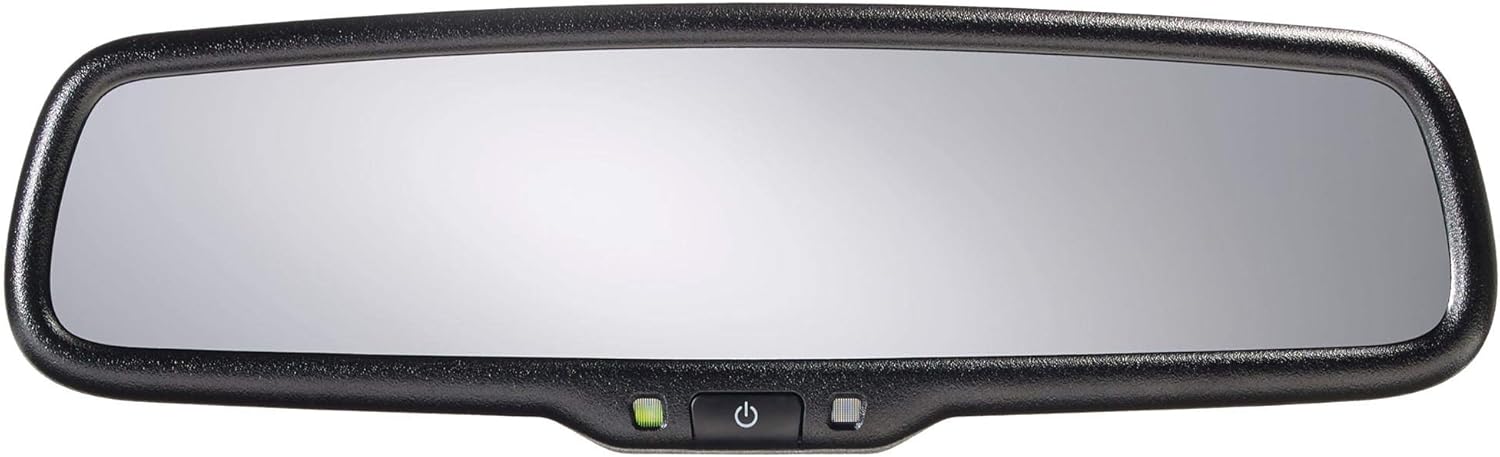
Figure 3.1: Overview of the Gentex Electrochromic Rearview Mirror, showing its rectangular shape and integrated controls at the bottom center.
3.2 Electrical Connection
Connect the provided wiring harness to the vehicle's electrical system according to the installation manual. This typically involves connecting to ignition power, ground, and reverse light circuits. Proper wiring is crucial for the auto-dimming and display functions.

Figure 3.2: Close-up view of the control buttons located on the bottom of the mirror. These include a power button, a green indicator light, and other control buttons for various functions.
4. Operating Instructions
4.1 Auto-Dimming Feature
The mirror automatically detects glare from headlights behind your vehicle using integrated sensors. When glare is detected, the mirror's electrochromic surface will darken to reduce the intensity of the light. This feature activates automatically when the vehicle is running and the mirror is powered on. The green indicator light (visible in Figure 3.2) typically indicates that the auto-dimming function is active.
To manually disable or enable the auto-dimming function, press the power button (often marked with a circle and vertical line, as seen in Figure 3.2) located on the bottom of the mirror. When disabled, the green indicator light may turn off or change color.
4.2 Compass Display
The mirror includes a self-calibrating compass that displays your current heading (e.g., N, NE, E). The compass will typically calibrate automatically as you drive. If calibration is needed, drive in a circle at a slow speed in an open area until the compass display stabilizes and shows accurate readings.
4.3 Temperature Display
The mirror displays the exterior temperature. An ICE indicator will activate when the outside temperature is at or below 37 degrees Fahrenheit (approximately 3 degrees Celsius) to alert the driver to potential icy road conditions.
5. Maintenance
Proper care will ensure the longevity and optimal performance of your rearview mirror.
- Cleaning the Mirror Surface: Use a soft, lint-free cloth and a non-abrasive glass cleaner. Spray the cleaner onto the cloth, not directly onto the mirror, to avoid liquid seeping into the electronics.
- Cleaning Sensors: Ensure the front and rear light sensors (small circles on the mirror surface and back) are kept clean and free from obstructions (e.g., stickers, dirt, or debris) to ensure proper auto-dimming function.
- Avoid Harsh Chemicals: Do not use ammonia-based cleaners, abrasive cleaners, or solvents, as these can damage the mirror's surface or electronic components.
6. Troubleshooting
This section addresses common issues you might encounter with your mirror.
| Problem | Possible Cause | Solution |
|---|---|---|
| Mirror does not dim. | Auto-dimming feature is turned off. Sensors are obstructed. Insufficient light for dimming to activate. Power issue. | Press the power button to enable auto-dimming. Clean the front and rear sensors. Test in low light conditions with bright lights behind. Check wiring harness connection and vehicle's fuse box. |
| Compass displays inaccurate readings. | Needs calibration. Magnetic interference. | Drive in a slow circle in an open area for calibration. Ensure no strong magnetic sources (e.g., speakers, metal objects) are near the mirror. |
| Temperature display is incorrect or not showing. | Temperature sensor issue or not connected. | Verify the external temperature sensor is properly installed and connected. Consult the installation manual. |
| No power to the mirror. | Loose wiring connection. Blown fuse. | Check all harness connections. Inspect and replace any blown fuses in the vehicle's fuse box related to the mirror's power supply. |
7. Specifications
| Feature | Detail |
|---|---|
| Model Number | 50-GENK7PW |
| Brand | Advent |
| Auto Part Position | Inside Center |
| Mounting Type | Windshield Mount |
| Special Features | Auto-dimming, Temperature Sensor, Compass |
| Item Weight | 2 Pounds (approx. 0.91 kg) |
| Shape | Rectangular |
| Lens Curvature | Convex |
| UPC | 841992144651 |
8. Warranty and Support
This product comes with a warranty. Please refer to the included Warranty Card in your package for detailed information regarding warranty coverage, terms, and conditions. The warranty typically covers manufacturing defects for a specified period from the date of purchase.
For technical support, troubleshooting assistance beyond this manual, or warranty claims, please contact the manufacturer or your authorized dealer. Keep your purchase receipt and warranty card readily available when seeking support.
Note: Specific contact information for support is typically provided on the warranty card or manufacturer's official website.
