
1. Important Safety Information
Read and understand all instructions and warnings before operating this winch. Failure to follow these instructions may result in serious injury or property damage. Keep this manual for future reference.
- Never exceed the rated line pull of 3500 lbs (1590 kgs).
- Always wear protective gear including gloves and eye protection when operating the winch.
- Keep hands and clothing clear of the wire rope, hook, and fairlead during operation.
- Do not use the winch for hoisting or moving people.
- Ensure the vehicle's engine is running during winching operations to maintain battery charge.
- Inspect the wire rope and all components for damage before each use. Replace worn or damaged parts immediately.
- Maintain a minimum of 5 wraps of wire rope on the drum at all times.
- Avoid continuous operation under heavy loads to prevent motor overheating. Allow the motor to cool down between pulls.
- Disconnect the winch from the power source when not in use or during maintenance.
2. Package Contents
Verify that all items are present before beginning installation.
- 1 x 3500 lbs Electric Winch
- 1 x Aluminum Fairlead
- 1 x Wireless Remote Control
- 1 x Switch Assembly (Wired Remote)
- 1 x Control Box
- 1 x Set of Negative/Positive Wires
- 1 x Hook with Safety Latch
- Mounting Hardware (Bolts, Nuts, Washers)
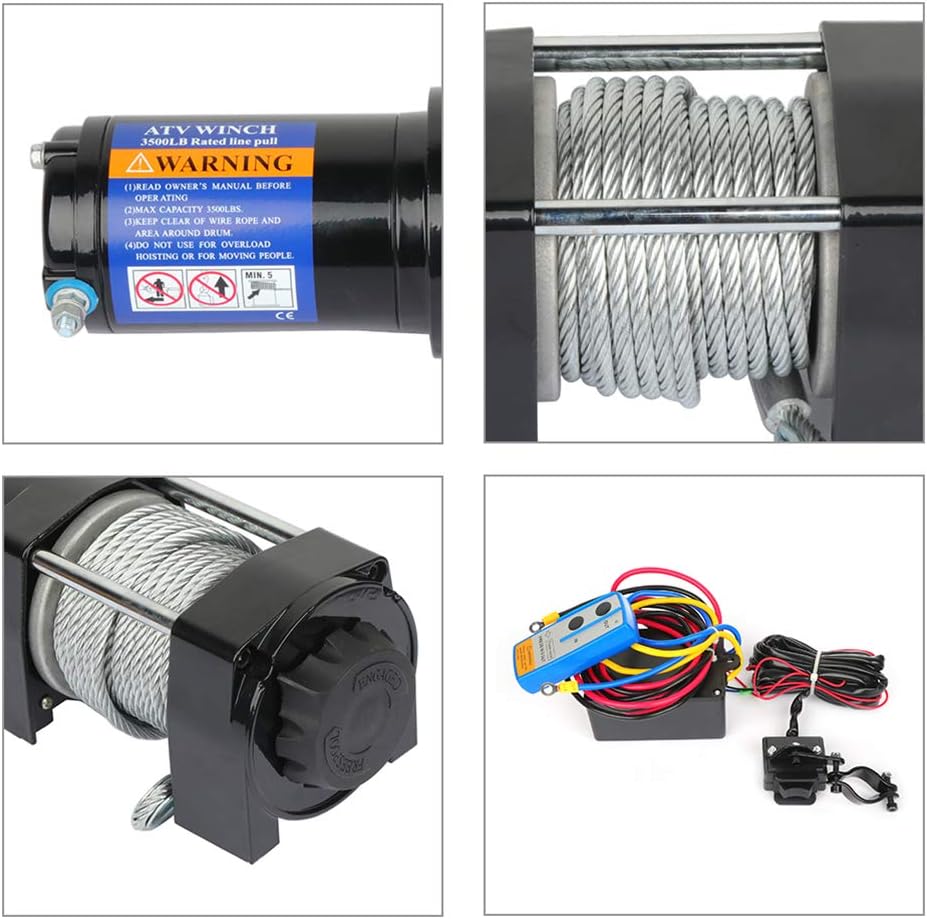
Image 2.1: Main winch unit showing the motor, wire rope, and clutch mechanism.

Image 2.2: Included wiring harness, control box, and both wireless and wired remote controls.
3. Specifications
| Feature | Specification |
|---|---|
| Rated Line Pull | 3500 lbs (1590 kgs) single-line |
| Motor | 1.3 HP 12V DC Permanent Magnet |
| Gear Ratio | 153:1 |
| Braking Action | Automatic |
| Wire Rope | 5.5mm x 15m (7/32" x 30') |
| Dimensions (L x W x H) | 320mm x 105mm x 105mm (12.6" x 4.13" x 4.13") |
| Drum Diameter | 31.75mm (1.25") |
| Bolt Pattern | 130mm x 80mm (5.12" x 3.15") |
| Remote Control | Wireless and Wired included |
| Weight | Approx. 21.1 lbs (9.57 kg) |
4. Installation (Setup)
4.1 Mounting the Winch
- Choose a suitable mounting location on your ATV, UTV, or boat that can support the winch's weight and pulling forces. A dedicated winch mounting plate is recommended.
- Align the winch with the pre-drilled holes on your mounting surface. The bolt pattern is 130mm x 80mm.
- Secure the winch using the provided mounting hardware. Ensure all bolts are tightened securely.

Image 4.1: Example of a mounting plate, illustrating the bolt pattern for winch installation.
4.2 Installing the Fairlead
The aluminum fairlead guides the wire rope and reduces wear. Mount it directly in front of the winch drum.
- Attach the fairlead to your mounting surface using appropriate hardware.
- Thread the wire rope through the fairlead opening.

Image 4.2: Aluminum roller fairlead, designed to guide the wire rope smoothly.
4.3 Electrical Wiring
WARNING: Incorrect wiring can cause damage to the winch, vehicle, or personal injury. If you are unsure, consult a qualified technician.
- Disconnect the vehicle's battery negative terminal before starting any wiring.
- Mount the control box in a secure, dry location, away from moving parts and heat sources.
- Connect the thick red wire from the control box to the positive (+) terminal of the winch motor.
- Connect the thick black wire from the control box to the negative (-) terminal of the winch motor.
- Connect the thick yellow and blue wires from the control box to the corresponding terminals on the winch motor (refer to the labels on the winch motor for specific connections).
- Connect the main power wires from the control box:
- Connect the main red power wire to the positive (+) terminal of the vehicle's 12V battery.
- Connect the main black ground wire to the negative (-) terminal of the vehicle's 12V battery or a suitable chassis ground point.
- Connect the wired remote control switch assembly to the designated port on the control box.
- Reconnect the vehicle's battery negative terminal.
- Test the winch operation with both wired and wireless remotes before use.
5. Operation
5.1 Preparing for Winching
- Ensure the vehicle's engine is running to provide maximum power to the winch.
- Disengage the clutch by rotating the clutch knob (if present) to the "FREE SPOOL" position.
- Pull out the wire rope to the anchor point.
- Attach the hook to a secure anchor point using a tree saver strap or shackle. Do not wrap the wire rope around an anchor point and hook it back onto itself.
- Engage the clutch by rotating the clutch knob to the "ENGAGED" position.
- Place a dampener (e.g., a heavy blanket or winch dampener bag) over the wire rope, midway between the winch and the anchor point, to absorb energy in case of rope failure.
- Ensure all bystanders are at a safe distance.
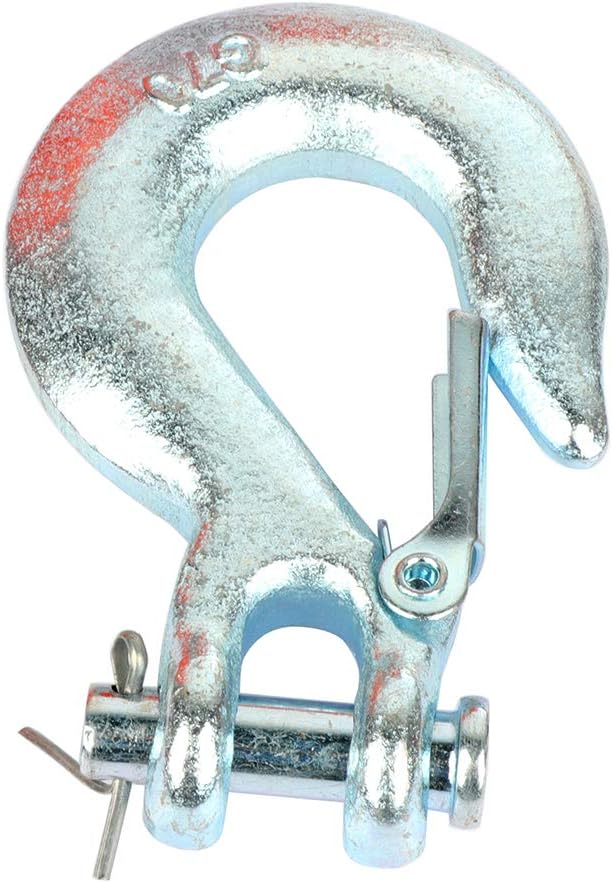
Image 5.1: Winch hook with a safety latch, designed for secure attachment to anchor points.
5.2 Winching Procedure
- Use the wired or wireless remote control. Stand clear of the wire rope and vehicle.
- Press the "IN" button to begin winching. Observe the wire rope winding evenly onto the drum.
- If the rope begins to pile up on one side, stop winching and manually guide the rope to spool evenly.
- Winch in short, controlled bursts. Avoid continuous pulling for extended periods.
- If the motor sounds strained or slows significantly, stop winching and allow it to cool.
- Once the recovery is complete, release the "IN" button.
5.3 Rewinding the Wire Rope
- Ensure the wire rope is under a light load (e.g., by walking it in or using a slight tension) to ensure tight and even spooling.
- Press the "IN" button on the remote to rewind the rope. Guide the rope evenly across the drum.
- Do not allow the rope to become tangled or overlap excessively.
- Once fully rewound, secure the hook to prevent it from swinging freely.
6. Maintenance
- Regular Inspection: Periodically inspect the wire rope for kinks, frayed strands, or corrosion. Replace the rope if any damage is found.
- Cleanliness: Keep the winch and control box clean and free of dirt, mud, and debris.
- Electrical Connections: Check all electrical connections for corrosion or looseness. Clean and tighten as necessary.
- Lubrication: The gearbox is factory-lubricated and generally does not require user maintenance. Consult a professional for internal servicing.
- Storage: When not in use, store the winch in a dry environment. If permanently mounted, ensure it is covered to protect from elements.
7. Troubleshooting
| Problem | Possible Cause | Solution |
|---|---|---|
| Winch does not operate |
|
|
| Winch operates slowly or with reduced power |
|
|
| Wire rope spools unevenly |
|
|
8. Warranty and Support
For warranty information or technical support, please contact cciyu customer service through their official website or the retailer where the product was purchased. Please have your model number (119860-5210-1610308201) and purchase date available.