1. Introduction
The Alpine DVR-C320R is a premium 1080P night vision dash camera system designed to record your driving experiences with clarity and provide built-in drive assist features. This system includes both front and rear cameras for comprehensive coverage. It is compatible with select Alpine AVN/AV Head Units, allowing for integrated control and display.
Key features of the DVR-C320R include Full HD 1080p recording, Wide Dynamic Range (WDR) for optimal exposure, night vision capabilities, impact recording (both moving and stationary), built-in Wi-Fi, and GPS. The system also offers drive-assist functions such as front collision warning, lane departure warning, and front car movement alerts.

Figure 1.1: Front view of the Alpine DVR-C320R dash camera unit.
What's in the Box:
- DVR-C320R Main Unit (Front Camera)
- Rear Camera
- Universal Mounting Bracket
- Vehicle Extension Power Cable
- 32GB SD Card
- User Manual (this document)
2. Safety Information
Please read all safety instructions carefully before installing and operating the Alpine DVR-C320R. Failure to follow these instructions may result in damage to the product, vehicle, or personal injury.
- Professional Installation Recommended: For optimal performance and safety, professional installation is recommended, especially when integrating with Alpine head units.
- Mounting Location: Ensure the camera is mounted in a location that does not obstruct the driver's view or interfere with vehicle safety features (e.g., airbags).
- Power Connection: Connect the power cable according to the instructions to prevent electrical issues. Use only the provided power cable.
- SD Card Handling: Always power off the device before inserting or removing the SD card to prevent data corruption.
- Operating Temperature: Avoid exposing the device to extreme temperatures outside the recommended operating range.
- Cleaning: Use a soft, dry cloth for cleaning. Do not use abrasive cleaners or solvents.
3. Setup and Installation
Proper installation is crucial for the optimal performance of your DVR-C320R system. This section outlines the general steps for installing both the front and rear cameras.
3.1. Front Camera Installation
- Choose Mounting Location: Select a location on your windshield, typically behind the rearview mirror, that provides a clear view of the road ahead and does not obstruct your driving visibility.
- Clean Surface: Thoroughly clean the chosen area on the windshield to ensure proper adhesion of the mounting bracket.
- Attach Mounting Bracket: Secure the universal mounting bracket to the windshield. Ensure the camera unit, once attached, is level and facing forward.
- Insert SD Card: Before powering on, insert the provided 32GB SD card into the designated slot on the side of the main unit. Ensure it clicks into place.
- Connect Power: Route the vehicle extension power cable from the main unit to a 12V power source (e.g., cigarette lighter adapter) or integrate it with your vehicle's electrical system, preferably through an Alpine head unit for full functionality.
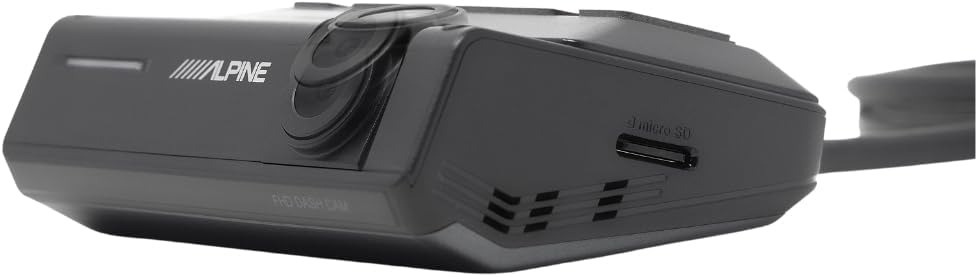
Figure 3.1: Side view of the main unit showing the microSD card slot.
3.2. Rear Camera Installation
- Choose Mounting Location: Mount the rear camera on the rear window, ensuring a clear view of the road behind. Avoid areas that might be obstructed by the defroster lines or wiper blades.
- Clean Surface: Clean the mounting area on the rear window.
- Secure Rear Camera: Use the provided adhesive or a suitable alternative (e.g., strong double-sided industrial tape) to secure the rear camera. Ensure the camera is oriented correctly (usually indicated by an "UP" marking).
- Route Cable: Carefully route the rear camera cable from the rear camera to the main front unit. Conceal the cable along the vehicle's headliner and pillars for a neat installation.
- Connect to Main Unit: Plug the rear camera cable into the designated port on the main DVR-C320R unit.

Figure 3.2: The Alpine DVR-C320R front and rear camera units.
3.3. Integration with Alpine Head Units
The DVR-C320R is designed for seamless integration with select Alpine AVN/AV Head Units. This integration allows for control of the dash cam directly from your head unit screen and enables audible alerts for drive-assist features through your vehicle's sound system. Refer to your Alpine head unit's manual for specific connection and setup instructions.
4. Operating Instructions
Once installed, the DVR-C320R operates largely automatically. This section details its primary functions and how to interact with the system.
4.1. Automatic Recording
- Continuous Recording: The camera automatically begins recording when the vehicle's ignition is turned on. Footage is saved in short segments, and older files are overwritten once the SD card is full (loop recording).
- Impact Recording (G-Sensor): The built-in G-sensor detects sudden impacts or rapid deceleration/acceleration. In such events, the current recording segment is locked and protected from being overwritten, ensuring critical incident footage is preserved. This applies to both moving and stationary impacts (parking mode).
- Night Vision & WDR: The system automatically adjusts for low-light conditions using night vision technology and Wide Dynamic Range (WDR) to ensure clear recordings in varying light environments, including sudden changes in brightness.
4.2. Drive-Assist Features
The DVR-C320R includes advanced driver assistance systems (ADAS) to enhance safety. These features provide audible alerts, often integrated with compatible Alpine head units.
- Front Collision Warning: Alerts you if you are approaching the vehicle in front too quickly.
- Lane Departure Warning: Notifies you if your vehicle drifts out of its lane without signaling.
- Front Car Movement Warning: Informs you when the vehicle ahead, while stopped in traffic, begins to move.
Note: The sensitivity of these alerts can typically be adjusted via the Alpine Recording Viewer App or compatible Alpine head unit settings. Some users may find certain alerts, like lane departure, to be sensitive depending on driving conditions and road quality.
4.3. Wi-Fi Connectivity and App Usage
The built-in Wi-Fi allows you to connect your smartphone to the dash camera using the Alpine Recording Viewer App. This app enables you to:
- View live footage from both cameras.
- Review recorded videos.
- Download video files to your smartphone.
- Adjust camera settings (e.g., G-sensor sensitivity, video quality, ADAS settings).
- Format the SD card.
Download the Alpine Recording Viewer App from your device's app store and follow the in-app instructions to connect to your DVR-C320R's Wi-Fi network.
4.4. PC Viewer Software
For more detailed video review and analysis, the Alpine Recording Viewer PC software is available. This software allows you to view recorded footage, GPS data, and G-sensor information on a larger screen. Install the software on your computer and insert the SD card from the dash cam to access its features.
5. Maintenance
Regular maintenance ensures the longevity and optimal performance of your dash camera system.
5.1. SD Card Management
- Formatting: It is recommended to format the SD card regularly (e.g., once a month) to prevent data corruption and ensure smooth recording. This can be done through the Alpine Recording Viewer App or PC software. Formatting will erase all data on the card, so back up any important files first.
- Replacement: SD cards have a limited lifespan due to continuous writing and rewriting. If you experience recording errors or degraded performance, consider replacing the SD card with a high-quality, high-endurance card (Class 10 or higher, U3 recommended). The system supports up to 128GB.
5.2. Cleaning the Camera Lenses
Periodically clean the lenses of both the front and rear cameras to ensure clear video quality. Use a soft, lint-free cloth. For stubborn smudges, a small amount of lens cleaning solution designed for optics can be applied to the cloth (not directly to the lens).
6. Troubleshooting
This section addresses common issues you might encounter with your Alpine DVR-C320R system.
| Problem | Possible Cause | Solution |
|---|---|---|
| Camera not powering on. | Loose power connection, vehicle power outlet issue, faulty cable. | Check all power connections. Ensure the vehicle's 12V outlet is functional. Test with a different power source if possible. |
| Poor video quality / blurry images. | Dirty lens, protective film still on lens, incorrect resolution settings, damaged SD card. | Clean the camera lenses. Ensure any protective film has been removed. Check video resolution settings in the app. Format or replace the SD card. |
| Recording stops or freezes. | SD card error, incompatible or low-quality SD card, full SD card. | Format the SD card. Ensure you are using a high-endurance Class 10 (U3) SD card. Replace the SD card if issues persist. |
| Wi-Fi connection issues with app. | Incorrect Wi-Fi password, too far from camera, app malfunction. | Ensure correct Wi-Fi password. Be within close proximity to the camera. Restart the app and the camera. Reinstall the app if necessary. |
| Driver assist alerts are too frequent or inaccurate. | Sensitivity settings are too high, environmental factors (e.g., poor road markings, heavy rain). | Adjust the sensitivity settings for front collision and lane departure warnings via the Alpine Recording Viewer App or compatible head unit. Disable specific alerts if they are consistently disruptive. |
| Rear camera not displaying or recording. | Loose cable connection, faulty rear camera. | Check the cable connection between the rear camera and the main unit. Ensure the cable is not damaged. |
7. Specifications
| Feature | Detail |
|---|---|
| Model Name | DVR-C320R |
| Video Capture Resolution | 1080p Full HD |
| Field of View | 140 Degrees |
| Special Features | 1080P FULL HD RECORDING, DUAL-CAMERA CONFIGURATIONS, CONTROL FROM THE DASH, Night Vision, Wide Dynamic Range (WDR), Impact Recording, Built-in Wi-Fi, Built-in GPS, Drive-Assist Features (Front Collision Warning, Lane Departure Warning, Front Car Movement Warning) |
| Connectivity Technology | RCA, Wireless (Wi-Fi) |
| Included Components | DVR-C320R Main Unit, Rear Camera, Universal Mounting Bracket, Vehicle Extension Power Cable, 32GB SD Card |
| Mounting Type | Windshield Mount |
| Color | Black |
| Product Dimensions | 11 x 11 x 5 inches (packaging/overall product dimensions, actual unit is smaller) |
| Item Weight | 2 pounds (packaging/overall product weight, actual unit is lighter) |
| Manufacturer | Alpine |
8. Warranty Information
Alpine products are manufactured to high-quality standards. For specific warranty terms and conditions applicable to your DVR-C320R, please refer to the warranty card included with your product or visit the official Alpine website. Keep your proof of purchase for warranty claims.
9. Customer Support
If you require further assistance with installation, operation, or troubleshooting, please contact Alpine customer support. You can find contact information and additional resources on the official Alpine website:
Please have your product model number (DVR-C320R) and proof of purchase ready when contacting support.
10. Official Product Videos
No official product videos from the seller were found in the provided data for this model. Please refer to the Alpine support website for any available video resources.


