
1. Introduction
Thank you for choosing the RYOBI RJS1050-KA5 Pendulum Jigsaw. This manual provides essential information for the safe and effective operation, maintenance, and troubleshooting of your tool. Please read these instructions carefully before use and keep them for future reference.
2. General Safety Instructions
Always follow basic safety precautions when using electric tools to reduce the risk of fire, electric shock, and personal injury. Keep this manual handy for quick reference.
Work Area Safety
- Keep the work area clean and well-lit. Cluttered or dark areas invite accidents.
- Do not operate power tools in explosive atmospheres, such as in the presence of flammable liquids, gases, or dust. Power tools create sparks which may ignite the dust or fumes.
- Keep children and bystanders away while operating a power tool. Distractions can cause you to lose control.
Electrical Safety
- Power tool plugs must match the outlet. Never modify the plug in any way.
- Avoid body contact with earthed or grounded surfaces such as pipes, radiators, ranges, and refrigerators. There is an increased risk of electric shock if your body is earthed or grounded.
- Do not expose power tools to rain or wet conditions. Water entering a power tool will increase the risk of electric shock.
- Do not abuse the cord. Never use the cord for carrying, pulling, or unplugging the power tool. Keep cord away from heat, oil, sharp edges, or moving parts.
Personal Safety
- Always wear eye protection. Use safety glasses, goggles, or a face shield.
- Dress properly. Do not wear loose clothing or jewelry. Keep your hair and clothing away from moving parts.
- Stay alert, watch what you are doing, and use common sense when operating a power tool.
- Use safety equipment such as a dust mask, non-skid safety shoes, hard hat, or hearing protection when appropriate.
Power Tool Use and Care
- Do not force the power tool. Use the correct power tool for your application.
- Disconnect the plug from the power source before making any adjustments, changing accessories, or storing power tools.
- Store idle power tools out of the reach of children and do not allow persons unfamiliar with the power tool or these instructions to operate the power tool.
- Maintain power tools. Check for misalignment or binding of moving parts, breakage of parts, and any other condition that may affect the power tool’s operation.
- Use clamps or another practical way to secure and support the workpiece to a stable platform. Holding the work by hand or against your body is unstable and may lead to loss of control.
3. Product Overview
The RYOBI RJS1050-KA5 is a powerful 680W pendulum jigsaw designed for various cutting tasks in wood and metal. It features a 105mm cutting capacity in wood and a variable speed control for optimal performance across different materials.

Image: Front view of the RYOBI RJS1050-KA5 Pendulum Jigsaw, showcasing its ergonomic design and blade area.
Key Features
- Variable Speed Control: Centrally located for adjustable speed up to 3000 strokes per minute, adapting to different cutting requirements.
- Flat Front Housing and Integrated Blower: Ensures maximum visibility of the cutting line at all times.
- 4-Position Pendulum Action: Adjusts blade oscillation based on material and cut type for faster cutting or finer finishes.
- SURELOCK Tool-Free Blade Change: Quick and easy blade replacement with a visual locking indicator for secure operation.
- STRAIGHTFIN Divider Knife: Retractable cutting guide for improved tracking of the cutting line.
- LED Illumination: Enhances visibility of the workpiece.
- GripZone Micro-Dimpled Handle: Provides a firm and comfortable grip.
- Cable Retaining Clip: Prevents accidental cable cuts.
- Trigger with Lock Button: Reduces fatigue during extended use.
- Base Plate Tilt: Adjustable from 0° to 45° for bevel cuts.
- PROSTROKE Blade Support System: Minimizes vibrations for better control, comfort, and performance.
4. Setup
4.1 Blade Installation (SURELOCK System)
- Ensure the jigsaw is unplugged from the power source.
- Locate the SURELOCK blade clamp lever at the front of the tool.
- Push the lever to open the blade clamp.
- Insert the shank of the jigsaw blade fully into the clamp opening with the teeth facing forward.
- Release the lever. The visual indicator should show that the blade is securely locked. Gently pull on the blade to confirm it is firmly seated.
- To remove, repeat steps 2 and 3, then pull the blade out.
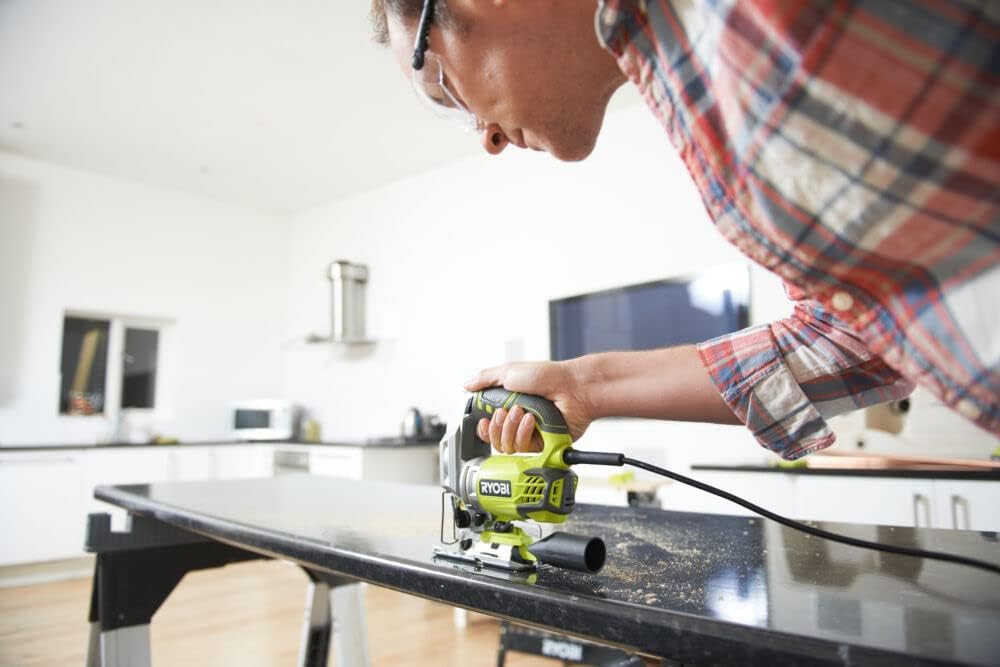
Image: Close-up of the RYOBI RJS1050-KA5 Jigsaw's front, showing the blade area and base plate.
4.2 Base Plate Adjustment (Bevel Cuts)
- Unplug the tool.
- Loosen the screws or lever that secure the base plate to the main body of the jigsaw.
- Tilt the base plate to the desired angle (0° to 45°). Use the angle scale for accuracy.
- Tighten the screws or lever firmly to secure the base plate in position.
4.3 Dust Extraction
Attach the provided aspiration nozzle to the dust port on the jigsaw. Connect a suitable vacuum cleaner to the nozzle for effective dust removal during operation, ensuring a cleaner work area and better visibility.
5. Operating Instructions
5.1 Powering On/Off
- To start the jigsaw, press the trigger switch.
- For continuous operation, press the lock-on button while the trigger is depressed.
- To stop the tool, release the trigger. If locked on, press the trigger again to release the lock-on button.
5.2 Variable Speed Control
The variable speed dial allows you to adjust the cutting speed from 0 to 3100 strokes per minute. Select a lower speed for harder materials like metal or for intricate cuts, and a higher speed for softer materials like wood or for faster, rougher cuts.
5.3 Pendulum Action Adjustment
The 4-position pendulum action lever controls the orbital movement of the blade. Adjust this setting based on the material and desired cut quality:
- Position 0 (No Pendulum): For fine, precise cuts in all materials, especially metal and plastics.
- Positions 1-3 (Increasing Pendulum): For faster cutting in wood and softer materials. Higher settings provide more aggressive cutting but may result in a rougher finish.
5.4 Cutting Techniques
- Straight Cuts: Guide the jigsaw along a marked line, keeping the base plate flat on the workpiece.
- Curve Cuts: Use a narrower blade and guide the tool slowly along the curve. Avoid forcing the blade.
- Plunge Cuts: For internal cuts without a pilot hole, tilt the jigsaw forward so the front of the base plate rests on the workpiece. Start the tool, then slowly lower the blade into the material. Exercise extreme caution.

Image: A person demonstrating the use of the RYOBI jigsaw for a precise cut on a dark surface, highlighting the tool's maneuverability.

Image: A person wearing safety glasses operating the RYOBI jigsaw on a workbench, illustrating proper safety and cutting posture.
6. Maintenance
Regular maintenance ensures the longevity and safe operation of your RYOBI jigsaw.
6.1 Cleaning
- Always unplug the tool before cleaning.
- Use a soft brush or compressed air to clear dust and debris from the ventilation openings.
- Wipe the tool housing with a damp cloth. Do not use harsh chemicals or abrasive cleaners.
- Ensure the blade clamp area is free of sawdust and debris for proper blade seating.
6.2 Blade Care
- Always use sharp blades appropriate for the material being cut. Dull blades can cause overheating, poor cut quality, and increased strain on the tool.
- Inspect blades for damage or wear before each use. Replace damaged blades immediately.
6.3 Power Cord
Regularly inspect the power cord for any signs of damage. If the cord is damaged, have it replaced by a qualified service technician to avoid electrical hazards. Utilize the cable retaining clip to prevent accidental cuts to the cord.
7. Troubleshooting
If you encounter issues with your jigsaw, refer to the following common problems and solutions:
| Problem | Possible Cause | Solution |
|---|---|---|
| Tool does not start | No power supply Damaged power cord Faulty switch | Check power outlet and circuit breaker Inspect cord for damage; replace if necessary Contact authorized service center |
| Poor cut quality / Slow cutting | Dull or incorrect blade Incorrect speed setting Incorrect pendulum setting | Replace blade; ensure it's suitable for material Adjust speed dial for material Adjust pendulum action (lower for finer cuts) |
| Excessive vibration | Loose blade Worn blade guide Damaged blade | Ensure blade is securely clamped Inspect and replace blade guide if worn Replace blade |
| Overheating | Blocked ventilation slots Forcing the tool Dull blade | Clean ventilation slots Reduce feed pressure Replace blade |
8. Specifications
Here are the technical specifications for the RYOBI RJS1050-KA5 Pendulum Jigsaw:
- Power: 680 Watts
- No-load Speed: 0-3100 strokes/min
- Stroke Length: 23 mm
- Cutting Capacity (Wood): 105 mm
- Cutting Capacity (Metal): 12 mm
- Base Plate Tilt: -45° to 45°
- Weight: 2.2 Kilograms
- Power Source: Corded Electric
- Special Feature: Spindle lock
- Included Components: 1 x Pendulum Jigsaw 680 W - 105mm - RJS1050-KA5, 1 x Case, 5 x Wood Blades, 1 x Hex Key, 1 x Aspiration Nozzle
9. Warranty Information
RYOBI products are manufactured to high-quality standards and are backed by a manufacturer's warranty. Please refer to the warranty card included with your product or visit the official RYOBI website for detailed warranty terms and conditions specific to your region. Keep your proof of purchase for warranty claims.
10. Customer Support
For further assistance, technical support, or spare parts, please contact RYOBI customer service or visit the official RYOBI website:
- Website: www.ryobi.eu (or your regional RYOBI website)
- Refer to your product packaging for specific contact numbers or service centers in your country.

Image: The RYOBI brand logo, representing quality and innovation in power tools.
11. No Official Product Videos Available
At this time, there are no official product videos from the seller available for embedding in this manual.