1. Introduction
This manual provides instructions for the safe and efficient operation, maintenance, and troubleshooting of your Volteck Rechargeable Emergency Lantern, Model 43009. Please read this manual thoroughly before use and retain it for future reference. This lantern is designed to provide reliable illumination during power outages or in situations requiring portable light.
2. Product Overview
The Volteck Rechargeable Emergency Lantern features 100 high-efficiency LEDs, two intensity levels, and a built-in rechargeable Lithium-Ion battery for extended use.
Key Features
- 100 LED lights for bright illumination.
- Two selectable light intensities (high/low).
- Integrated rechargeable Lithium-Ion battery.
- Foldable handle for easy carrying or hanging.
- Automatic activation during power outages when connected to power.
Product Components

Figure 1: Volteck Rechargeable Emergency Lantern, front view showing 100 LED lights. The power switch and indicator lights are visible on the side.
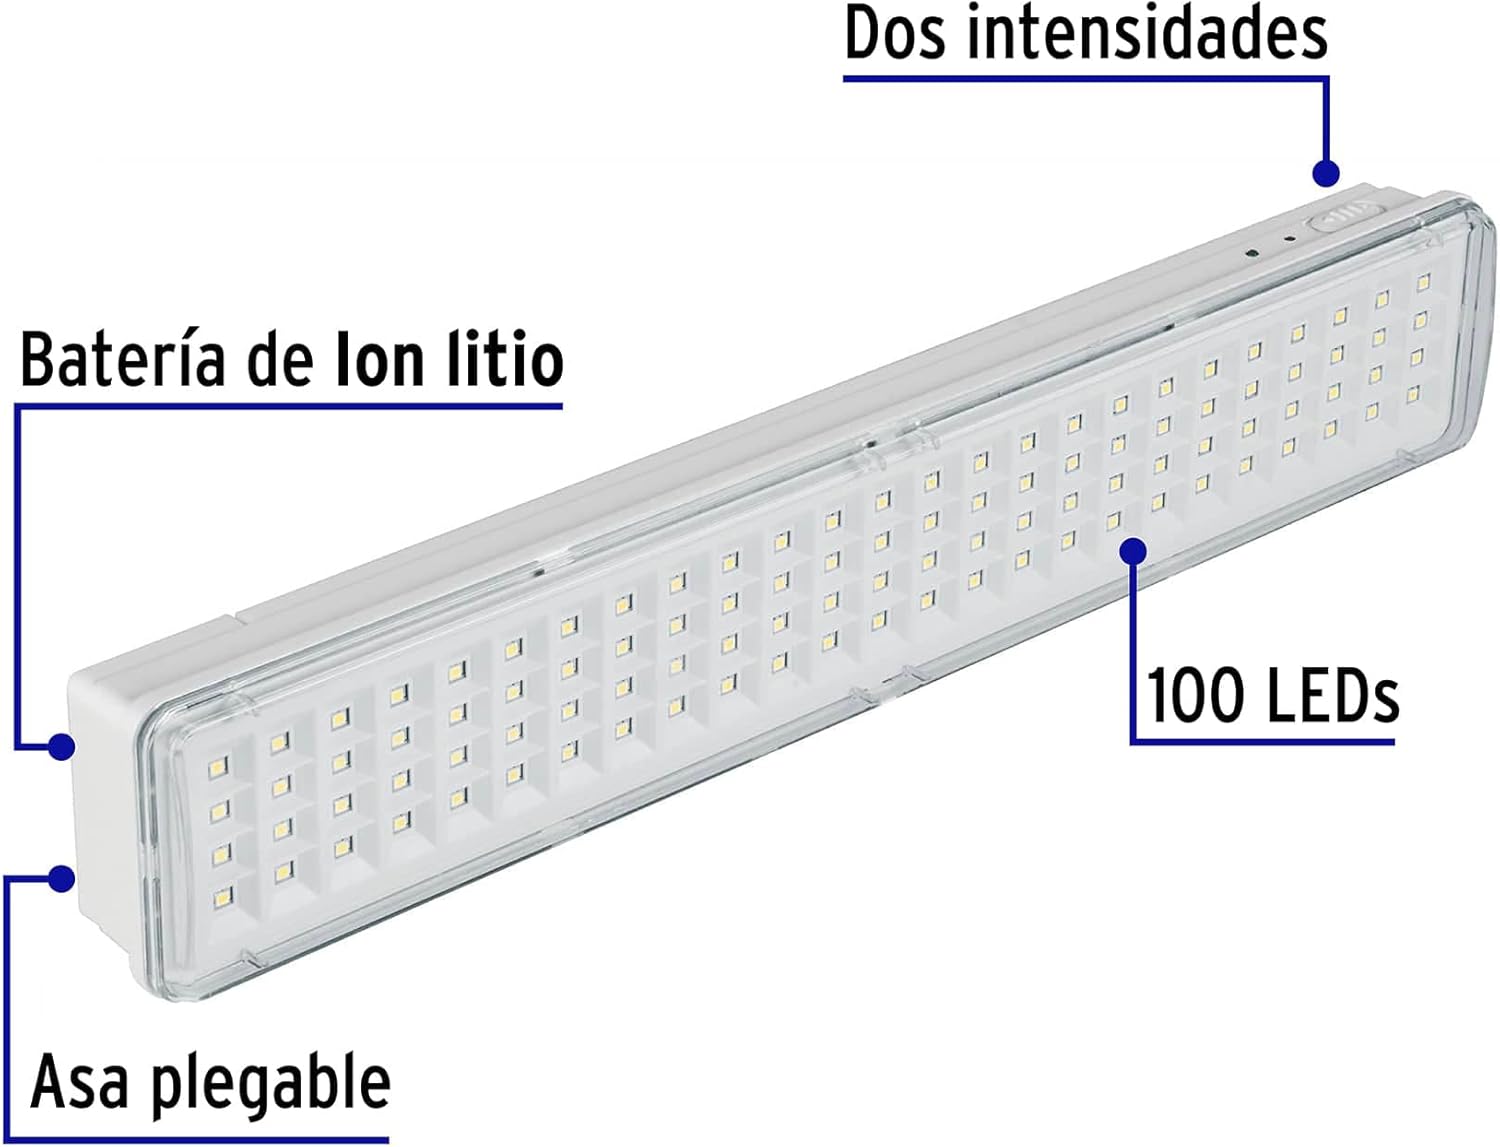
Figure 2: This image illustrates the key components of the lantern. Labels indicate the location of the Lithium-Ion battery compartment, the foldable handle for portability, the 100 LED light array, and the switch for selecting between two light intensities.

Figure 3: This image provides the physical dimensions of the Volteck Emergency Lantern. It measures approximately 40 cm (15.7 inches) in length, 7 cm (2.75 inches) in height, and 4 cm (1.57 inches) in width.

Figure 4: The product packaging box for the Volteck Rechargeable Emergency Lantern. The box displays the product image, brand logo, and key specifications such as 'Rechargeable Emergency Lamp', '500 lm', '100 LED', and '6h runtime'.
3. Setup
Initial Charging
- Before first use, fully charge the lantern for approximately 20-24 hours.
- Connect the lantern's power cord to a standard AC outlet (120V AC).
- The charging indicator light will illuminate to confirm charging is in progress.
- Ensure the lantern is switched OFF during initial charging for optimal battery conditioning.
Mounting (Optional)
The lantern can be wall-mounted using the integrated mounting holes on the back. Ensure the mounting surface is secure and capable of supporting the lantern's weight.
4. Operating Instructions
Power On/Off and Intensity Selection
- Locate the power switch on the side of the lantern.
- Slide the switch to the 'LOW' position for a lower light intensity.
- Slide the switch to the 'HIGH' position for maximum brightness.
- Slide the switch to the 'OFF' position to turn off the lantern.
Emergency Function
When the lantern is connected to an AC power source and the switch is in either the 'LOW' or 'HIGH' position, it will automatically turn on if the main power supply fails. This feature ensures continuous illumination during power outages.
Using the Foldable Handle
The integrated foldable handle can be extended for carrying the lantern or for hanging it from a hook or suitable support.
5. Maintenance
Cleaning
Clean the exterior of the lantern with a soft, dry cloth. Do not use abrasive cleaners or solvents, as these may damage the plastic housing.
Battery Care
To prolong battery life, recharge the lantern every three months if not in regular use. Avoid completely draining the battery frequently.
Storage
Store the lantern in a cool, dry place away from direct sunlight and extreme temperatures.
6. Troubleshooting
| Problem | Possible Cause | Solution |
|---|---|---|
| Lantern does not turn on | Battery is discharged | Recharge the lantern fully. |
| Lantern does not turn on | Power switch is in 'OFF' position | Slide the switch to 'LOW' or 'HIGH'. |
| Lantern does not charge | Power cord not properly connected | Ensure the power cord is securely plugged into both the lantern and the AC outlet. |
| Lantern does not turn on during power outage | Not connected to AC power or switch is 'OFF' | Ensure the lantern is plugged into an AC outlet and the switch is in 'LOW' or 'HIGH' position. |
7. Specifications
| Feature | Detail |
|---|---|
| Model | 43009 (LAE-100) |
| Light Source | 100 LEDs |
| Brightness | 500 Lumens |
| Battery Type | Lithium-Ion |
| Power Source | Battery Powered, AC Rechargeable |
| Voltage | 240 Volts (AC) |
| Wattage | 3.5 Watts |
| Dimensions (L x W x H) | 11 x 1.1 x 2.75 inches (28 x 2.8 x 7 cm) |
| Item Weight | 1.06 pounds (0.48 kg) |
| Material | Plastic |
| Special Features | Rechargeable, Two Light Intensities, Automatic Emergency On |
| Water Resistance | Not Water Resistant |
| Plug Format | A- US style |
8. Warranty and Support
For warranty information or technical support, please contact Volteck customer service. Refer to the product packaging or the Volteck official website for contact details. Keep your purchase receipt as proof of purchase.


