1. Introduction and Overview
This manual provides essential information for the safe and efficient operation, maintenance, and troubleshooting of your Hyundai HY-HY900SI Inverter Generator. The HY-HY900SI is a compact, lightweight, and functional inverter generator designed for various applications requiring portable power.
Key features include a rated power output of 750 W (0.75 kW) and a maximum power output of 900 W (0.90 kW) at 230 V and 50 Hz. It features a 2.4-liter fuel tank capacity and operates at a low noise level of approximately 44 decibels. The generator is equipped with a 12V DC output with surge protection, an economy switch for fuel efficiency, and LED indicators for overload and operational status.
Figure 1: Front view of the Hyundai HY-HY900SI Inverter Generator, showing the control panel and outlets.
2. Safety Information
Always prioritize safety when operating the generator. Failure to follow these instructions can result in serious injury or death.
- Carbon Monoxide Hazard: Generators produce carbon monoxide, an odorless, colorless, poisonous gas. Operate the generator outdoors in a well-ventilated area, far away from windows, doors, and vents. Never operate indoors, in a garage, or in any enclosed space.
- Fire Hazard: Gasoline is highly flammable. Refuel in a well-ventilated area with the engine off and cool. Do not smoke or allow open flames near the generator. Store fuel in an approved container in a safe location.
- Electrical Shock Hazard: Do not operate the generator in wet conditions. Ensure all electrical connections are secure and dry. Never touch electrical components with wet hands.
- Hot Surfaces: The generator's engine and exhaust system become very hot during operation and remain hot for some time after shutdown. Avoid contact with these surfaces to prevent burns.
- Children and Pets: Keep children and pets away from the generator at all times.
- Ear Protection: Although designed for low noise, prolonged exposure to generator noise can cause hearing damage. Consider wearing ear protection during extended operation.

Figure 2: Back view of the generator, showing the exhaust area with a caution label. Avoid touching hot surfaces.
3. Product Components and Features
Familiarize yourself with the main components of your HY-HY900SI generator:
- Control Panel: Located on the front, it houses the outlets, indicators, and control switches.
- Fuel Cap: For filling the gasoline tank.
- Recoil Starter: Used to manually start the engine.
- Exhaust Outlet: Discharges engine fumes.
- AC 230V Outlet: Standard power outlet for electrical appliances.
- DC 12V/4A Outlet: For charging 12V batteries or powering compatible DC devices.
- USB Ports: For charging USB-powered devices.
- ECO Switch: Engages economy mode for reduced fuel consumption and noise at lower loads.
- Overload Indicator: An LED that illuminates when the generator is overloaded.
- Output Indicator: An LED that indicates power output is available.
- Oil Warning Indicator: An LED that illuminates when engine oil level is low.
- Reset Button: For resetting the overload protection.
- Parallel Outlets: For connecting two compatible generators in parallel to increase power output (requires a parallel kit, sold separately).
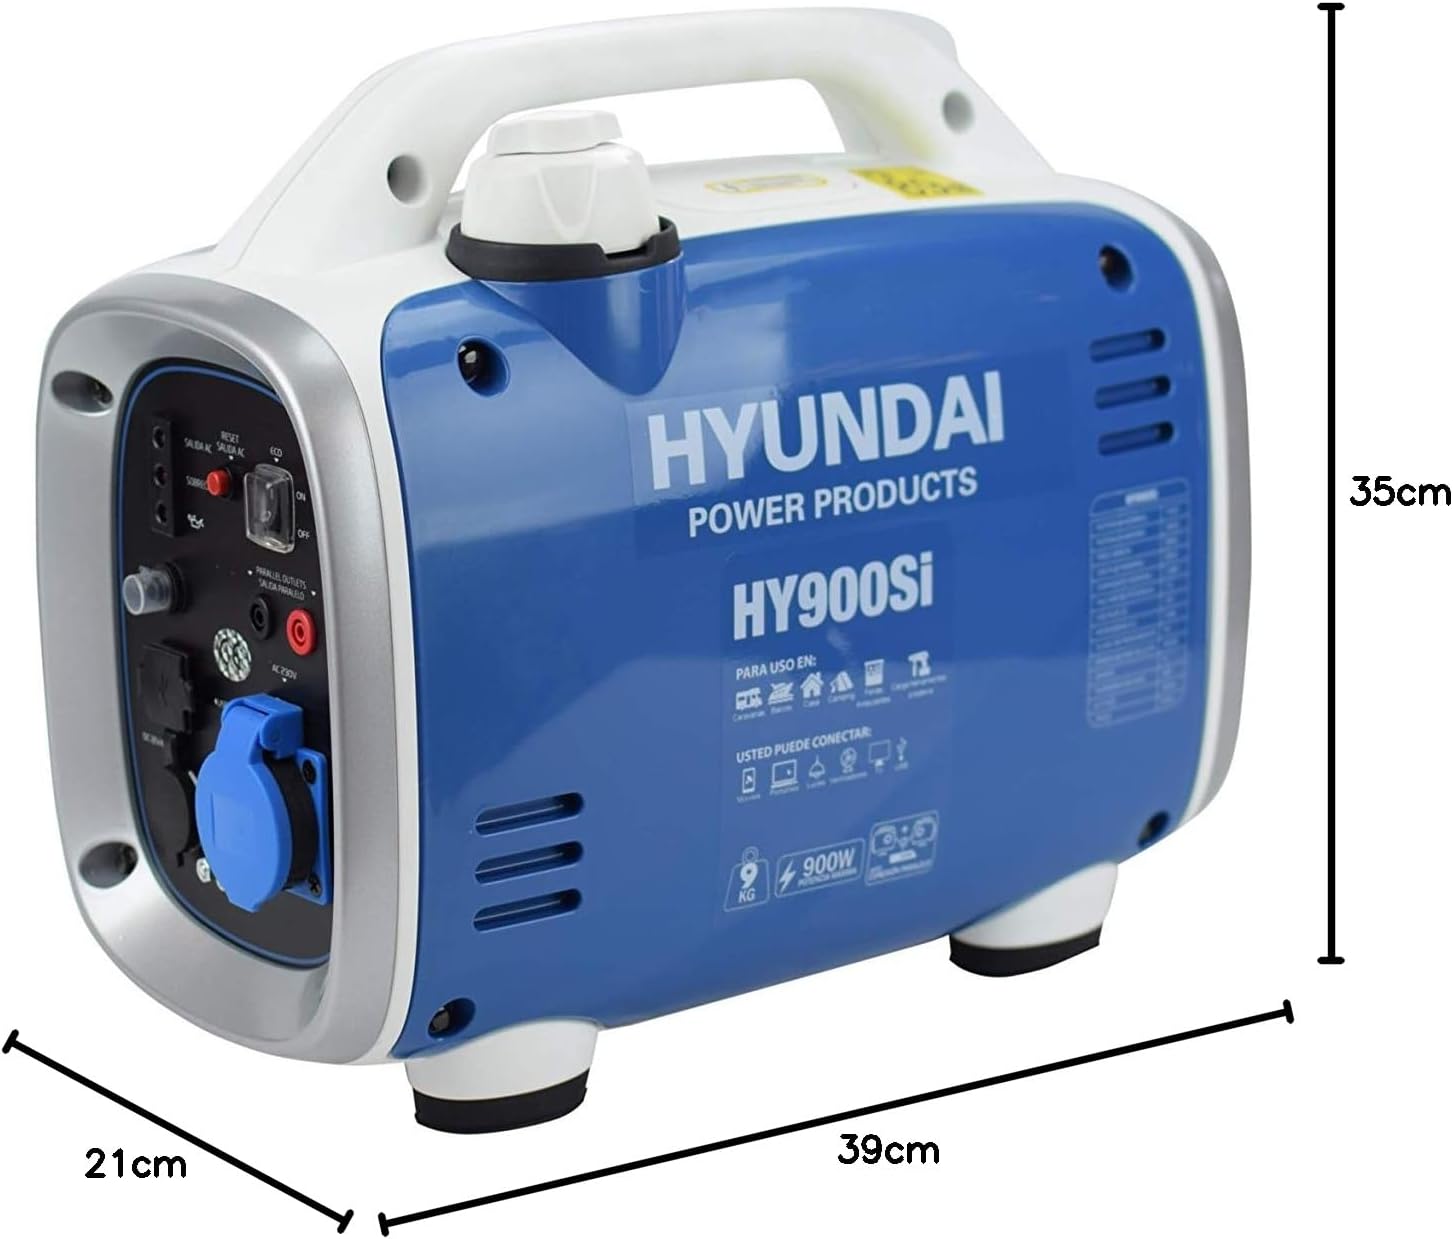
Figure 3: Detailed view of the control panel, showing the AC outlet, DC 12V/4A, USB ports, ECO switch, and indicator lights.
4. Setup
Before first use, proper setup is crucial for safe and effective operation.
4.1. Placement
- Place the generator on a firm, level surface.
- Ensure adequate ventilation. Operate only outdoors and away from any openings to buildings.
- Maintain a minimum clearance of 1 meter (3 feet) from other objects or structures.
4.2. Adding Engine Oil
The generator is shipped without engine oil. You must add the correct type and amount of oil before starting.
- Locate the oil fill cap/dipstick.
- Remove the cap and carefully pour the recommended engine oil (refer to specifications for type and capacity) into the oil reservoir.
- Check the oil level using the dipstick; it should be at the upper mark.
- Securely replace the oil fill cap.
4.3. Adding Fuel
Use fresh, unleaded gasoline with an octane rating of 87 or higher.
- Ensure the engine is off and cool.
- Unscrew the fuel cap.
- Carefully pour gasoline into the fuel tank, avoiding overfilling. Leave some space for fuel expansion.
- Securely replace the fuel cap. Wipe up any spilled fuel immediately.
5. Operating Instructions
5.1. Starting the Engine
- Ensure the generator is on a level surface and all connections are secure.
- Turn the fuel valve to the 'ON' position.
- If the engine is cold, move the choke lever to the 'CHOKE' position. If the engine is warm, move it directly to the 'RUN' position.
- Turn the engine switch to the 'ON' position.
- Grasp the recoil starter handle firmly and pull it slowly until resistance is felt, then pull sharply to start the engine. Repeat if necessary.
- Once the engine starts, gradually move the choke lever to the 'RUN' position.
5.2. Using the ECO Switch
The ECO switch allows the engine speed to automatically adjust to the connected load, reducing fuel consumption and noise.
- 'ON' Position: Activates economy mode. Ideal for light loads or when lower noise is desired.
- 'OFF' Position: Disables economy mode. The engine runs at a constant speed, providing full power output. Recommended for heavy loads or when starting high-demand appliances.
5.3. Connecting Electrical Devices
Ensure the generator is running stably before connecting any devices.
- AC 230V: Plug your appliance into the AC outlet. Ensure the total wattage does not exceed the generator's rated output (750W) to avoid overloading.
- DC 12V/4A: Connect 12V devices or battery charging cables to the DC outlet.
- USB: Plug USB charging cables into the USB ports for charging compatible devices.
5.4. Stopping the Engine
- Disconnect all electrical loads from the generator.
- Turn the engine switch to the 'OFF' position.
- Turn the fuel valve to the 'OFF' position.
6. Maintenance
Regular maintenance ensures optimal performance and extends the lifespan of your generator.
- Engine Oil: Check the engine oil level before each use. Change the oil after the first 20 hours of operation, then every 50-100 hours or every 6 months, whichever comes first.
- Air Filter: Inspect the air filter regularly and clean or replace it as needed, especially in dusty conditions.
- Spark Plug: Inspect the spark plug annually or every 100 hours. Clean or replace if necessary.
- Fuel System: If storing the generator for an extended period (more than 30 days), drain the fuel tank and carburetor or use a fuel stabilizer to prevent fuel degradation.
- General Cleaning: Keep the generator clean and free of dirt and debris. Use a damp cloth to wipe down exterior surfaces. Do not use a pressure washer.
- Monthly Start-up: If the generator is not used frequently, start it for a short period (e.g., 15-20 minutes) once a month to keep components lubricated and ensure readiness.
7. Troubleshooting
Refer to this section for common issues and their solutions.
| Problem | Possible Cause | Solution |
|---|---|---|
| Engine does not start |
|
|
| No power output |
|
|
| Engine runs rough or stalls |
|
|
| Overload alert with sensitive equipment |
|
|
8. Specifications
Technical specifications for the Hyundai HY-HY900SI Inverter Generator:
| Feature | Specification |
|---|---|
| Model Number | HY-HY900SI |
| Manufacturer | Hyundai |
| Rated Power Output | 750 W / 0.75 kW |
| Maximum Power Output | 900 W / 0.90 kW |
| Voltage | 230 V |
| Frequency | 50 Hz |
| Engine Power | 1.4 HP |
| Fuel Type | Benzine (Gasoline) |
| Fuel Tank Capacity | 2.4 Liters |
| Noise Level (at 7m, 50% load) | 58 dBA (or 44 Decibels from general specs) |
| DC Output | 12 V / 4 A |
| Product Dimensions (L x W x H) | 39 x 21 x 35 cm |
| Weight | 9.3 kg |
| Special Features | Automatic idle-bediening (Automatic idle control) |
| Certifications | TUV |

Figure 4: Dimensions of the Hyundai HY-HY900SI Inverter Generator.
9. Warranty and Support
For warranty information, please refer to the documentation provided at the time of purchase or contact your retailer. Specific warranty terms and conditions may vary by region and retailer.
For technical support or service inquiries, please contact Hyundai Power Products customer service or your authorized service center. Contact details are typically available on the manufacturer's website or in your purchase documentation.


