1. Introduction
Thank you for choosing the Luby HI3 Robot Vacuum Cleaner. This manual provides essential information for the safe operation, effective use, and proper maintenance of your device. Please read this manual thoroughly before using the product and retain it for future reference.
2. Safety Instructions
To reduce the risk of injury or damage, read and follow all safety precautions when setting up, using, and maintaining your robot vacuum.
- This appliance can be used by children aged 8 years and above and persons with reduced physical, sensory or mental capabilities or lack of experience and knowledge if they have been given supervision or instruction concerning use of the appliance in a safe way and understand the hazards involved.
- Children should be supervised to ensure that they do not play with the appliance.
- Cleaning and user maintenance shall not be made by children without supervision.
- Use only the original power adapter provided by the manufacturer.
- Do not operate the robot vacuum in areas with open flames or explosive materials.
- Avoid using the robot vacuum on wet surfaces or to pick up liquids.
- Ensure all cables, curtains, and small objects are cleared from the cleaning path to prevent entanglement.
- Do not sit on the robot vacuum or place heavy objects on it.
3. Package Contents
Verify that all components are present in the package:
- Luby HI3 Robot Vacuum Cleaner
- Charging Dock
- Power Adapter
- Side Brushes (2 pairs)
- High-Efficiency Filter (pre-installed)
- Remote Control
- User Manual
4. Product Overview
Familiarize yourself with the main components of your Luby HI3 robot vacuum.

Figure 4.1: Luby HI3 Robot Vacuum Cleaner, showing the main unit, remote control, and mobile application interface.
4.1 Main Unit
- Top Cover: Protects internal components.
- Power/Clean Button: Initiates or pauses cleaning, powers on/off, and connects to Wi-Fi.
- Dustbin: Collects debris.
- Side Brushes: Sweep debris into the vacuum's path.
- Driving Wheels: Allow movement across various surfaces.
- Charging Contacts: Connect with the charging dock.
- Sensors: Anti-drop and anti-collision sensors for navigation.
4.2 Control Methods

Figure 4.2: Overview of control options including the Tuya App, remote controller, and the main power button on the robot.
- Tuya App: Offers remote control, mode changes, robot finding, scheduling, and integration with Google Home & Alexa.
- Remote Controller: Allows scheduling, time setting, mode changes, and direct remote control.
- Power Button: Hold to power On/Off. Press to Start/Stop cleaning. Double tap to initiate Wi-Fi connection.
5. Setup
5.1 Charging Dock Placement
Place the charging dock against a wall in an open, uncluttered area. Ensure there is at least 0.5 meters (1.6 feet) of clear space on both sides of the dock and 1.5 meters (4.9 feet) in front of it. Plug the power adapter into the charging dock and then into a wall outlet. Ensure the power indicator on the dock illuminates.
5.2 Initial Charge
Before first use, fully charge the robot vacuum. Place the robot onto the charging dock, ensuring the charging contacts align. The indicator light on the robot will show charging status. A full charge typically takes 4-5 hours. The robot will automatically return to the charging dock when its battery level is low (below 20%).
5.3 App Connection (Tuya App)
- Download the 'Tuya Smart' app from your smartphone's app store.
- Register or log in to your Tuya Smart account.
- Ensure your robot vacuum is powered on and near your Wi-Fi router.
- Double tap the power button on the robot to enter Wi-Fi pairing mode (indicator light will flash).
- In the app, tap '+' to add a device, then select 'Small Home Appliance' > 'Robot Vacuum'.
- Follow the on-screen instructions to connect the robot to your home Wi-Fi network (2.4GHz only).
6. Operating Instructions
6.1 Starting and Stopping Cleaning
- To Start: Press the power button on the robot or the 'Clean' button on the remote/app.
- To Pause: Press the power button on the robot or the 'Pause' button on the remote/app during cleaning.
- To Stop: Press the power button on the robot or the 'Stop' button on the remote/app.
6.2 Cleaning Modes
The Luby HI3 offers various cleaning modes for different needs:

Figure 6.1: Visual representation of the robot vacuum performing Spot Cleaning, Edge Cleaning, and L-Shape Cleaning patterns.
- Auto Cleaning: The robot intelligently navigates and cleans the entire floor area.
- Spot Cleaning: Focuses on a specific dirty area, cleaning in a spiral pattern. Ideal for concentrated spills.
- Edge Cleaning: Cleans along walls and furniture edges to ensure thorough coverage.
- L-Shape Cleaning: A specific pattern for cleaning rooms, often used in conjunction with auto cleaning.
6.3 Floor Type Adaptability
The Luby HI3 is designed for versatile cleaning across different floor types, including hard floors and carpets.

Figure 6.2: The robot vacuum seamlessly moves from a hard floor onto a carpet, illustrating its multi-surface cleaning capability.
Its design allows it to climb over small obstacles, such as carpet edges, up to 20 degrees.
6.4 Slim Design for Under-Furniture Cleaning
With a height of approximately 2.9 inches, the Luby HI3 can easily clean under most furniture, including sofas and beds, reaching hidden areas.
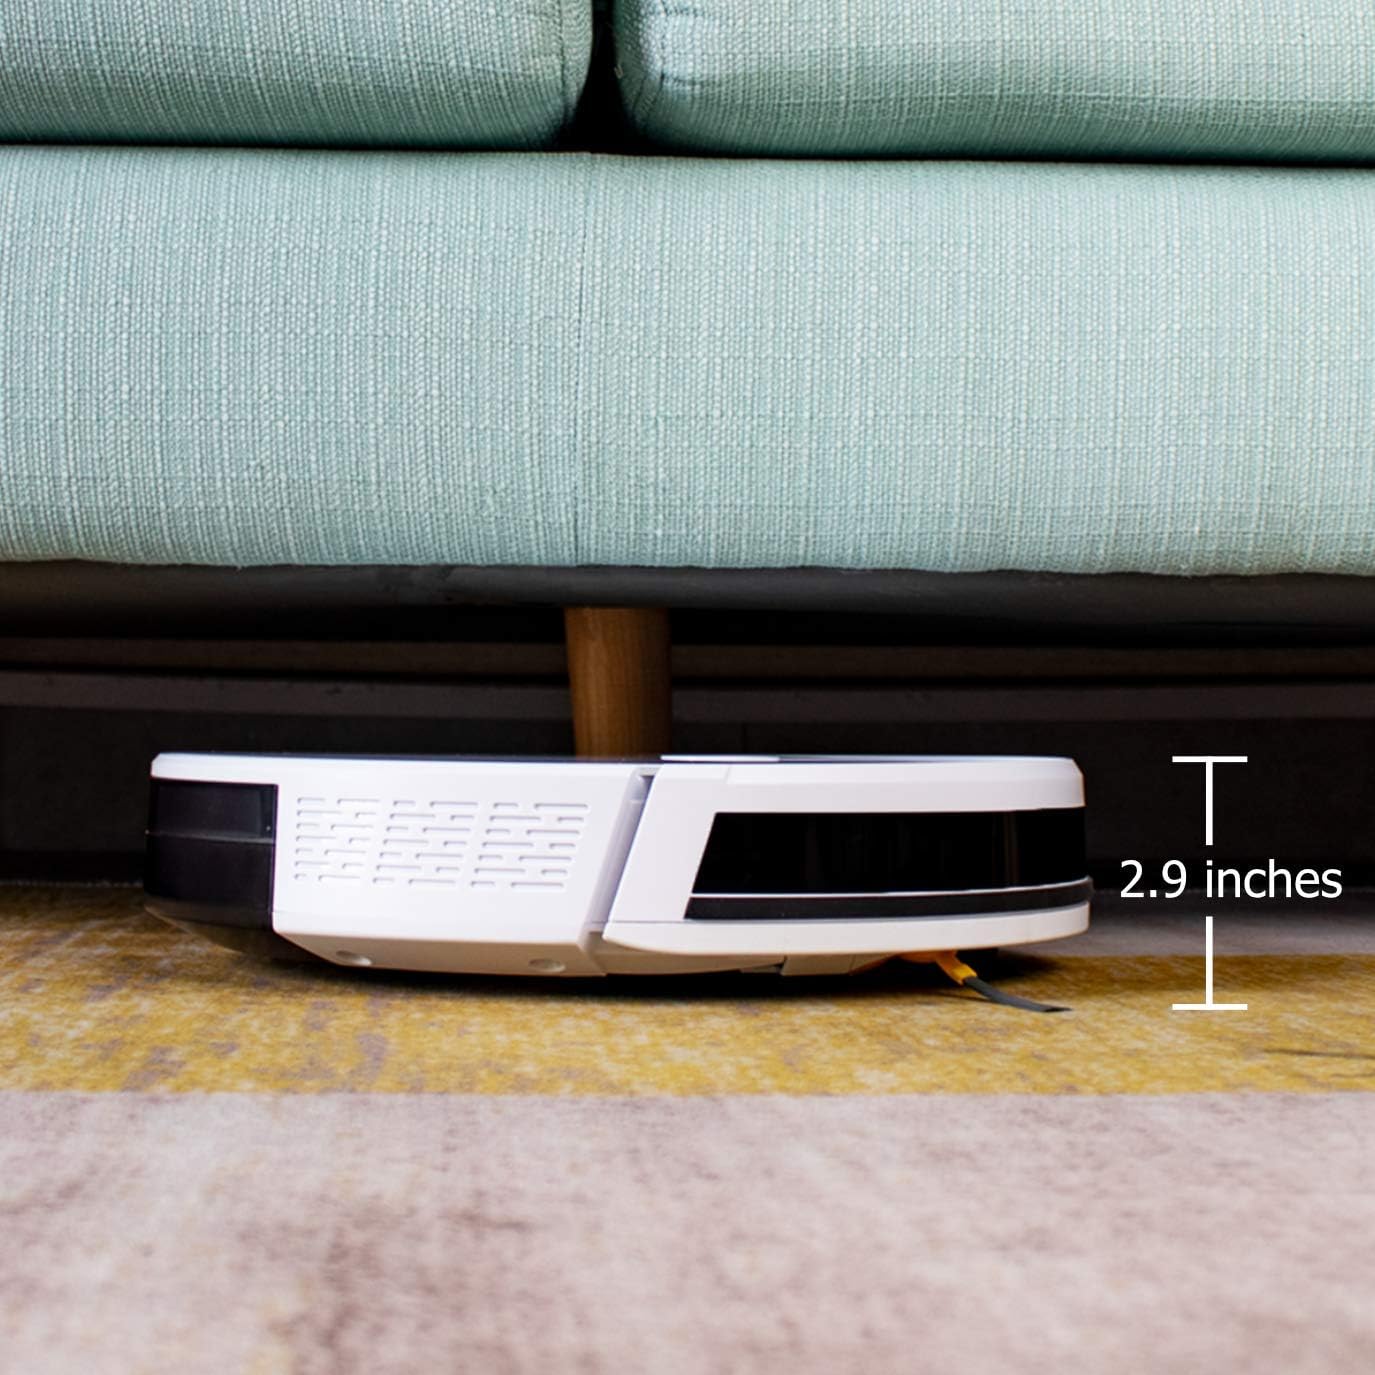
Figure 6.3: The robot vacuum positioned under a sofa, demonstrating its ability to clean low-clearance areas due to its 2.9-inch height.
6.5 Powerful Suction
The robot vacuum features strong suction power to effectively pick up dirt, dust, crumbs, and pet hair from various surfaces.

Figure 6.4: The robot vacuum actively collecting various debris from a floor, illustrating its powerful suction capability.
6.6 Quiet Operation
The Luby HI3 operates at a low noise level, typically under 65 dB, allowing for cleaning without significant disturbance.

Figure 6.5: The robot vacuum operating in a room while a child sleeps nearby, highlighting its quiet performance (under 65 dB).
7. Maintenance
Regular maintenance ensures optimal performance and extends the lifespan of your robot vacuum.
7.1 Emptying the Dustbin
Empty the dustbin after each cleaning cycle or when the 'Dustbin Full' indicator appears. Open the top cover, remove the dustbin, open its lid, and discard the contents. Rinse the dustbin with water if necessary, ensuring it is completely dry before reinstallation.
7.2 Cleaning the Filters
The robot vacuum uses a multi-layer filtration system. Tap the primary filter to remove loose dirt. The high-efficiency filter should be cleaned with a brush tool. Replace filters every 3-6 months, depending on usage.
7.3 Cleaning the Side Brushes
Periodically check the side brushes for tangled hair or debris. Gently pull them off, remove any obstructions, and reattach them. Replace worn or damaged brushes.
7.4 Cleaning the Sensors
Wipe the anti-drop sensors (located on the bottom) and anti-collision sensors (on the bumper) with a clean, dry cloth. Keep them free of dust and debris to ensure proper navigation.
8. Troubleshooting
If you encounter issues with your Luby HI3, refer to the following common problems and solutions:
| Problem | Possible Cause | Solution |
|---|---|---|
| Robot does not turn on. | Low battery; Power switch off. | Charge the robot; Ensure power switch is on. |
| Robot does not charge. | Charging contacts dirty; Charging dock not powered. | Clean charging contacts on robot and dock; Ensure dock is plugged in. |
| Robot gets stuck frequently. | Obstacles in path; Sensors dirty. | Clear cables, rugs, and small objects; Clean sensors. |
| Poor cleaning performance. | Dustbin full; Brushes tangled; Filter clogged. | Empty dustbin; Clean/replace brushes; Clean/replace filter. |
| Cannot connect to Wi-Fi. | Incorrect Wi-Fi password; Router too far; 5GHz network. | Verify password; Move robot closer to router; Ensure 2.4GHz network is used. |
9. Specifications
Detailed technical specifications for the Luby HI3 Robot Vacuum Cleaner:
| Feature | Specification |
|---|---|
| Brand | Luby |
| Model Number | HI3 |
| Color | All White |
| Package Dimensions | 47.75 x 41 x 14 cm |
| Item Weight | 2.7 Kilograms |
| Noise Level | 75 Decibels (typically under 65 dB during operation) |
| Special Feature | Wireless |
| Surface Recommendation | Carpet, Hard Floors |
| Controller Type | App Control, Remote Control |
| Included Components | Side Brush, Filter |
| Filter Type | Fabric and Foam |
| Battery Composition | Lithium-ion (2500 mAh capacity) |
10. Warranty and Support
For warranty information and customer support, please refer to the documentation included with your purchase or contact the retailer/manufacturer directly. Keep your proof of purchase for warranty claims.


