1. Introduction
Thank you for choosing the Vexus YZC-701 Digital Biometric Lock. This advanced security device provides convenient and secure access to your property using multiple authentication methods, including fingerprint, access card, and traditional key. Please read this manual carefully before installation and operation to ensure proper use and optimal performance.
2. Safety Information
- Do not attempt to disassemble or repair the lock yourself. Contact qualified personnel for service.
- Use only the specified battery type and ensure correct polarity during installation.
- Keep the lock away from water and direct sunlight to prevent damage.
- Ensure all components are securely fastened during installation to prevent malfunction.
- Always keep a physical key in a safe, accessible location outside the property for emergency access.
3. Package Contents
Verify that all items are present in the package:
- Front Panel Assembly
- Rear Panel Assembly
- Mortise Lock Body
- Strike Plate and Box
- Mounting Screws and Accessories
- Mechanical Keys (2-3 pcs)
- Access Cards (2-3 pcs)
- User Manual (this document)
4. Product Overview
The Vexus YZC-701 lock consists of an exterior panel with a fingerprint sensor and card reader, and an interior panel with a battery compartment and manual lock/unlock switch.
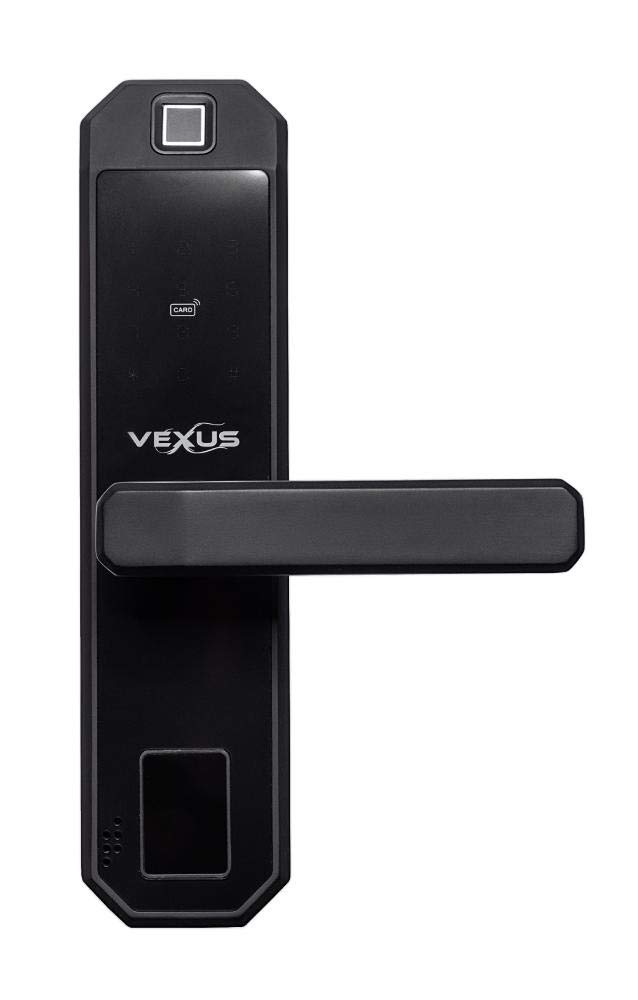
Image 1: Overview of the Vexus YZC-701 Digital Biometric Lock, showing both the exterior (left) and interior (right) panels. The exterior panel features a fingerprint sensor at the top, a card reader area, and the Vexus logo. The interior panel includes a manual lock/unlock switch and a battery cover.
4.1 Exterior Panel Features
- Fingerprint Sensor: Located at the top for biometric authentication.
- Card Reader: For access card authentication.
- Keyhole: For emergency mechanical key access.
- Handle: To operate the latch.
4.2 Interior Panel Features
- Battery Compartment: Houses the power source for the lock.
- Manual Lock/Unlock Switch: For manual operation from inside.
- Handle: To operate the latch.
5. Setup and Installation
Professional installation is recommended. Ensure the door thickness and backset are compatible with the lock specifications before proceeding.
5.1 Prepare the Door
- Measure the door thickness and backset to confirm compatibility.
- Drill necessary holes for the mortise lock body and mounting posts according to the provided template.
5.2 Install the Mortise Lock Body
- Insert the mortise lock body into the prepared hole on the door edge.
- Secure it with the provided screws.
5.3 Install the Exterior Panel
- Pass the data cable and spindle through the mortise lock body.
- Align the exterior panel with the door and secure it loosely with mounting screws.
5.4 Install the Interior Panel
- Connect the data cable from the exterior panel to the interior panel.
- Align the interior panel with the door, ensuring the spindle engages correctly.
- Secure the interior panel with the remaining mounting screws. Tighten all screws firmly.
5.5 Install Batteries
- Open the battery compartment cover on the interior panel.
- Insert the required number of AA alkaline batteries, observing correct polarity.
- Close the battery compartment cover. The lock will typically emit a startup sound.
5.6 Install Strike Plate and Box
- Install the strike box into the door frame.
- Install the strike plate over the strike box, ensuring proper alignment with the mortise latch.
6. Operating Instructions
6.1 Initial Setup (Administrator Registration)
The first fingerprint or card registered will automatically be set as the administrator. This administrator is required to add or delete other users.
- Press the 'Enroll' button (usually located inside the battery compartment or on the interior panel).
- Place your finger on the fingerprint sensor multiple times as prompted by the voice guide or indicator lights.
- Alternatively, present an access card to the card reader multiple times.
- Upon successful registration, the lock will confirm with a voice prompt or indicator.
6.2 Adding User Fingerprints/Cards
- Activate the lock (e.g., by touching the keypad or pressing a button).
- Enter the administrator's fingerprint or present the administrator's card.
- Follow the voice prompts to select the 'Add User' option.
- Register the new user's fingerprint or card as instructed.
6.3 Deleting User Fingerprints/Cards
- Activate the lock.
- Enter the administrator's fingerprint or present the administrator's card.
- Follow the voice prompts to select the 'Delete User' option.
- Select the specific user to delete or choose to delete all users (refer to specific lock prompts).
6.4 Unlocking the Door
- By Fingerprint: Place a registered finger on the sensor. If recognized, the lock will unlock.
- By Access Card: Present a registered access card to the card reader. If recognized, the lock will unlock.
- By Mechanical Key: Insert the mechanical key into the keyhole and turn to unlock.
6.5 Locking the Door
- Automatic Locking: The lock may automatically re-lock after a few seconds once the door is closed.
- Manual Locking (from inside): Use the manual lock/unlock switch on the interior panel.
7. Maintenance
- Cleaning: Wipe the lock surface with a soft, dry cloth. Do not use abrasive cleaners or solvents.
- Battery Replacement: When the low battery warning sounds or the indicator light flashes, replace all batteries with new AA alkaline batteries. Ensure correct polarity.
- Sensor Care: Keep the fingerprint sensor clean and dry for optimal performance.
8. Troubleshooting
- Lock not responding: Check battery level. Replace batteries if low. Ensure cables are properly connected if recently installed.
- Fingerprint not recognized: Ensure your finger is clean and dry. Try different angles or re-register your fingerprint if issues persist.
- Access card not recognized: Ensure the card is correctly presented to the reader. Re-register the card if necessary.
- Lock does not engage/disengage: Check for any obstructions in the door frame or latch. Ensure the mortise lock body is properly aligned.
- No voice prompts/indicator lights: Check battery level.
9. Specifications
| Feature | Detail |
|---|---|
| Brand | Vexus |
| Model | YZC-701 |
| ASIN | B084T8LNZD |
| Unlock Methods | Fingerprint, Access Card, Mechanical Key |
| Power Supply | AA Batteries (quantity not specified, typically 4x or 8x) |
| Operating Temperature | Varies by environment (typical range: -20°C to 60°C) |
| Door Thickness Compatibility | Varies by model (refer to installation template) |
10. Warranty and Support
For warranty information and technical support, please refer to the documentation provided at the time of purchase or contact your retailer. Keep your proof of purchase for warranty claims.


