1. Introduction
Thank you for purchasing the BRUNO Radio 2-Way Joyful Clock. This versatile timepiece is designed for both desk and wall use, featuring radio-controlled time synchronization for accurate timekeeping and a clear analog display. Please read this manual carefully before use to ensure proper operation and to maximize the lifespan of your clock.
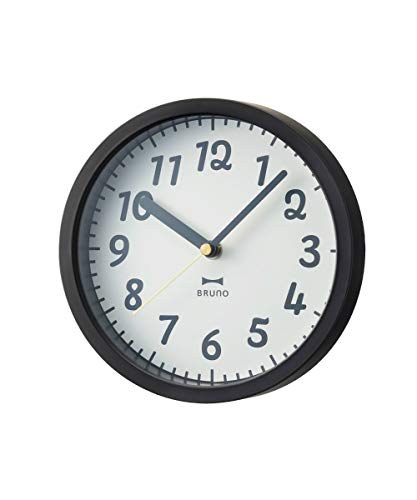
An image displaying six BRUNO Radio 2-Way Joyful Clocks. The clocks are round with white faces and black numbers, featuring different colored frames: black, pink, mint green, yellow, white, and light blue. The black clock is positioned at the top right, with the pink and mint green clocks below it. The white and light blue clocks are at the bottom left and right, respectively. The image highlights the compact size and color variety of the clock series.
2. Package Contents
Please check that all items are present in the package:
- BRUNO Radio 2-Way Joyful Clock unit
- Integrated Stand (for desk use)
- AA Battery (1x)
- Instruction Manual (this document)
3. Safety Information
To ensure safe operation and prevent damage, please observe the following:
- Read all instructions thoroughly before using the product.
- Keep the clock out of reach of small children.
- Do not expose the clock to extreme temperatures, high humidity, direct sunlight, or strong magnetic fields.
- Use only the specified battery type (1x AA battery).
- Ensure correct battery polarity when inserting.
- Remove batteries if the clock will not be used for an extended period to prevent leakage.
- Dispose of used batteries according to local regulations.
- Do not attempt to disassemble or repair the clock yourself. Contact qualified personnel for service.
4. Setup
4.1 Battery Installation
- Open the battery compartment cover located on the back of the clock.
- Insert one AA battery, ensuring the positive (+) and negative (-) terminals align correctly with the markings inside the compartment.
- Close the battery compartment cover securely.
4.2 Initial Time Setting (Radio Reception)
After battery installation, the clock will automatically attempt to receive the radio time signal. This process may take several minutes to a few hours depending on your location and environmental conditions.
- Place the clock near a window or in an open area for optimal signal reception.
- The clock supports automatic switching between 40kHz and 60kHz radio frequencies.
- Once the signal is successfully received, the clock hands will automatically adjust to the correct time.
Note: This product does not feature an ON/OFF switch for the radio reception function. It continuously attempts to synchronize.
4.3 Manual Time Setting (If Radio Signal is Not Received)
If the radio signal is not received after an extended period (e.g., overnight), or if you are in an area with poor reception, you can manually set the time:
- Locate the time adjustment dial (or button) on the back of the clock.
- Rotate the dial or press the button repeatedly to move the clock hands to the correct time.
- The clock will continue to attempt radio synchronization even after manual setting. If a signal is later received, it will override the manual setting.
4.4 Placement
The BRUNO Radio 2-Way Joyful Clock is designed for versatile placement:
- Desk Clock: Use the integrated stand to place the clock on any flat, stable surface.
- Wall Clock: Utilize the hanging slot on the back of the clock to mount it securely on a wall hook or screw. Ensure the chosen location is stable and free from excessive vibrations.
5. Operating the Clock
Once the battery is installed and the time is set (either automatically via radio signal or manually), the clock will operate continuously.
- The clock features an analog display with hour, minute, and second hands.
- The second hand moves in a distinct step motion, not a continuous sweep. This is a normal characteristic of the clock.
- The radio control function ensures accurate timekeeping by periodically synchronizing with the atomic clock signal.
6. Maintenance
6.1 Cleaning
- Wipe the clock's surface with a soft, dry cloth.
- Do not use abrasive cleaners, solvents, or chemical sprays, as these can damage the finish or internal components.
6.2 Battery Replacement
- Replace the AA battery when the clock stops functioning or if the time becomes consistently inaccurate despite radio synchronization attempts.
- Always use a new, high-quality AA battery for optimal performance.
7. Troubleshooting
| Problem | Possible Cause | Solution |
|---|---|---|
| Clock is not working / Hands are not moving. | Battery is dead or incorrectly installed. | Check battery installation. Replace with a new AA battery, ensuring correct polarity. |
| Clock shows incorrect time / Not receiving radio signal. | Poor radio signal reception due to location or interference. | Move the clock to a location with better radio signal reception, such as near a window, away from electronic devices. Allow several hours for the clock to receive the signal. If the issue persists, manually set the time. |
| Second hand moves in distinct steps, not smoothly. | This is a normal feature of the clock. | No action required. The clock is functioning as designed with a step second hand. |
8. Specifications
- Model: BCR017-BK
- Dimensions: W180mm x H180mm x D50mm (approx. 7.1 x 7.1 x 2.0 inches)
- Weight: 245g (approx. 0.54 lbs)
- Materials: Body: ABS resin, Lens: Glass
- Functions: Radio reception (40/60kHz automatic switching), Step second hand, Desk/Wall mountable
- Power Source: AA battery x 1
- Display Type: Analog
- Style: Modern
- Shape: Round
- Country of Origin: China
9. Warranty and Support
For warranty information, please refer to the documentation included with your purchase or visit the official BRUNO website. If you require technical support or have questions not covered in this manual, please contact BRUNO customer service through their official channels.
BRUNO Official Website: https://bruno-inc.com/ (Please note this is a general link and may not be specific to your region. Search for BRUNO customer support in your country.)


