
Introduction
This manual provides detailed instructions for the safe installation, operation, and maintenance of your Crystorama Lucille 6 Light Antique Silver Chandelier. Please read all instructions carefully before beginning installation and retain this manual for future reference.
The Lucille collection features a versatile transitional design, embracing natural materials' imperfections and raw beauty. This chandelier is adorned with oversized faceted cut crystal drops and finished in an Antique Silver metal, a mid-tone gray with lavender and blue undertones, ideal for various interior settings.
Safety Information
WARNING: Risk of electric shock. Disconnect power at the fuse box or circuit breaker before installation or servicing.
- All electrical connections must be in accordance with local codes, ordinances, or the National Electric Code (NEC).
- Consult a qualified electrician if you are unsure about the installation process.
- Use only UL listed wire connectors.
- Do not exceed the maximum wattage specified for the bulbs.
- This fixture is authorized for use in dry interior locations only.
- Proposition 65 Warning: This product can expose you to chemicals including lead, which is known to the State of California to cause cancer and birth defects or other reproductive harm. For more information go to www.P65Warnings.ca.gov.
What's in the Box
Please verify that all components are present and undamaged before beginning installation.
- Chandelier Frame Assembly
- Crystal Drops (various sizes)
- Mounting Hardware (Canopy, Mounting Plate, Screws, Wire Nuts)
- Chain and Loop
- Instruction Manual
- Note: Bulbs are not included.
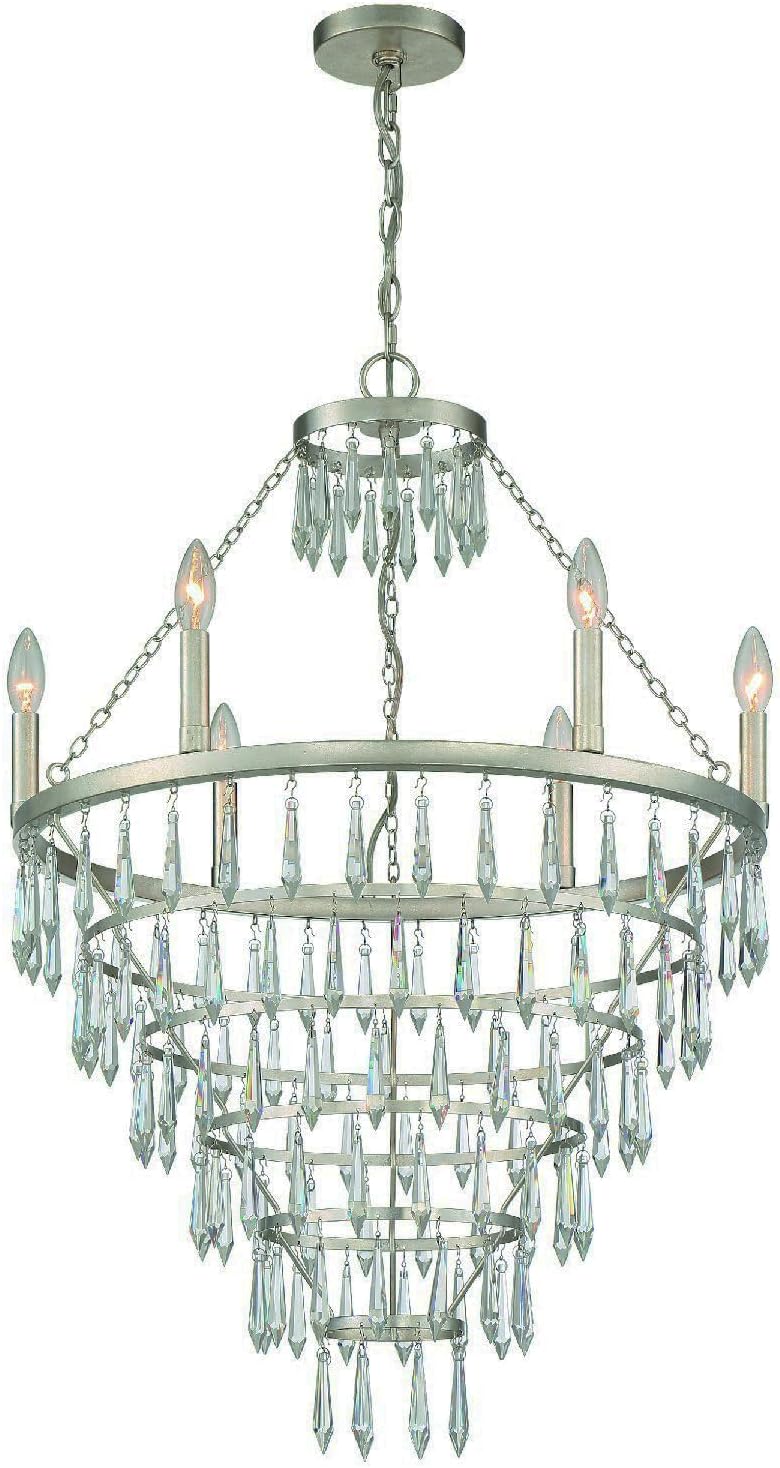
Image: The Crystorama Lucille 6 Light Antique Silver Chandelier, showcasing its elegant design with crystal drops and antique silver finish.
Setup and Installation
Professional installation is recommended. Ensure you have the necessary tools: screwdriver, wire strippers, electrical tape, and safety glasses.
- Turn Off Power: Locate the circuit breaker or fuse box that controls the power to the light fixture. Turn off the power completely before starting any work.
- Prepare Mounting: Attach the mounting plate to the junction box in the ceiling. Ensure it is securely fastened.
- Adjust Chain Length: Determine the desired hanging height for your chandelier. Adjust the chain length by removing links as needed. Thread the electrical wires through the chain and canopy.
- Wire Connections:
- Connect the fixture's ground wire (bare copper or green) to the house's ground wire.
- Connect the fixture's neutral wire (white) to the house's neutral wire (white).
- Connect the fixture's hot wire (black or smooth) to the house's hot wire (black or ribbed).
- Secure all connections with UL listed wire nuts and wrap with electrical tape.
- Secure Canopy: Carefully push the canopy up to the ceiling, covering the junction box, and secure it with the provided screws or collar ring.
- Attach Crystal Drops: Individually attach the crystal drops to the designated hooks on the chandelier frame. Refer to the product image for the correct placement and arrangement of the crystal drops.
- Install Bulbs: Insert six E12 Candelabra base bulbs (not included) into the sockets. Do not exceed 60 watts per bulb.
- Restore Power: Once installation is complete and all connections are secure, restore power at the circuit breaker or fuse box.

Image: The chandelier with key dimensions: 24 inches width, 35 inches height (fixture only), and a total hanging height of up to 107.75 inches including the chain and canopy.

Image: A close-up view of the faceted crystal drops, highlighting their intricate design and how they attach to the chandelier frame.
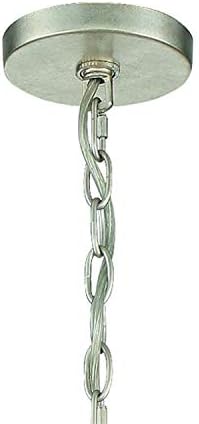
Image: A detailed view of the ceiling canopy and chain, showing the components that connect the chandelier to the ceiling junction box.
Operating Instructions
The Crystorama Lucille Chandelier operates via a standard wall switch connected to its electrical circuit.
- Turning On/Off: Use the wall switch to turn the chandelier on or off.
- Dimmable Feature: This fixture is dimmable. If connected to a compatible dimmer switch (sold separately) and using dimmable bulbs, you can adjust the light intensity.
- Bulb Requirements: Requires six E12 Candelabra base bulbs, maximum 60 watts per bulb. LED or CFL equivalent bulbs can be used.
Maintenance
Regular maintenance will help preserve the appearance and functionality of your chandelier.
- Cleaning:
- Always turn off power and allow the fixture to cool before cleaning.
- Dust the fixture with a soft, dry cloth.
- For crystal components, use a soft, damp cloth with a mild glass cleaner. Avoid abrasive cleaners or harsh chemicals that may damage the finish or crystals.
- Do not spray cleaner directly onto the fixture; apply it to the cloth first.
- Bulb Replacement:
- Ensure power is off and bulbs are cool before replacing.
- Carefully unscrew the old bulb and screw in the new E12 Candelabra base bulb, ensuring it is no more than 60 watts.
Troubleshooting
If you encounter issues with your chandelier, refer to the following common problems and solutions:
| Problem | Possible Cause | Solution |
|---|---|---|
| Light does not turn on. |
|
|
| Light flickers. |
|
|
| Fixture hums. |
|
|
If problems persist, contact a qualified electrician or Crystorama customer support.
Specifications
| Feature | Detail |
|---|---|
| Brand | Crystorama |
| Model Number | LUC-A9066-SA |
| Collection | Lucille |
| Color | Antique Silver |
| Material | Glass, Metal |
| Style | Transitional |
| Light Fixture Form | Ceiling Chandelier |
| Product Dimensions (Fixture) | 24"L x 24"W x 35"H |
| Item Weight | 13.9 Pounds |
| Indoor/Outdoor Usage | Indoor |
| Power Source | Hardwired |
| Special Feature | Dimmable |
| Light Source Type | E12 Candelabra |
| Number of Light Sources | 6 |
| Maximum Compatible Wattage | 60 Watts per bulb (360 watts total) |
| Voltage | 120 Volts |
| Included Components | Bulbs not included |
| Embellishment | Crystal |
| Certification | UL Listed |
| UPC | 633779041587 |
Warranty and Support
Warranty: This Crystorama product comes with a 1-Year Warranty from the date of purchase, covering defects in materials and workmanship under normal use.
Customer Support: For technical assistance, replacement parts, or warranty claims, please contact Crystorama customer service. Refer to the official Crystorama website for contact information.
You can visit the Crystorama Store on Amazon for more information: Crystorama Store


