1. Introduction
This manual provides comprehensive instructions for the safe and effective use of your Stanley Multi-Line 4V1H STHT77514-1 Cross Line Laser. Please read this manual thoroughly before operating the device to ensure proper function and to prevent injury or damage.
The Stanley STHT77514-1 is a precision instrument designed for various leveling and alignment applications, projecting bright red laser lines for accurate measurements.
2. Product Features and Components

Figure 2.1: Front view of the Stanley Multi-Line 4V1H Cross Line Laser, showing its compact design and integrated tripod base.
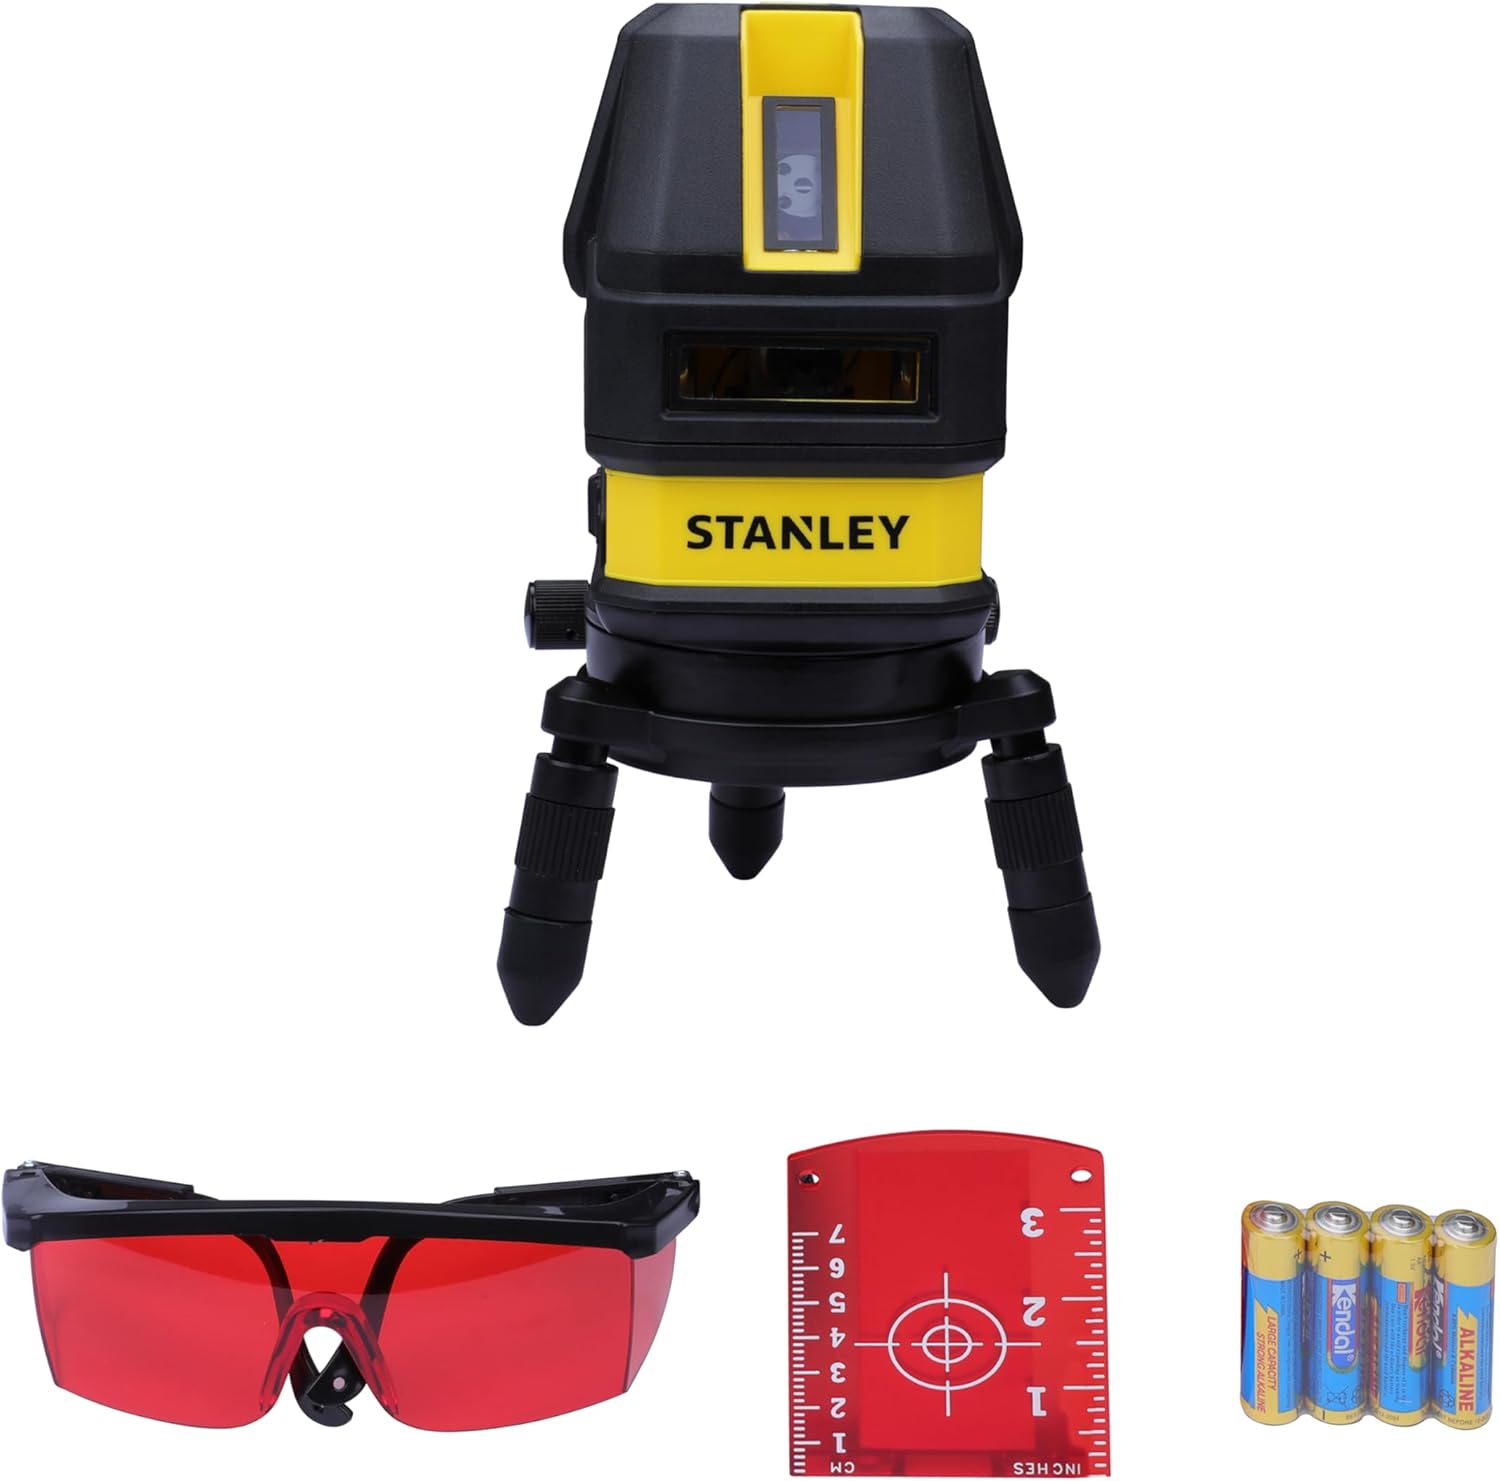
Figure 2.2: The laser level shown with included accessories: red laser enhancement glasses, a magnetic target plate, and four AA batteries.
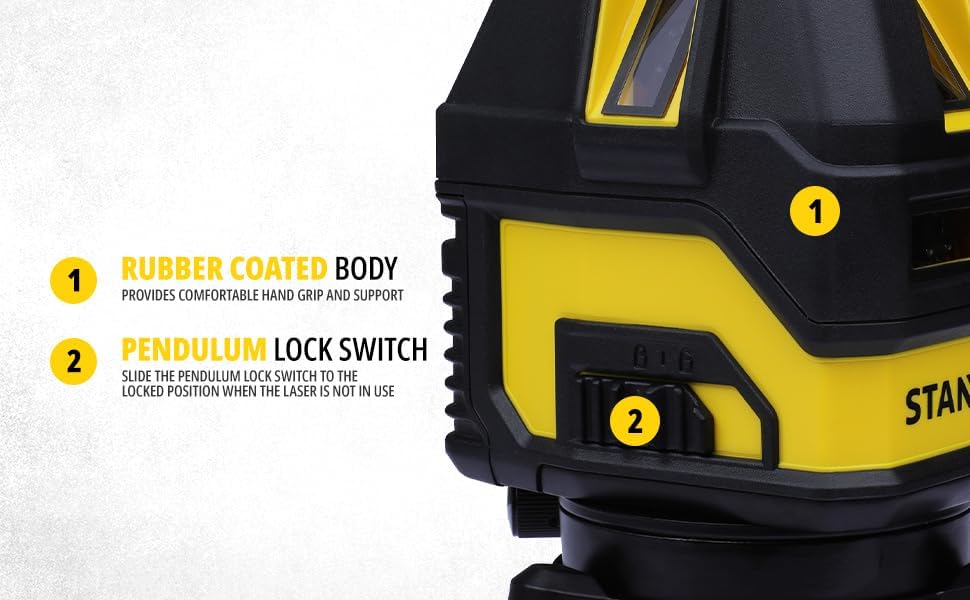
Figure 2.3: Detail view highlighting the rubber-coated body for enhanced grip and durability, and the pendulum lock switch (labeled '2') for securing the internal mechanism during transport or for projecting angled lines.

Figure 2.4: Top-down view of the control panel, featuring buttons for power, mode selection (horizontal/vertical lines), and a bubble level for initial coarse leveling.
Key Features:
- Model: STHT77514-1
- Laser Accuracy: ±4 mm at 10 meters
- Working Range: Up to 10 meters
- Laser Wavelength: 630 - 680 nm (Visible Red Laser)
- Laser Power: ≤1.5 mW
- Body Material: Durable Metal with Rubber Coating
- Pendulum Lock Switch: For secure transport and manual mode operation.
- Self-Leveling: Automatically levels within its range.
3. Setup
3.1 Battery Installation
- Locate the battery compartment cover, typically on the rear or bottom of the unit.
- Open the cover by sliding or unlatching it.
- Insert four (4) AA batteries, ensuring correct polarity (+/-) as indicated inside the compartment.
- Close the battery compartment cover securely.
3.2 Positioning the Laser
- Place the laser on a stable, level surface or mount it on a compatible tripod.
- Ensure the pendulum lock switch is in the unlocked position for self-leveling operation. The lock symbol is typically an open padlock.
- For best accuracy, ensure the bubble level on top of the unit is centered before activating the laser.
4. Operating Instructions
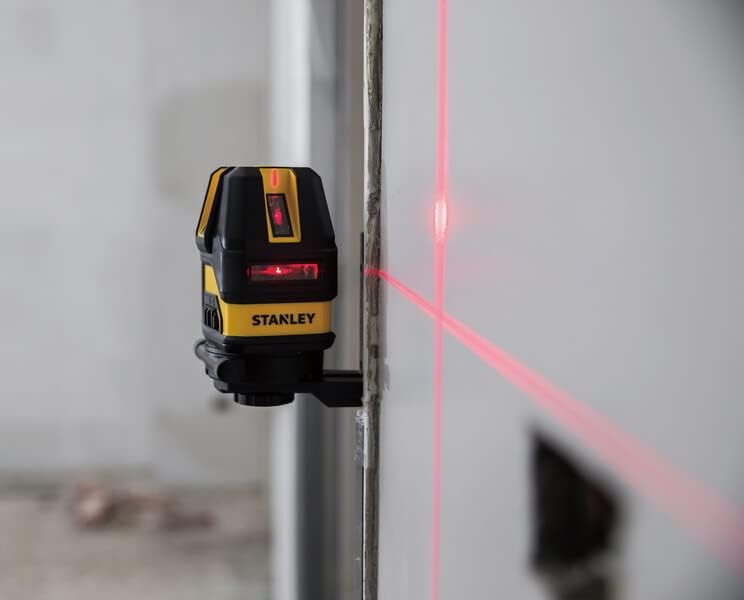
Figure 4.1: The laser level projecting a bright red cross-line onto a wall, demonstrating its visibility and utility for alignment tasks.

Figure 4.2: A composite image showing the laser level in various applications, including floor leveling, wall alignment, and close-up of the control panel during operation.
4.1 Powering On/Off
- To turn on the laser, press the power button (often marked with a circle and vertical line symbol) on the control panel.
- To turn off the laser, press the power button again.
4.2 Selecting Laser Modes
- After powering on, the laser typically defaults to a cross-line mode (both horizontal and vertical lines).
- Press the mode selection button (often marked with horizontal and vertical line symbols) to cycle through available modes: horizontal line only, vertical line only, or cross-line.
4.3 Self-Leveling Function
- When the pendulum lock is in the unlocked position, the laser will automatically self-level within its specified range.
- If the laser is outside its self-leveling range, the laser lines may flash or an audible alarm may sound, indicating that the unit needs to be adjusted to a more level position.
4.4 Manual Mode (Locked Pendulum)
- To project angled lines, engage the pendulum lock switch. The laser will no longer self-level.
- You can then tilt the unit to project lines at any desired angle. Note that in this mode, the lines are not level.
5. Maintenance
- Cleaning: Use a soft, damp cloth to clean the laser unit. Do not use abrasive cleaners or solvents. Keep the laser apertures clean and free of dust.
- Storage: Store the laser in its protective case in a dry, cool place when not in use. Always engage the pendulum lock before storing or transporting the unit.
- Battery Care: Remove batteries if the unit will not be used for an extended period to prevent leakage and damage.
- Calibration Check: Periodically check the calibration of your laser level by comparing its lines against a known level reference. If accuracy issues are suspected, contact customer support.
6. Troubleshooting
| Problem | Possible Cause | Solution |
|---|---|---|
| Laser does not turn on. | Dead or incorrectly installed batteries. | Check battery polarity; replace with fresh batteries. |
| Laser lines are flashing or unit beeps. | Unit is outside its self-leveling range. | Place the unit on a more level surface. Ensure pendulum lock is disengaged. |
| Laser lines are not level/plumb. | Pendulum lock is engaged (manual mode). | Disengage the pendulum lock for self-leveling operation. |
| Laser lines are dim. | Low batteries or bright ambient light. | Replace batteries. Use laser enhancement glasses in bright conditions. |
7. Specifications
| Attribute | Value |
|---|---|
| Brand | Stanley |
| Model Number | STHT77514-1 |
| Color | Black |
| Dimensions (L x W x H) | 41.5 x 24 x 18 cm |
| Material | Metal |
| Item Weight | 300 grams |
| Laser Accuracy | ±4 mm @ 10M |
| Working Range | 10 M |
| Laser Wavelength | 630 - 680 NM Visible |
| Laser Power | ≤1.5 MW |
| Power Source | 4 x AA Batteries |
8. Warranty and Support

Figure 8.1: Overview of Stanley's Total Care support, including sales and after-sales support, service network, warranty, original parts, information, and omnichannel support.
For detailed warranty information, service, or technical support, please contact Stanley Customer Care using the information below. Keep your purchase receipt as proof of purchase for warranty claims.
Customer Care Contact:
- Phone: 1800-203-0644 (Monday - Saturday, 09:00 AM - 06:00 PM IST, except government holidays)
- Email: SBD-CUSTOMERCOMMUNICATIONS@SBDINC.COM
- WhatsApp: Click to Chat on WhatsApp (+91 96060 55835)
- Authorized Service Centers: Over 500+ locations available.