
1. Introduction
This manual provides essential information for the safe and effective installation, operation, and maintenance of your ECOTRIC Class 3 III Tow Trailer Hitch. Please read all instructions carefully before proceeding with installation or use. Retain this manual for future reference.
2. Vehicle Fitment
This Class 3 III Tow Trailer Hitch is compatible with the following vehicle models and years:
- 2002-2007 Saturn Vue (Except Redline models)
- 2005-2017 Chevy Chevrolet Equinox (All Styles)
- 2006-2009 Pontiac Torrent (All Styles)
- 2010-2017 GMC Terrain (All Styles)
Verify your vehicle's make, model, and year against this list to ensure proper fitment.

Figure 2.1: Visual representation of compatible vehicle models for the trailer hitch.
3. Product Features and Specifications
The ECOTRIC Class 3 III Tow Trailer Hitch is designed for reliable towing performance. Key features and specifications include:
- Receiver Size: Standard 2-inch x 2-inch hitch receiver.
- Material: Stainless Steel construction.
- Finish: Highly durable powder coat finish for corrosion resistance and extended lifespan.
- Maximum Gross Trailer Weight (GTW): 4500 lbs.
- Maximum Tongue Weight (TW): 675 lbs.
- Weight: Approximately 36.5 pounds.
Note: This trailer hitch is not an all-welded structure design.

Figure 3.1: Traction capacity details including max tongue weight and gross trailer weight.

Figure 3.2: The 2-inch receiver supports various towing methods and accessories.
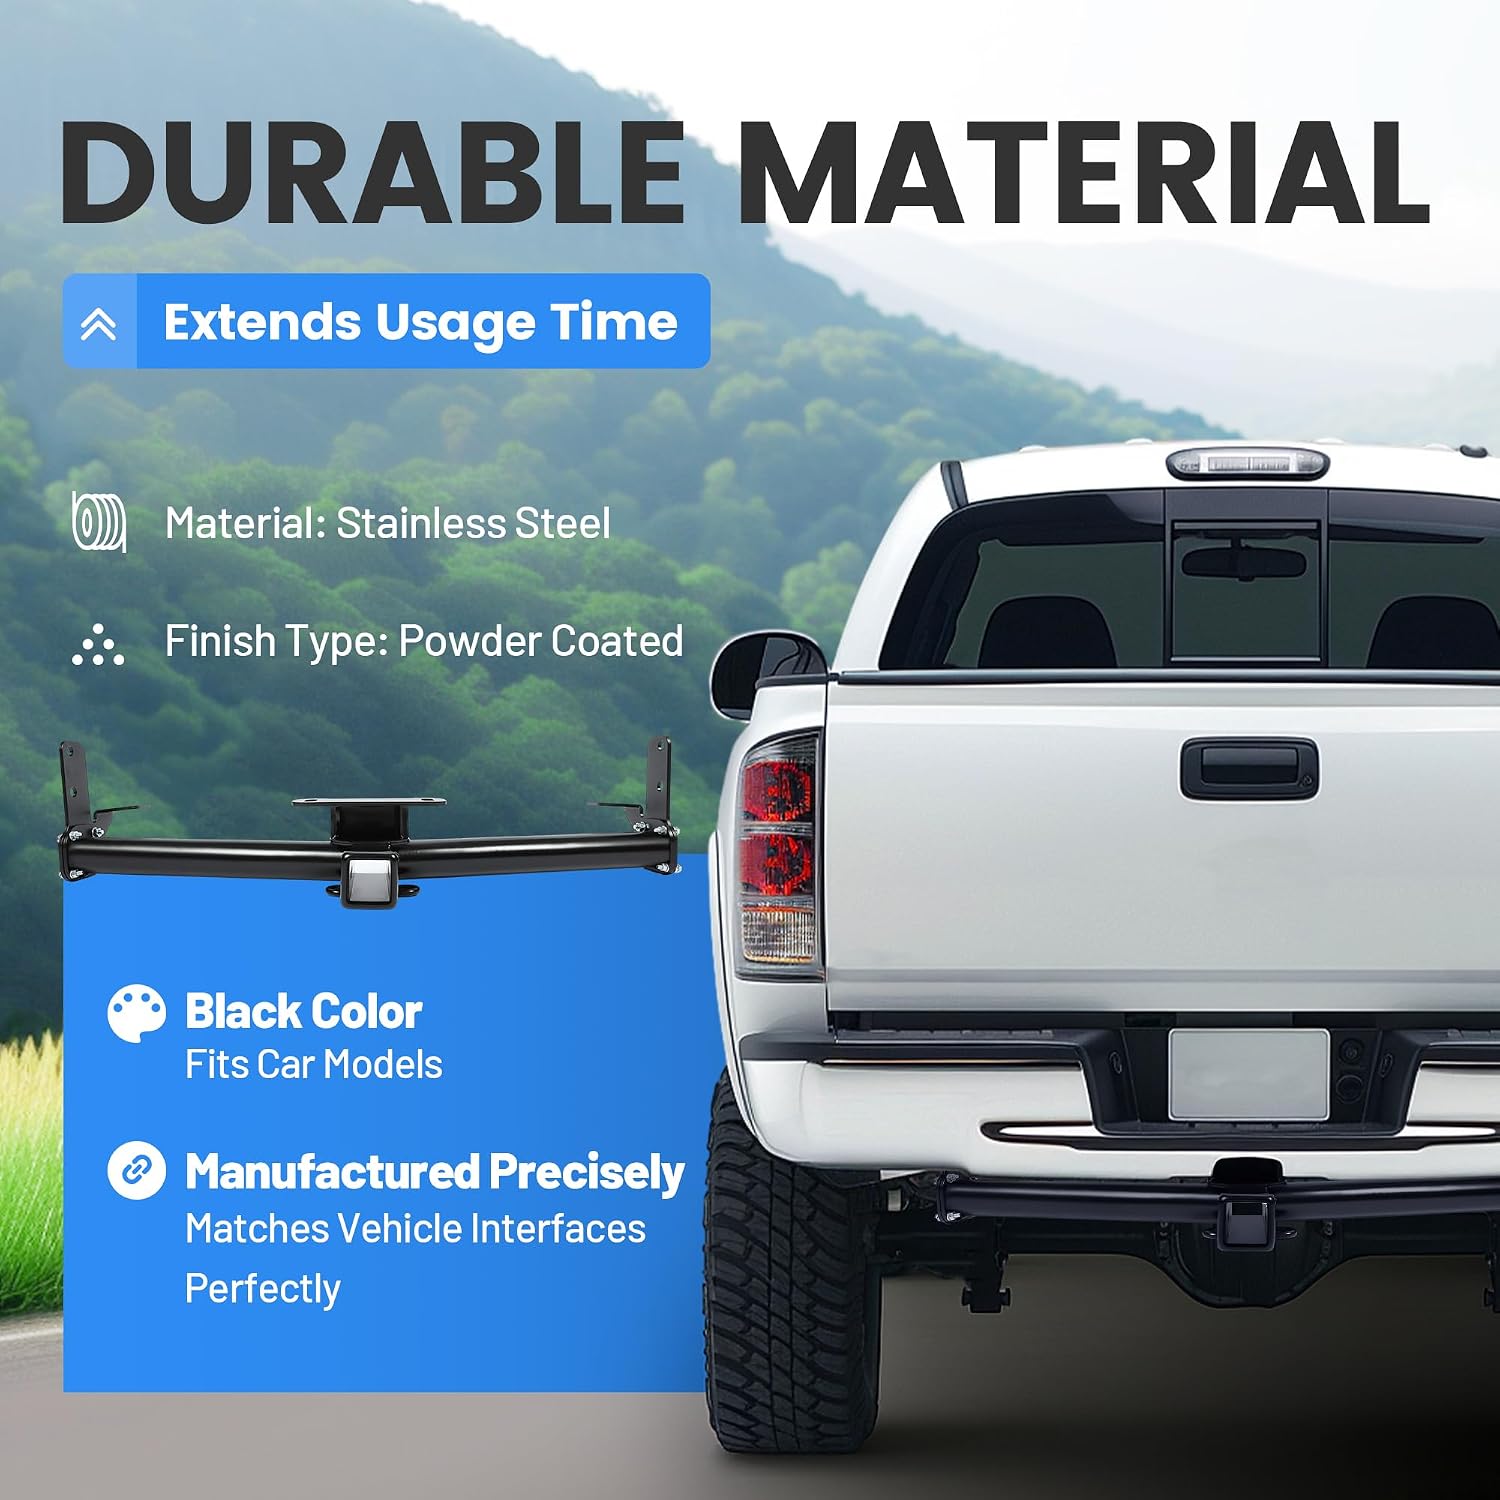
Figure 3.3: The hitch features a durable powder-coated stainless steel construction.
4. Package Contents
Upon opening the package, ensure all components are present:
- 1 x ECOTRIC Class 3 Trailer Hitch
- Mounting Hardware (bolts, washers, nuts, specialized tool for fishing bolts)
Note: An instruction manual is not included in the physical package. This digital manual serves as your primary guide.

Figure 4.1: Contents of the package, including the hitch and hardware.
5. Setup (Installation)
Professional installation is highly recommended for this product. Incorrect installation can lead to product failure and safety hazards. While specific vehicle installation steps may vary, general guidelines are provided below.
5.1 Pre-Installation Checks
- Ensure all package contents are present and undamaged.
- Inspect your vehicle's frame and mounting points for any rust, debris, or damage. Clean out and re-tap weld nuts if necessary (e.g., using an M12 x 1.75 tap) to ensure bolts can be threaded easily.
- Refer to your vehicle's owner's manual for any specific towing or hitch installation requirements.
5.2 General Installation Steps
While detailed vehicle-specific instructions are not provided in this manual, the following video demonstrates a general assembly process for a similar hitch. Use this as a visual aid in conjunction with your vehicle's specific mounting points and the provided hardware.
Video 5.1: Assembly demonstration for a Class III Tow Trailer Hitch. This video illustrates the general process of attaching components and securing the hitch.
Key considerations during installation:
- Position the hitch correctly against the vehicle's frame.
- Use the provided fish wire or specialized tool to guide bolts through the vehicle's sub-frame if necessary.
- Hand-tighten all bolts initially, leaving them slightly loose to allow for adjustment and alignment.
- Once aligned, tighten all bolts to the manufacturer's specified torque settings (refer to your vehicle's service manual or a professional mechanic for exact values).

Figure 5.2: Close-up of the hitch attachment points under the vehicle.
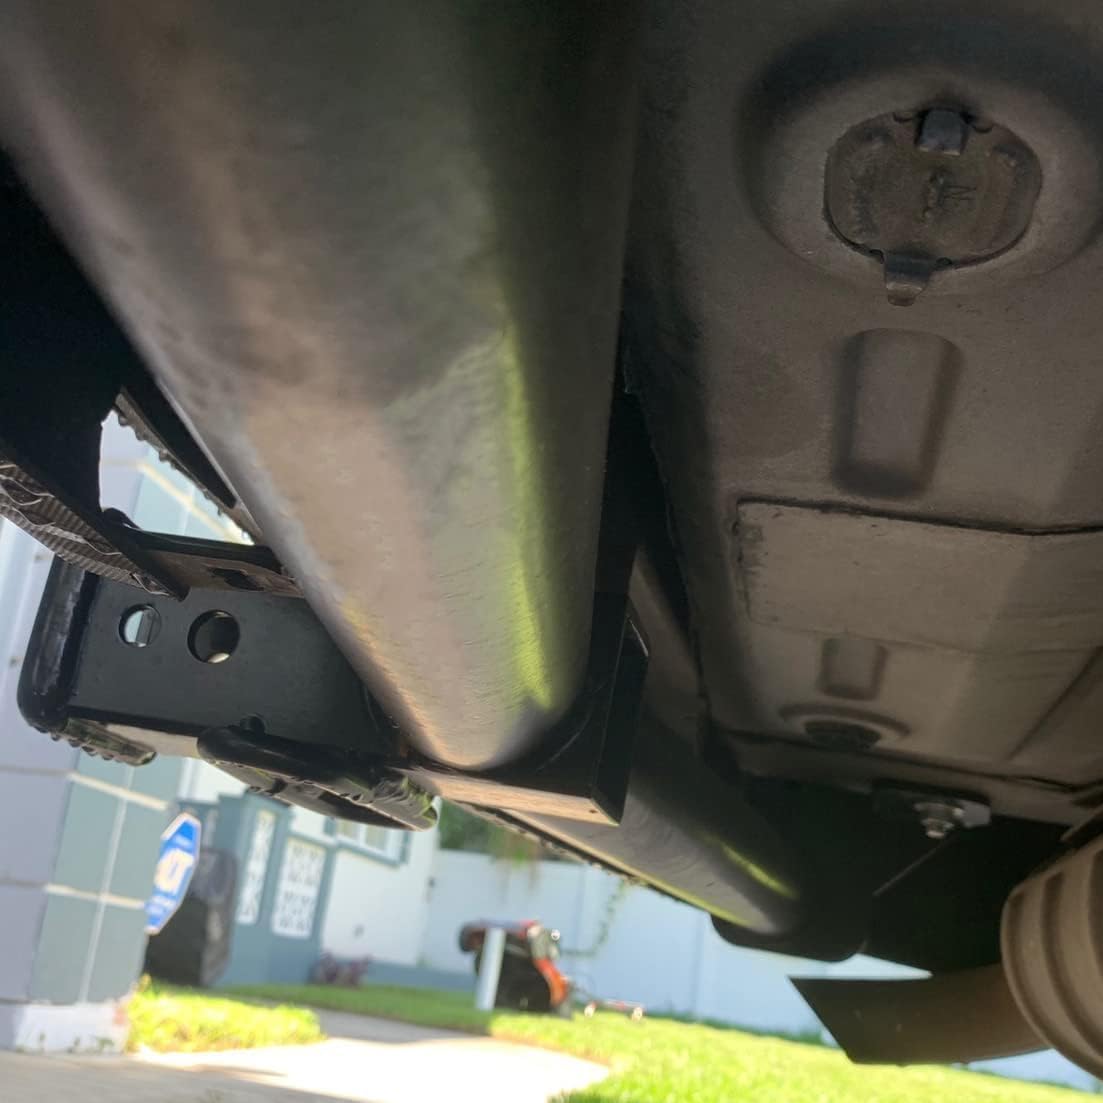
Figure 5.3: Detailed view of the hitch receiver and its secure mounting.
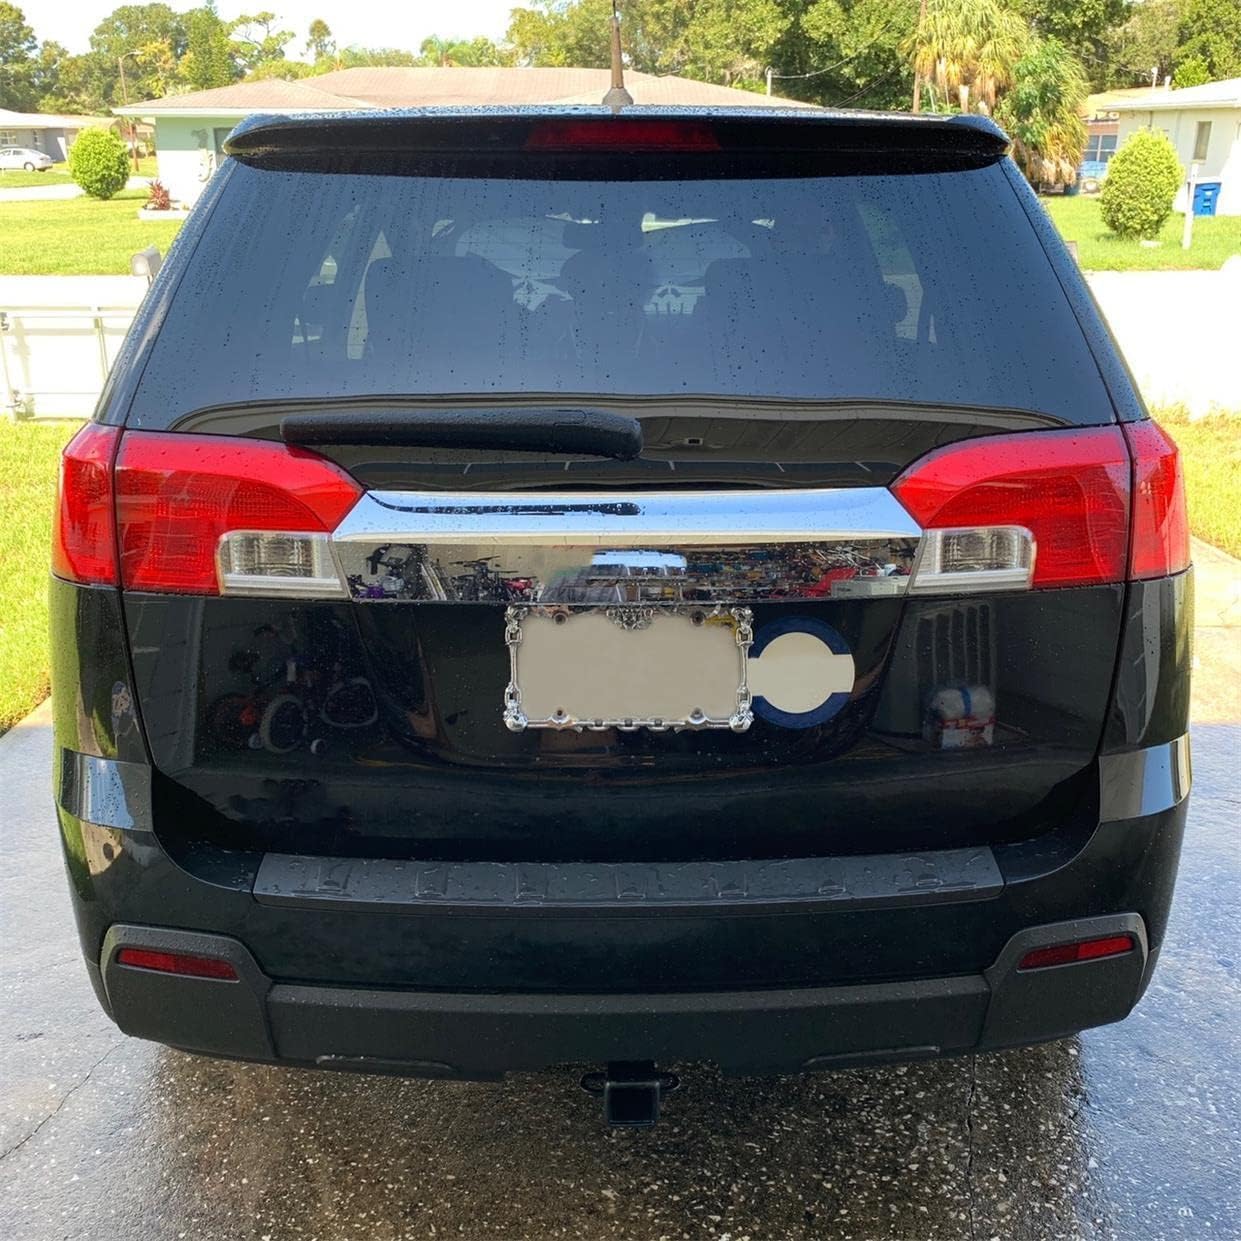
Figure 5.4: Rear view of a vehicle with the trailer hitch installed.
6. Operating (Usage)
The 2-inch x 2-inch receiver allows for a wide range of towing possibilities. Always adhere to the maximum towing capacities to ensure safety and prevent damage.
6.1 Connecting a Trailer
- Insert a compatible ball mount into the 2-inch receiver tube.
- Secure the ball mount with a hitch pin and clip (not included).
- Lower the trailer coupler onto the hitch ball.
- Engage the coupler latch and secure it with a safety pin.
- Attach safety chains from the trailer to the designated chain loops on the hitch.
- Connect trailer wiring (if applicable) to your vehicle's electrical system.
6.2 Using Accessories
The receiver can also accommodate various accessories such as bike racks, cargo carriers, and tow hooks. Ensure any accessory used is compatible with a 2-inch receiver and does not exceed the hitch's tongue weight capacity.
6.3 Weight Distribution
For heavier loads, a weight distribution system can be used with this hitch to distribute trailer tongue weight more evenly across the vehicle's axles. Ensure your weight distribution system is properly installed and adjusted according to its manufacturer's instructions.
7. Maintenance
Regular maintenance will ensure the longevity and safe operation of your trailer hitch.
- Regular Inspection: Periodically inspect the hitch, mounting hardware, and vehicle frame for any signs of rust, cracks, loose bolts, or damage. Address any issues promptly.
- Cleaning: Clean the hitch regularly, especially after exposure to road salt, dirt, or harsh weather conditions. The powder coat finish helps protect against corrosion, but regular cleaning is still beneficial.
- Lubrication: Apply a light coat of grease to the inside of the receiver tube and any moving parts of accessories (e.g., ball mount shank) to prevent rust and ensure smooth operation.
- Torque Check: Re-check the torque of all mounting bolts periodically, especially after the first few uses, to ensure they remain securely fastened.
8. Troubleshooting
This section addresses common issues that may arise during installation or use.
8.1 Difficulty During Installation
- Bolts not threading: This is often due to rust or debris in the vehicle's weld nuts. Use a wire brush and a thread tap (e.g., M12 x 1.75) to clean and re-tap the threads before attempting to install bolts.
- Hitch not aligning: Ensure all bolts are only hand-tightened initially. This allows for slight movement to align the hitch with the mounting holes. Once aligned, tighten gradually and evenly.
- Missing hardware: Verify all components against the package contents list. If parts are missing, contact ECOTRIC customer support.
8.2 Towing Issues
- Excessive sway or instability: Ensure the trailer is loaded correctly, with appropriate tongue weight (typically 10-15% of GTW). Check tire pressure on both the tow vehicle and trailer. Consider a weight distribution hitch or sway control device if issues persist.
- Exceeding capacity: Always verify that the combined weight of the trailer and its contents does not exceed the hitch's or your vehicle's maximum towing capacity.
9. Safety Information
Adhere to all safety precautions when installing and using your trailer hitch:
- Always wear appropriate personal protective equipment (PPE) during installation, including safety glasses and gloves.
- Never exceed the maximum gross trailer weight (GTW) or tongue weight (TW) specified for this hitch or your vehicle, whichever is lower.
- Ensure all connections are secure before towing. Double-check hitch pins, safety chains, and electrical connections.
- Drive cautiously when towing. Allow for increased stopping distances and wider turns.
- Consult your vehicle's owner's manual for specific towing recommendations and limitations.
10. Warranty and Support
Specific warranty details for the ECOTRIC Class 3 III Tow Trailer Hitch are not provided within this manual. For warranty claims, technical support, or inquiries regarding missing parts, please refer to the product's original purchase documentation or contact ECOTRIC customer service directly through their official channels.