1. Introduction
The Hotop 24 Volt 40 VA AC Transformer (Model PS D40) is designed to provide a stable 24V AC power supply for various low-voltage devices. This transformer is suitable for powering smart doorbells, smart thermostats, and other compatible 24V AC devices. It features a 40 VA output capacity and an integrated auto-resetting PTC fuse for enhanced safety and reliability.
This manual provides essential information for the safe and correct installation, operation, and maintenance of your Hotop 24 Volt 40 VA AC Transformer.
2. Safety Information
WARNING: Risk of Electric Shock. Always disconnect power before installation or servicing.
- Ensure the main power supply to the installation area is disconnected at the circuit breaker before beginning any work.
- Wear appropriate personal protective equipment, such as insulating gloves, when handling electrical components.
- The resistor within the unit is not insulated. Exercise caution during installation.
- This transformer is designed for indoor use in dry locations only. Do not expose to moisture or extreme temperatures.
- Do not attempt to open or modify the transformer casing. There are no user-serviceable parts inside.
- Ensure proper ventilation around the transformer during operation.
3. Specifications
| Feature | Detail |
|---|---|
| Model Number | PS D40 |
| Input Voltage | 120 VAC, 60Hz |
| Output Voltage | 24V AC, 40VA (1660mA) |
| Current Rating | 1.5 Amps |
| Product Dimensions | 2.13"D x 2.56"W x 3.94"H |
| Mounting Type | Wall Mount (Plug-in) |
| Safety Features | Auto-resetting (PTC) fused secondary, LED green power indicator |
| Certifications | UL Listed (E508012) |

Figure 3.1: Internal circuit diagram and physical dimensions of the transformer.
4. Setup and Installation
This transformer is designed for easy plug-in installation. However, connecting it to your doorbell or thermostat system requires careful attention to wiring. No wires are included with the transformer.
4.1 General Installation Steps
- Disconnect Power: Before starting, ensure the main power supply to the doorbell or thermostat circuit is turned off at the circuit breaker.
- Identify Terminals: The transformer features three screw terminals: 0V, Ground, and 24V. The middle terminal is intended for the ground wire.
- Wire Connection: Connect the low-voltage wires from your doorbell or thermostat system to the appropriate terminals on the transformer. Refer to the specific wiring diagrams for your device (doorbell/thermostat) and the transformer.
- Secure Connections: Ensure all wire connections are secure and properly tightened to prevent loose contacts.
- Plug In: Once wiring is complete and verified, plug the transformer into a standard 120V AC wall outlet.
- Restore Power: Turn the main power supply back on at the circuit breaker.
- Verify Operation: Check that your doorbell or thermostat is receiving power and functioning correctly. The transformer has a green LED power indicator.
4.2 Doorbell Wiring Diagram
The following diagram illustrates typical wiring configurations for one or multiple doorbells with a chime unit. Always consult your doorbell and chime manufacturer's instructions for precise wiring details.

Figure 4.1: Wiring diagram for single and multiple doorbell installations.
Important Note for Doorbells: If using this transformer to charge a doorbell, it may be necessary to add a 50W Watt 25 Ohm Resistor to the circuit. Refer to your doorbell's specific requirements.
4.3 Thermostat Wiring Diagram
Below is a general wiring example for connecting the transformer to a thermostat. Specific wiring will depend on your thermostat model and heating/cooling system.

Figure 4.2: Example wiring diagram for thermostat installation.
5. Operation
Once properly installed and connected, the Hotop 24 Volt 40 VA AC Transformer operates continuously to provide 24V AC power to your connected devices. The green LED indicator on the transformer confirms that it is receiving input power and is operational.
5.1 Compatibility
This transformer is compatible with a wide range of 24V AC powered devices, including but not limited to:
- Ring Video Doorbells (e.g., Ring Video Doorbell, Ring Video Doorbell 2, Ring Video Doorbell Pro)
- Nest Skybell Doorbells
- Nest Smart Thermostats
- Ecobee Smart Thermostats
- Sensi/Honeywell Smart Thermostats
- Other devices requiring constant 24 volt AC power.
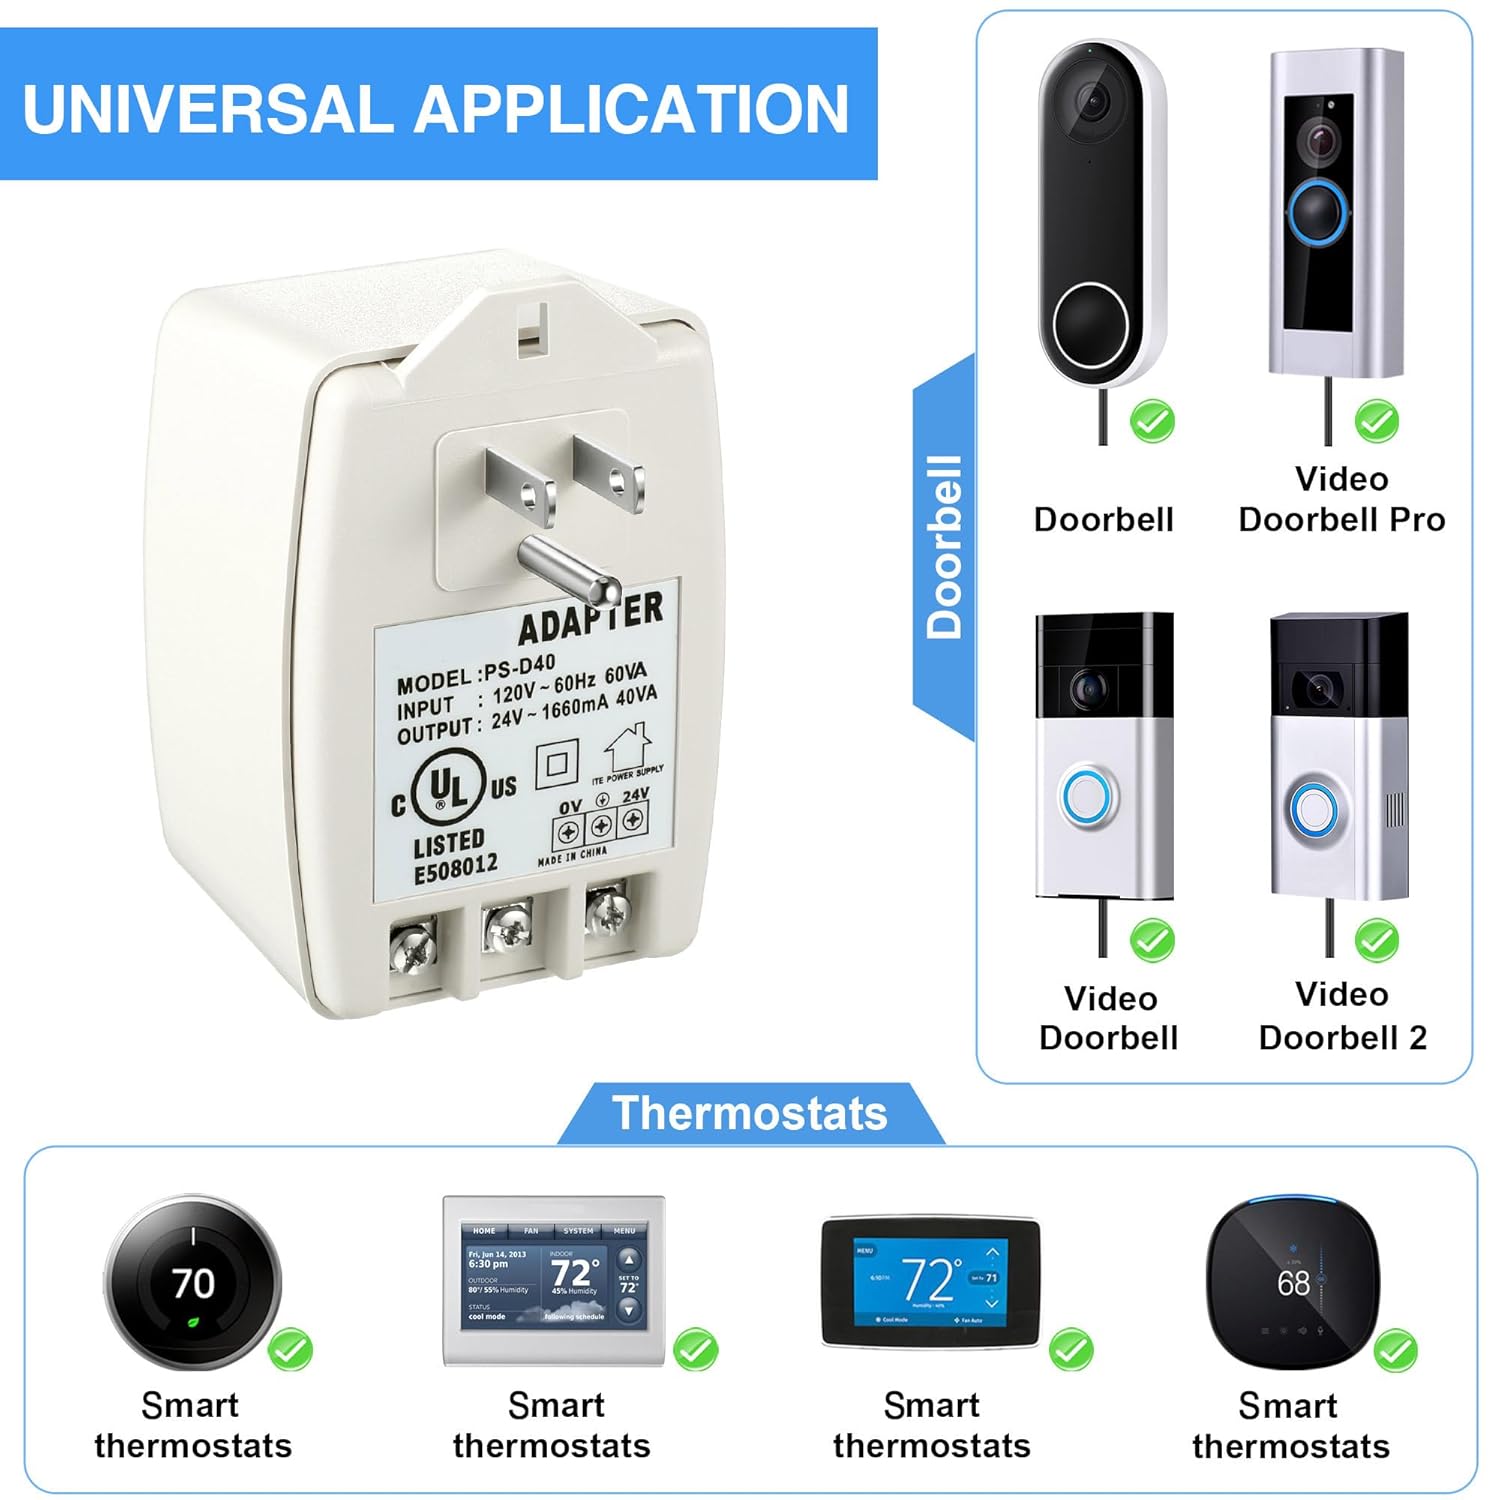
Figure 5.1: Examples of compatible smart home devices.
6. Maintenance
The Hotop 24 Volt 40 VA AC Transformer requires minimal maintenance. Follow these guidelines to ensure optimal performance and longevity:
- Cleaning: Periodically wipe the exterior of the transformer with a dry, soft cloth to remove dust. Do not use liquid cleaners or solvents.
- Ventilation: Ensure the transformer is not covered and has adequate airflow around it to prevent overheating.
- Connection Check: Occasionally inspect the wire connections at the terminals to ensure they remain secure.
- Environmental Conditions: Operate the transformer within its specified environmental conditions (indoor, dry location).
7. Troubleshooting
If you encounter issues with your Hotop 24 Volt 40 VA AC Transformer, refer to the following troubleshooting steps:
| Problem | Possible Cause | Solution |
|---|---|---|
| No power to connected device (e.g., doorbell, thermostat) |
|
|
| Green LED indicator is off |
|
|
| Connected device is underpowered or intermittent |
|
|
8. Warranty and Support
For warranty information and customer support, please refer to the official Hotop website or contact your retailer. Keep your purchase receipt as proof of purchase.
For further assistance, you may visit the Hotop Store on Amazon.


