1. Introduction
This manual provides comprehensive instructions for the installation, use, and maintenance of your BoxWave ClearTouch Anti-Glare Screen Protector, designed specifically for the AKASO DL9 Mirror Dash Cam. This screen protector is engineered to reduce glare, resist fingerprints, and protect your device's screen from scratches, ensuring optimal visibility and longevity.

Image 1.1: AKASO DL9 Mirror Dash Cam with the ClearTouch Anti-Glare Screen Protector installed.
2. Package Contents
Please verify that all items listed below are included in your package:
- Two (2) BoxWave ClearTouch Anti-Glare Screen Protectors
- One (1) Microfiber Cleaning Cloth
- One (1) Applicator Card (Squeegee)
- One (1) Dust Removing Sticker

Image 2.1: Contents of the BoxWave ClearTouch Anti-Glare Screen Protector package.
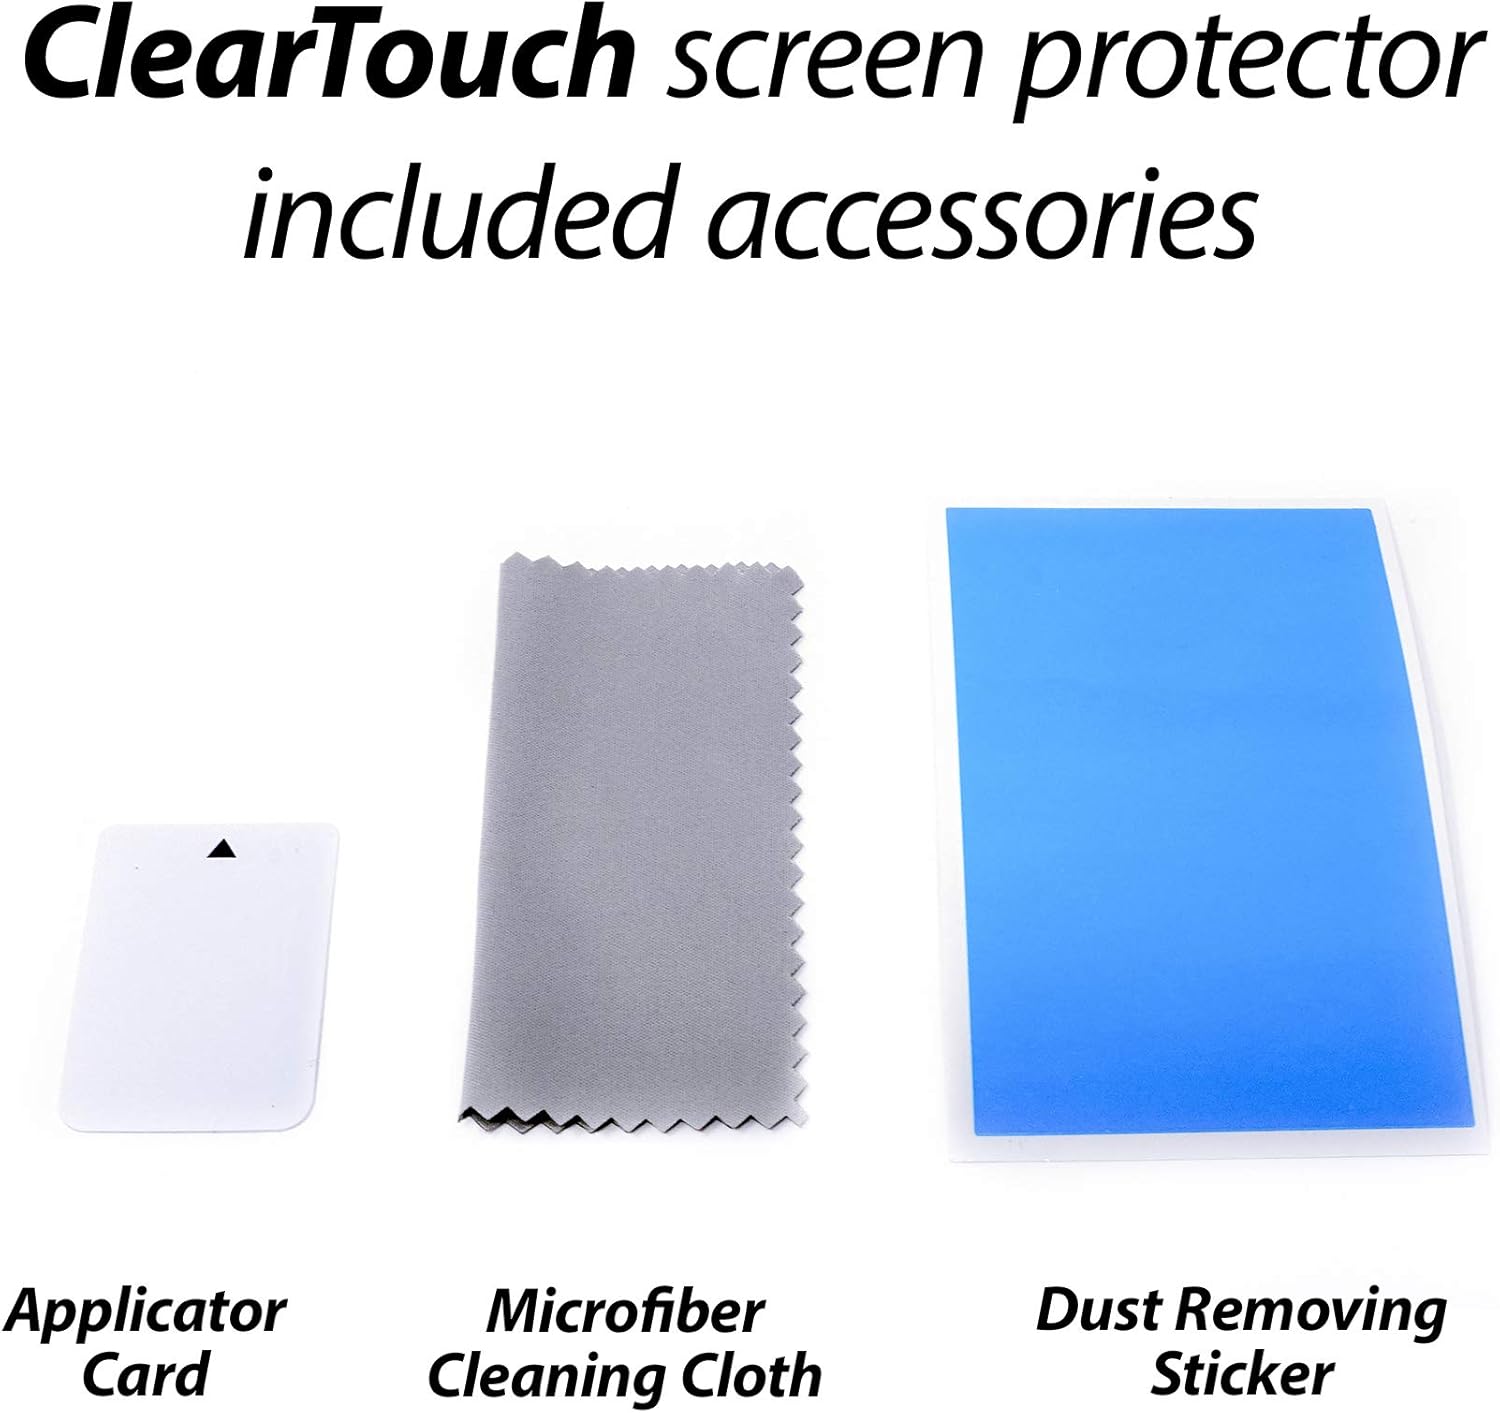
Image 2.2: Detailed view of the included installation accessories.
3. Setup and Installation
Follow these steps carefully for optimal screen protector application:
- Clean the Screen: Use the microfiber cleaning cloth to thoroughly clean the surface of your AKASO DL9 Mirror Dash Cam screen. Ensure all dust, smudges, and fingerprints are removed. For stubborn marks, a small amount of screen cleaner (not included) can be used with the cloth.
- Remove Dust: Use the dust removing sticker to lift any remaining dust particles from the screen. Gently dab the sticker across the screen surface.
- Peel Layer 1: Carefully peel back a small portion of the protective film labeled 'Layer 1' from one end of the screen protector. Avoid touching the adhesive side.
- Align and Apply: Align the exposed adhesive edge of the screen protector with one edge of your dash cam screen. Once aligned, slowly and steadily lower the rest of the screen protector onto the screen, peeling off 'Layer 1' as you go.
- Smooth Out Bubbles: Use the applicator card (squeegee) to gently push out any air bubbles towards the edges of the screen. Start from the center and work your way outwards.
- Remove Layer 2: Once the screen protector is fully applied and free of major bubbles, carefully peel off the top protective film labeled 'Layer 2'.
- Final Inspection: Perform a final check for any remaining small bubbles or dust. Minor bubbles often disappear within 24-48 hours.

Image 3.1: The screen protector is precision-cut for a perfect fit on your device.
4. Operating Features
The BoxWave ClearTouch Anti-Glare Screen Protector enhances your AKASO DL9 Mirror Dash Cam experience through several key features:
- Anti-Glare Surface: The matte finish disperses light, significantly reducing reflections and glare from sunlight or interior lighting. This improves screen visibility and reduces eye strain, especially during bright conditions.
- Anti-Fingerprint Properties: The specialized surface repels oils and smudges, keeping your screen cleaner for longer and maintaining a clear view.
- Scratch Protection: Provides a durable barrier against scratches, scuffs, and minor impacts, preserving the original screen of your dash cam.
- Smooth Touch Response: Engineered to maintain the original touch sensitivity of your device, ensuring seamless interaction.

Image 4.1: Anti-Glare technology reduces distracting reflections.

Image 4.2: Oleophobic layer resists smudges and fingerprints.
5. Maintenance
To maintain the clarity and effectiveness of your screen protector:
- Cleaning: Use the provided microfiber cleaning cloth to gently wipe the screen protector. For more thorough cleaning, lightly dampen the cloth with water or a screen-safe cleaning solution. Avoid harsh chemicals or abrasive materials.
- Avoid Sharp Objects: While the protector offers scratch resistance, extreme pressure or sharp objects can still damage it.
- Reusability: The ClearTouch screen protector is designed to be reusable. If removed carefully, it can be reapplied. Ensure the adhesive side remains clean during removal and reapplication.
6. Troubleshooting
Common issues and their solutions:
- Bubbles After Installation:
- Small Bubbles: Many small bubbles will dissipate naturally within 24-48 hours.
- Large Bubbles: Gently lift the nearest edge of the screen protector and reapply, using the applicator card to push the air out as you lay it back down.
- Dust Under Protector:
- Carefully lift the edge of the screen protector near the dust particle. Use the dust removing sticker to gently dab and lift the dust from the adhesive side of the protector or the screen. Reapply the protector.
- Protector Not Sticking:
- Ensure the screen was thoroughly cleaned and free of oils or residues before application. If the adhesive side has become contaminated, clean it gently with a lint-free cloth and water, allow to air dry completely, then reapply.
7. Specifications
| Feature | Description |
|---|---|
| Product Name | ClearTouch Anti-Glare Screen Protector |
| Brand | BoxWave |
| Compatibility | AKASO DL9 Mirror Dash Cam |
| Material | Polyethylene Terephthalate (PET) |
| Finish Type | Matte |
| Special Features | Anti-Glare, Anti-Fingerprint, Scratch Resistant |
| Number of Items | 2 (Two-Pack) |
8. Warranty and Support
For warranty information, technical support, or any questions regarding your BoxWave ClearTouch Anti-Glare Screen Protector, please contact BoxWave customer service directly. Refer to the product packaging or the official BoxWave website for contact details.


