
1. Introduction
Thank you for choosing the Zopsc Programmable Smart Digital LCD Thermostat. This device is designed to provide precise and reliable temperature control for your fireplace, enhancing comfort and energy efficiency in your home. This manual provides detailed instructions for installation, operation, maintenance, and troubleshooting to ensure optimal performance and longevity of your thermostat.
2. Safety Information
- Electrical Safety: Installation should be performed by a qualified electrician or a knowledgeable individual. Ensure power is disconnected before wiring to prevent electrical shock.
- Battery Safety: Use only 2x AA 1.5V alkaline batteries. Do not mix old and new batteries, or different types of batteries. Dispose of used batteries responsibly.
- Placement: Install the thermostat away from direct sunlight, drafts, and heat sources that could affect temperature readings.
- Child Lock: Utilize the child lock feature to prevent unintended adjustments by children.
3. Product Overview
The Zopsc Programmable Thermostat features a high-performance digital control system with a clear LCD display. It includes several functions designed for user convenience and safety.
Key Features:
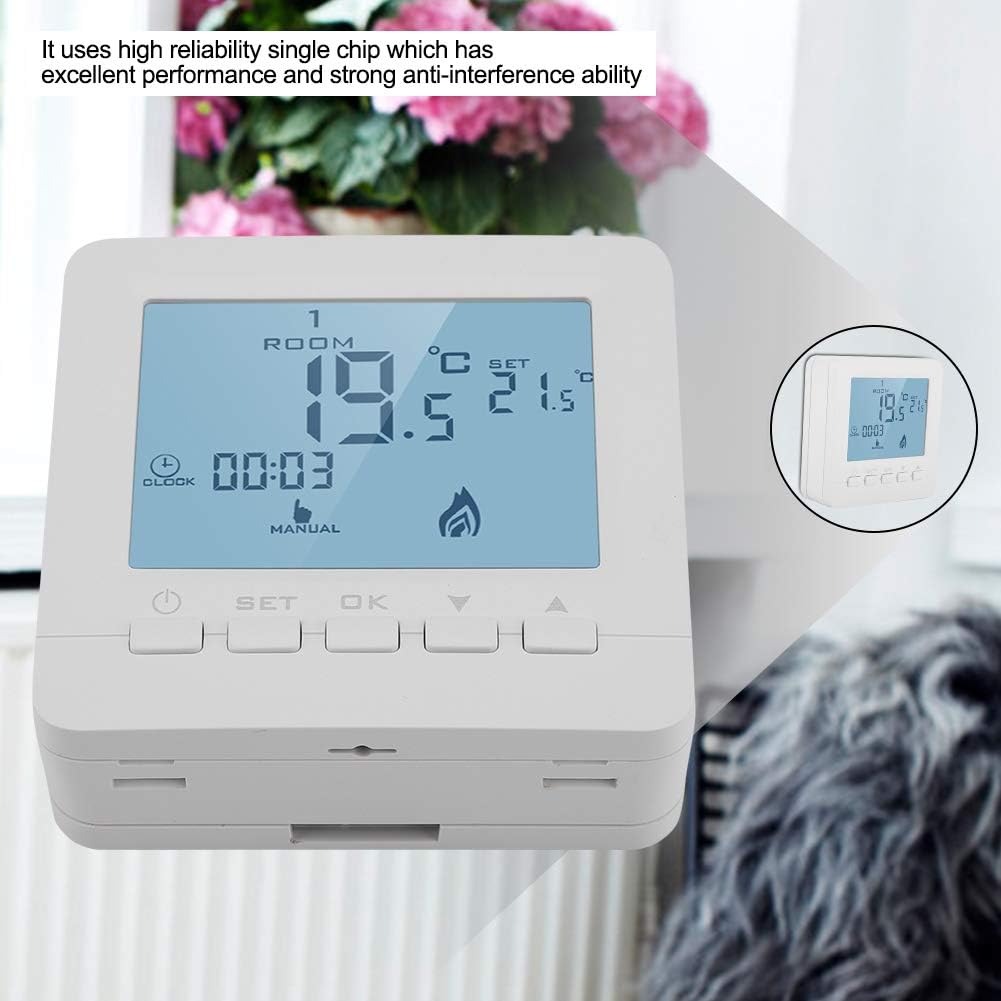
- High-Performance Digital Control: Utilizes an advanced single-chip design for reliable anti-interference and consistent temperature management.
- Digital LCD Display: Provides clear readability of current and set temperatures, time, and operating mode.
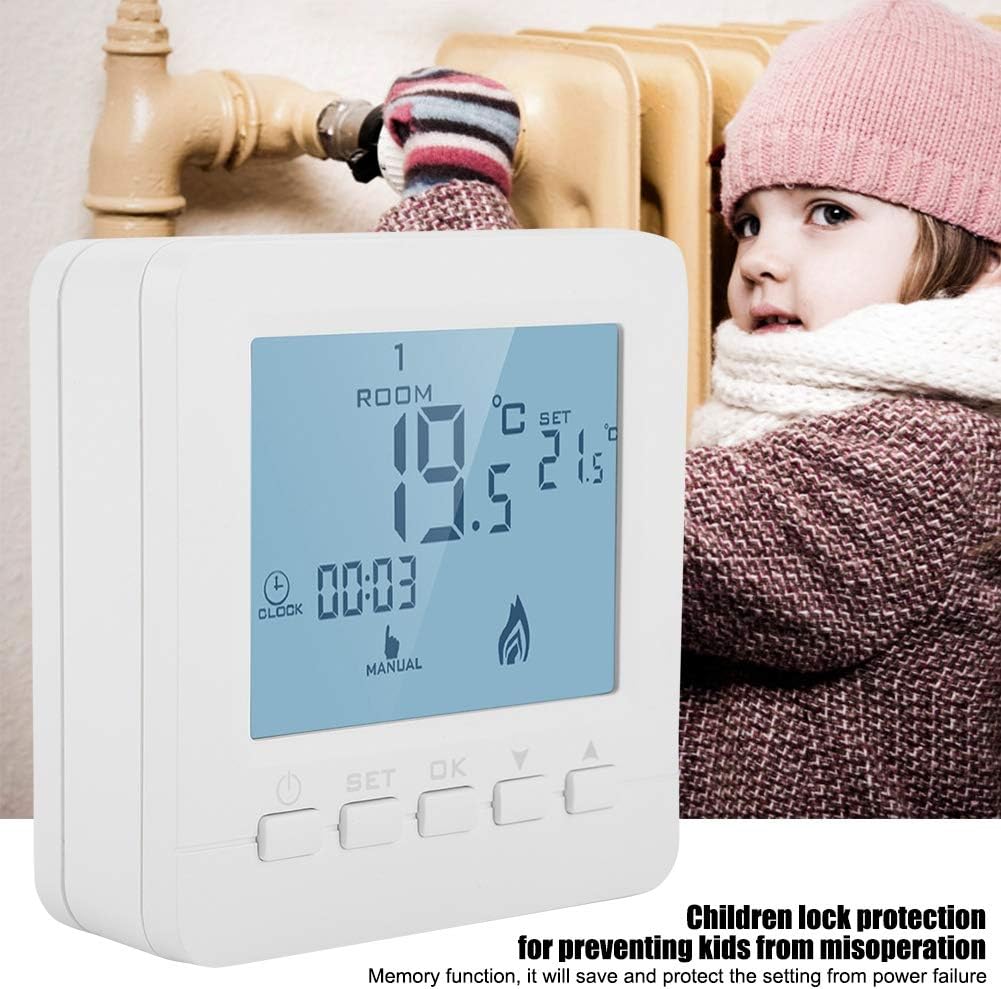
- Child Lock Safety Feature: Prevents accidental changes to settings, ideal for households with children.
- Data Memory Protection: Automatically saves and restores settings after a power outage, eliminating the need for manual resetting.
- Holiday Mode Convenience: Allows presetting a desired temperature for when you are away, ensuring comfort upon return.
- Multi-Mode Versatility: Easily switch between various working modes via an intuitive button interface.
Product Components:



Product Video:
Video 3.1: An official product video demonstrating the Zopsc Digital Programmable Smart Temperature Controller, including its features and basic operation.
4. Setup and Installation
Proper installation is crucial for the thermostat's performance. Please follow these steps carefully.
4.1 Mounting the Thermostat
- Power Off: Before beginning installation, ensure the power to your heating system is completely turned off at the main circuit breaker.
- Remove Front Panel: Gently separate the front display unit from the back mounting plate.
- Positioning: Choose a suitable location on an interior wall, approximately 1.5 meters (5 feet) from the floor, away from direct sunlight, drafts, and heat sources.
- Mark and Drill: Use the back mounting plate as a template to mark the drilling points on the wall. Drill holes and insert wall anchors if necessary.
- Secure Back Plate: Fasten the back mounting plate to the wall using the provided screws.
4.2 Wiring Instructions
This thermostat is designed for millivolt systems, commonly found in gas fireplaces. It typically requires two low-voltage wires.
- Identify Wires: Connect the two low-voltage wires from your fireplace system to the appropriate terminals on the thermostat's back plate. Refer to Figure 3.5 for terminal locations. The polarity of these wires typically does not matter for millivolt systems.
- Secure Connections: Ensure all wire connections are secure and properly insulated.
- Attach Front Panel: Carefully align the front display unit with the mounted back plate and press firmly until it clicks into place. Ensure the electrical contacts are properly engaged.
4.3 Battery Installation
- Access Battery Compartment: The battery compartment is typically located on the back of the front display unit.
- Insert Batteries: Insert two (2) AA 1.5V alkaline batteries, observing the correct polarity (+/-) as indicated inside the compartment.
- Close Compartment: Close the battery compartment cover securely.
- Power On: Restore power to your heating system at the main circuit breaker. The thermostat display should now illuminate.
5. Operating Instructions
This section details how to operate your Zopsc thermostat and utilize its various functions.
5.1 Basic Controls
- Power Button (⏻): Press to turn the thermostat ON or OFF.
- SET Button: Used to enter programming mode or confirm settings.
- OK Button: Confirms selections or exits a menu.
- Up Arrow (▲): Increases temperature, time, or navigates menu options.
- Down Arrow (▼): Decreases temperature, time, or navigates menu options.
5.2 Setting Time and Day
Upon initial power-up or after battery replacement, you may need to set the current time and day.
- Press and hold the SET button for approximately 3 seconds until the time display flashes.
- Use the ▲ or ▼ buttons to adjust the hour. Press SET to confirm.
- Use the ▲ or ▼ buttons to adjust the minute. Press SET to confirm.
- Use the ▲ or ▼ buttons to set the current day of the week (1=Monday, 7=Sunday). Press OK to exit.
5.3 Operating Modes
The thermostat supports both Manual and Programmable modes.
- Manual Mode: In this mode, the thermostat maintains a constant temperature set by the user. To activate, press the SET button until "MANUAL" appears on the display. Use ▲ or ▼ to adjust the desired temperature.
- Programmable Mode: This mode allows you to set a weekly schedule with different temperatures for various times of the day.
Programming Schedule:
- Press and hold the SET button until the programming icon appears (e.g., a clock or schedule icon).
- The display will show the first period (e.g., "1" for Monday morning). Use ▲ or ▼ to adjust the start time for this period, then press SET.
- Use ▲ or ▼ to adjust the desired temperature for this period, then press SET.
- Repeat for all programmed periods (typically 6 periods per day, 5+2 day or 7-day programming options may be available).
- Press OK to save and exit programming mode.
5.4 Child Lock Function
To activate the child lock, press and hold the ▲ and ▼ buttons simultaneously for approximately 3 seconds until a lock icon appears on the display. To deactivate, repeat the process.
5.5 Holiday Mode
Holiday mode allows you to set a specific temperature for an extended period, overriding the regular schedule. This is useful when you are away from home.
- Press and hold the OK button for approximately 3 seconds until the holiday mode icon appears.
- Use ▲ or ▼ to set the desired temperature for holiday mode.
- Press OK to confirm. The thermostat will maintain this temperature until manually exited or the set duration (if applicable) expires.
5.6 Temperature Calibration
If you believe the thermostat's temperature reading is inaccurate, it can be calibrated.
- Turn the thermostat OFF.
- Press and hold the SET button and the ▲ button simultaneously for 3 seconds to enter calibration mode.
- Use ▲ or ▼ to adjust the temperature offset (e.g., +1°C or -1°C).
- Press OK to save and exit.
Note: This thermostat displays temperature in Celsius only and does not support Fahrenheit.
6. Maintenance
Regular maintenance ensures your thermostat operates efficiently.
- Cleaning: Wipe the thermostat's surface with a soft, dry cloth. Do not use abrasive cleaners or solvents.
- Battery Replacement: Replace batteries annually or when the low battery indicator appears on the display. Follow the instructions in Section 4.3.
- Inspection: Periodically check for loose wiring connections or any physical damage.
7. Troubleshooting
If you encounter issues with your thermostat, refer to the following common problems and solutions.
| Problem | Possible Cause | Solution |
|---|---|---|
| No display/Thermostat not powering on | Dead or incorrectly installed batteries. | Replace batteries, ensuring correct polarity. |
| Heating system not responding | Incorrect wiring; low battery; system power off. | Check wiring connections; replace batteries; ensure heating system power is on. |
| Temperature reading seems inaccurate | Thermostat placement; calibration needed. | Relocate thermostat away from drafts/heat sources; perform temperature calibration (Section 5.6). |
| Difficulty programming schedule | Incorrect programming steps. | Review Section 5.3 carefully. Some settings may only be accessible when the thermostat is in the OFF state. |
| Settings lost after battery change | Batteries removed for too long or contact lost. | Re-enter time, day, and program settings. Ensure secure battery contact during replacement. |
| Cannot switch to Fahrenheit | Thermostat only supports Celsius. | This model operates exclusively in Celsius. Fahrenheit display is not available. |
8. Specifications
| Feature | Specification |
|---|---|
| Brand | Zopsc |
| Model Number | Zopscngebczaoxd |
| Power Source | 2x AA 1.5V Alkaline Batteries |
| Display Type | Digital LCD |
| Screen Size | 2.9 cm |
| Control Type | Button Control |
| Temperature Control Type | Programmable |
| Material | ABS Plastic |
| Color | White |
| Dimensions (approx.) | 8.6cm x 8.6cm x 2.9cm |
| Special Features | Child Lock, Data Memory, Holiday Mode |
9. Warranty and Support
Zopsc products are manufactured to high-quality standards. For warranty information or technical support, please refer to the contact details provided with your purchase or visit the official Zopsc website. Keep your purchase receipt as proof of purchase for any warranty claims.