1. Introduction
Welcome to the EMAX Tinyhawk 2 II RTF Kit user manual. This guide provides essential information for the safe and effective operation of your FPV racing drone. The Tinyhawk 2 II is designed for beginners and enthusiasts, offering a complete ready-to-fly experience with included goggles and controller. Please read this manual thoroughly before operating the drone to ensure proper setup, flight, and maintenance.
2. What's in the Box
Upon unboxing, verify that all components listed below are present and in good condition.
- EMAX Tinyhawk 2 II FPV Racing Drone
- EMAX E8 Transmitter (Controller)
- EMAX Transporter 2 FPV Goggles
- 1S HV LiPo Battery (e.g., 450mAh) for drone
- 2S HV LiPo Battery (e.g., 300mAh) for goggles
- USB Charger for drone battery
- USB Charger for goggles battery
- Spare Propellers (e.g., 4x CW, 4x CCW)
- Screwdriver and spare screws
- USB Cable
- User Manual (this document)
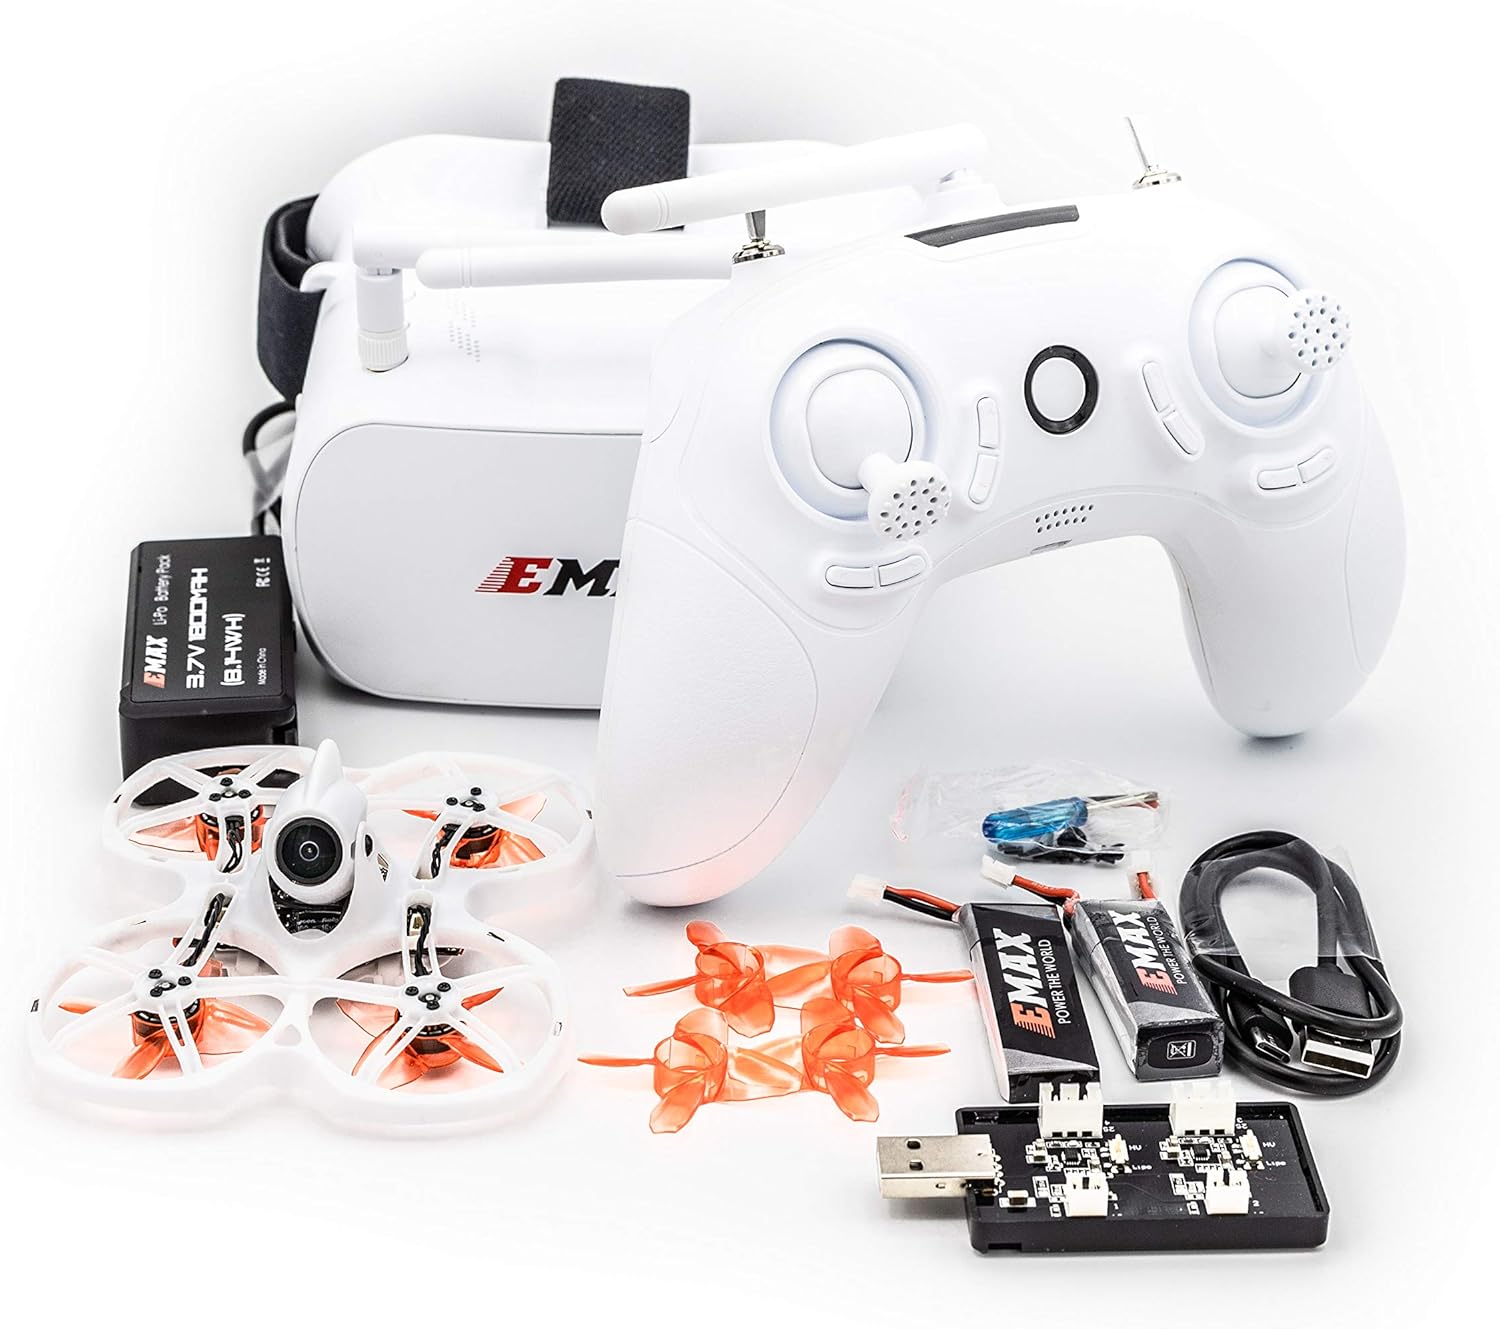
Image: All components of the EMAX Tinyhawk 2 II RTF Kit, including the drone, controller, FPV goggles, batteries, chargers, and spare parts, laid out on a white surface.

Image: The EMAX Tinyhawk 2 II RTF Kit neatly packed inside its custom carrying case, showing the drone, controller, and goggles secured in foam inserts.
3. Setup Guide
3.1 Charging Batteries
Before first use, fully charge all batteries.
- Drone Battery (1S LiPo): Connect the drone battery to the provided USB charger. Plug the charger into a standard USB power source (e.g., computer USB port, USB wall adapter). The indicator light on the charger will show charging status (e.g., red for charging, green for full).
- Goggles Battery (2S LiPo): Connect the goggles battery to its dedicated USB charger. Plug into a USB power source. Observe the indicator light for charging status.
- Controller Battery: The EMAX E8 controller typically has an internal rechargeable battery. Connect the controller to a USB power source using the provided USB cable. The controller's indicator light will show charging status.
Important: Always use the provided chargers and never leave charging batteries unattended.
3.2 Propeller Installation (if not pre-installed)
The Tinyhawk 2 II may come with propellers pre-installed. If not, or if replacing, ensure correct orientation.
- Identify CW (Clockwise) and CCW (Counter-Clockwise) propellers. They are usually marked.
- Match the propeller rotation direction to the motor rotation direction. Typically, diagonal motors spin in the same direction.
- Gently push the propeller onto the motor shaft until it seats firmly. Do not force.

Image: A close-up view of an orange propeller installed on one of the motors of the EMAX Tinyhawk 2 II drone, showing the secure fit.
3.3 Goggles and Controller Setup
The RTF kit typically comes pre-bound. If you need to re-bind or adjust settings:
- Goggles: Power on the goggles. Ensure the antenna is securely attached. The goggles will automatically scan for the drone's video feed. Adjust the head strap for a comfortable fit.
- Controller: Power on the E8 controller. It should automatically connect to the drone once the drone is powered on. Familiarize yourself with the stick layout and switch functions.

Image: A person wearing the white EMAX FPV goggles with dual antennas, demonstrating how they are worn for an immersive flight experience.

Image: A close-up of the white EMAX E8 FPV drone controller, showing its joysticks, buttons, and antenna, ready for use.
4. Operating Instructions
4.1 Pre-Flight Checklist
- Ensure all batteries (drone, goggles, controller) are fully charged.
- Check propellers for damage and ensure they are securely attached.
- Inspect the drone frame for any cracks or loose components.
- Choose a safe, open area free from obstacles, people, and animals.
- Verify local regulations for drone operation.
4.2 Powering On and Arming
- Power on the EMAX E8 Controller.
- Power on the EMAX Transporter 2 FPV Goggles.
- Connect the fully charged battery to the Tinyhawk 2 II drone. Place the drone on a flat, stable surface.
- Wait for the drone to initialize (LEDs will flash and then become solid).
- Arming: To arm the motors, move the throttle stick (left stick for Mode 2) to the lowest-right position. The motors will spin slowly, indicating they are armed. To disarm, move the throttle stick to the lowest-left position.

Image: A top-down view of the EMAX Tinyhawk 2 II drone, showcasing its white frame, orange propellers, and central camera.

Image: A detailed close-up of the FPV camera mounted on the front of the EMAX Tinyhawk 2 II drone, highlighting its lens and mounting bracket.
4.3 Basic Flight Controls (Mode 2)
- Left Stick (Throttle/Yaw):
- Up/Down: Controls altitude (Throttle).
- Left/Right: Rotates the drone left/right (Yaw).
- Right Stick (Pitch/Roll):
- Up/Down: Tilts the drone forward/backward (Pitch).
- Left/Right: Tilts the drone left/right (Roll).
- Switches: Refer to the E8 controller manual for specific switch functions (e.g., Arm/Disarm, Flight Modes).
4.4 Taking Off and Landing
- Take Off: With motors armed, slowly increase throttle until the drone lifts off the ground. Maintain a stable hover.
- Landing: Slowly decrease throttle until the drone gently descends. Once on the ground, disarm the motors immediately.
5. Maintenance
5.1 General Care
- Keep the drone, goggles, and controller clean and free from dust and debris. Use a soft, dry cloth.
- Avoid exposing components to extreme temperatures or moisture.
- Store the kit in its original case or a protective bag when not in use.
5.2 Propeller Replacement
Damaged propellers can significantly affect flight performance and safety. Replace them immediately if bent, cracked, or chipped.
- Gently pull the damaged propeller straight off the motor shaft.
- Select a new propeller of the correct rotation direction (CW or CCW).
- Align the new propeller with the motor shaft and gently push it down until it is seated firmly.
5.3 Battery Care
- Always charge batteries using the provided or recommended chargers.
- Do not overcharge or over-discharge LiPo batteries.
- Store LiPo batteries at a storage voltage (around 3.8V per cell) if not used for extended periods.
- Dispose of damaged or swollen batteries safely according to local regulations.
6. Troubleshooting
| Problem | Possible Cause | Solution |
|---|---|---|
| Drone not arming | Throttle not at lowest position; Controller not bound; Safety switch engaged; Calibration issue. | Ensure throttle is fully down and to the right (Mode 2 arming). Re-bind controller if necessary. Check controller switches. Recalibrate accelerometer if needed (refer to advanced settings). |
| No video feed in goggles | Goggles not powered on; Goggles battery low; Drone VTX not powered; Incorrect video channel. | Ensure goggles are powered and charged. Check drone battery connection. Scan for channels on goggles or manually set to drone's VTX channel. |
| Unstable flight / Drifting | Damaged propellers; Uncalibrated accelerometer; Motor issue; Center of gravity off. | Inspect and replace damaged propellers. Perform accelerometer calibration on a flat surface. Check for debris in motors. Ensure battery is properly secured. |
| Short flight time | Battery not fully charged; Old/degraded battery; Aggressive flying. | Ensure batteries are fully charged. Consider replacing old batteries. Practice smoother flight. |
7. Specifications
| Feature | Detail |
|---|---|
| Brand | EMAX |
| Model Name | Tinyhawk 2 |
| Manufacturer Part Number | TH2RTFKITI |
| Age Range (Description) | Kid (Beginner Skill Level) |
| Color | White |
| Video Capture Resolution | 1080p (FPV feed resolution may vary) |
| Connectivity Technology | USB (for charging/configuration) |
| Item Weight | 43.5 Grams / 1.53 ounces |
| Battery Capacity (Drone) | Typically 450mAh 1S LiPo (specifics may vary) |
| Battery Cell Composition | Lithium Polymer |
| Remote Control Technology | 2.4GHz RF (FRSKY compatible) |
| Material | PP (Polypropylene) |
| Package Dimensions | 13.89 x 10.55 x 6.89 inches |
| UPC | 691036971749 |
8. Warranty and Support
For warranty information, technical support, or service inquiries, please refer to the official EMAX website or contact their customer service directly. Keep your proof of purchase for warranty claims.
EMAX Official Website: www.emax-usa.com (or relevant regional site)


