
1. Product Overview
This SAKAWA Ignition Coil CDI is a complete unit, including a high-quality spark plug cap. It is designed for compatibility with various generic and Honda-type OHV engines, specifically models 140, 160, 168, 198, 208, and 212. This ignition coil is suitable for a wide range of applications, including water pumps, tillers, motor cultivators, and generators.
The ignition coil is a critical component in the engine's ignition system, responsible for generating the high voltage required to create a spark at the spark plug, initiating combustion.
2. Product Features
- High Compatibility: Designed to work with a wide range of generic and Honda-type OHV engines (140, 160, 168, 198, 208, 212).
- Complete Unit: Includes the ignition coil and integrated spark plug cap for easy installation.
- Durable Construction: Manufactured with high-quality finishes for reliable performance and longevity.
- Versatile Application: Ideal for use in motopumps, tillers, motor cultivators, generators, and other small engine equipment.
3. Setup and Installation
Safety First: Before beginning any installation, ensure the engine is completely off and cooled down. Disconnect the spark plug wire to prevent accidental starting. Wear appropriate safety gear, including gloves and eye protection.
- Locate the Old Coil: Identify the existing ignition coil on your engine. It is typically mounted near the flywheel and connected to the spark plug via a high-tension wire.
- Disconnect Wiring: Carefully disconnect any low-voltage wires leading to the old ignition coil. Note their positions for reinstallation.
- Remove Old Coil: Unscrew and remove the bolts or fasteners securing the old ignition coil to the engine block.
- Install New Coil: Position the new SAKAWA ignition coil in the same location. Ensure the mounting holes align.
- Set Air Gap: An essential step is to set the correct air gap between the ignition coil's laminations and the flywheel magnets. Use a non-magnetic feeler gauge (typically 0.2mm to 0.4mm, refer to your engine's specific manual for exact specifications). Loosen the mounting bolts slightly, insert the feeler gauge between the coil and the flywheel, then push the coil firmly against the flywheel. Tighten the mounting bolts while holding the coil in place. Remove the feeler gauge.
- Connect Wiring: Reconnect the low-voltage wires to the new coil. Ensure connections are secure.
- Connect Spark Plug Cap: Firmly attach the spark plug cap to the spark plug.
- Test: After installation, perform a test start to ensure proper operation.
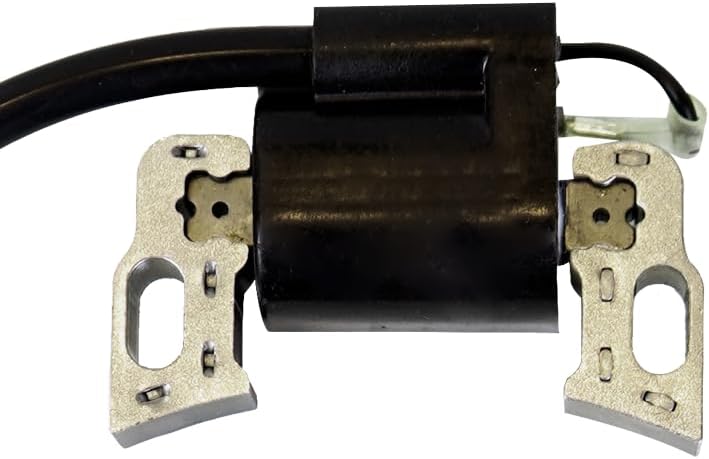
Figure 1: Close-up view of the SAKAWA Ignition Coil, showing the main body and mounting brackets.

Figure 2: SAKAWA Ignition Coil with approximate dimensions for the spark plug cap (20mm diameter, 85mm length) and coil body (13mm width, 68mm length).

Figure 3: SAKAWA Ignition Coil showing the distance between mounting points (6 cm) and overall width of the mounting brackets (6.8 cm).
4. Operating Instructions
Once the SAKAWA Ignition Coil is correctly installed and the air gap is set, the engine's ignition system should function as intended. The coil works automatically to provide the necessary spark for engine operation.
- Ensure all engine components are properly assembled and secured before starting.
- Follow your engine manufacturer's specific starting procedures (e.g., choke settings, fuel valve open, pull cord/electric start).
- A properly functioning ignition coil will produce a strong, consistent spark, leading to reliable engine starting and smooth operation.
5. Maintenance
Regular maintenance of your engine's ignition system, including the ignition coil, is crucial for optimal performance and longevity.
- Inspect Spark Plug Cap: Periodically check the spark plug cap for cracks, wear, or corrosion. Replace if damaged to ensure a good connection.
- Check Wiring: Inspect all wiring connected to the ignition coil for fraying, loose connections, or damage. Secure or replace as needed.
- Clean Coil: Keep the ignition coil and surrounding area clean and free of dirt, oil, and debris. A clean coil dissipates heat more effectively.
- Verify Air Gap: If experiencing ignition issues, re-check the air gap between the coil and the flywheel to ensure it remains within the manufacturer's specifications.
- Spark Plug Condition: While not part of the coil, a worn or fouled spark plug can mimic ignition coil problems. Regularly inspect and replace spark plugs according to your engine's maintenance schedule.
6. Troubleshooting
If your engine is experiencing ignition problems, consider the following troubleshooting steps:
- No Spark:
- Check the spark plug: Is it fouled, wet, or damaged? Replace if necessary.
- Check the spark plug cap and wire: Ensure a secure connection and no visible damage.
- Verify the air gap: An incorrect air gap can prevent spark generation.
- Inspect kill switch/stop button wiring: Ensure it is not shorted or faulty.
- Test the coil: If all other components are good, the coil itself may be faulty and require replacement.
- Weak Spark:
- Check for corrosion on electrical connections.
- Ensure the air gap is correctly set.
- Inspect the flywheel magnets for damage or debris.
- Engine Misfires or Runs Roughly:
- This could indicate an intermittent spark. Check all connections and the spark plug.
- Ensure the engine is not overheating, which can affect coil performance.
If troubleshooting steps do not resolve the issue, consult a qualified engine technician.
7. Specifications
| Brand | SAKAWA |
| Model Number | 94A170F005 |
| Product Dimensions | 5 x 19 x 19 cm |
| Product Weight | 1 kg |
| Compatibility | OHV Honda Type and Generic Engines (140, 160, 168, 198, 208, 212) |
| ASIN | B083P62CF9 |
| First Available Date | December 16, 2019 |
8. Warranty and Support
This SAKAWA product is designed for durability and performance. For specific warranty information, please refer to the terms and conditions provided by your retailer at the time of purchase. In most cases, standard consumer guarantees apply.
For technical support or inquiries regarding this product, please contact your authorized SAKAWA dealer or the point of purchase. When contacting support, please have your product model number (94A170F005) and purchase details readily available.