1. Introduction
This manual provides detailed instructions for the installation, operation, and maintenance of your RED WOLF Spare Tire Rear View Backup Camera. This camera system is designed to enhance rear visibility for Jeep Wrangler JK models manufactured between 2007 and 2018, including Rubicon, Sahara, and Unlimited variants. Please read this manual thoroughly before installation and use to ensure proper function and safety.
2. Safety Information
- Power Supply: Ensure the camera is connected to a stable 12V DC power source. Do not use ignition power directly to the camera, as this may cause overheating and potential damage to the resistors in the plug.
- Professional Installation: If you are not confident with electrical wiring or vehicle modifications, it is recommended to seek professional installation.
- Programming Requirement: For factory radios, programming by a Jeep dealership or using an OBD dongle (e.g., OBD Genie) may be required to activate the reverse camera function. This camera kit provides the necessary RCA adapters for factory radio connection, but activation is a separate step.
- Waterproof Rating: The camera is rated IP67 waterproof. While designed to withstand environmental elements, ensure all connections are secure and properly sealed during installation to prevent water ingress.
- Driving Safety: The backup camera is an aid for reversing and parking. Always check your surroundings visually and use your mirrors in conjunction with the camera feed.
3. Package Contents
Verify that all items listed below are included in your package:
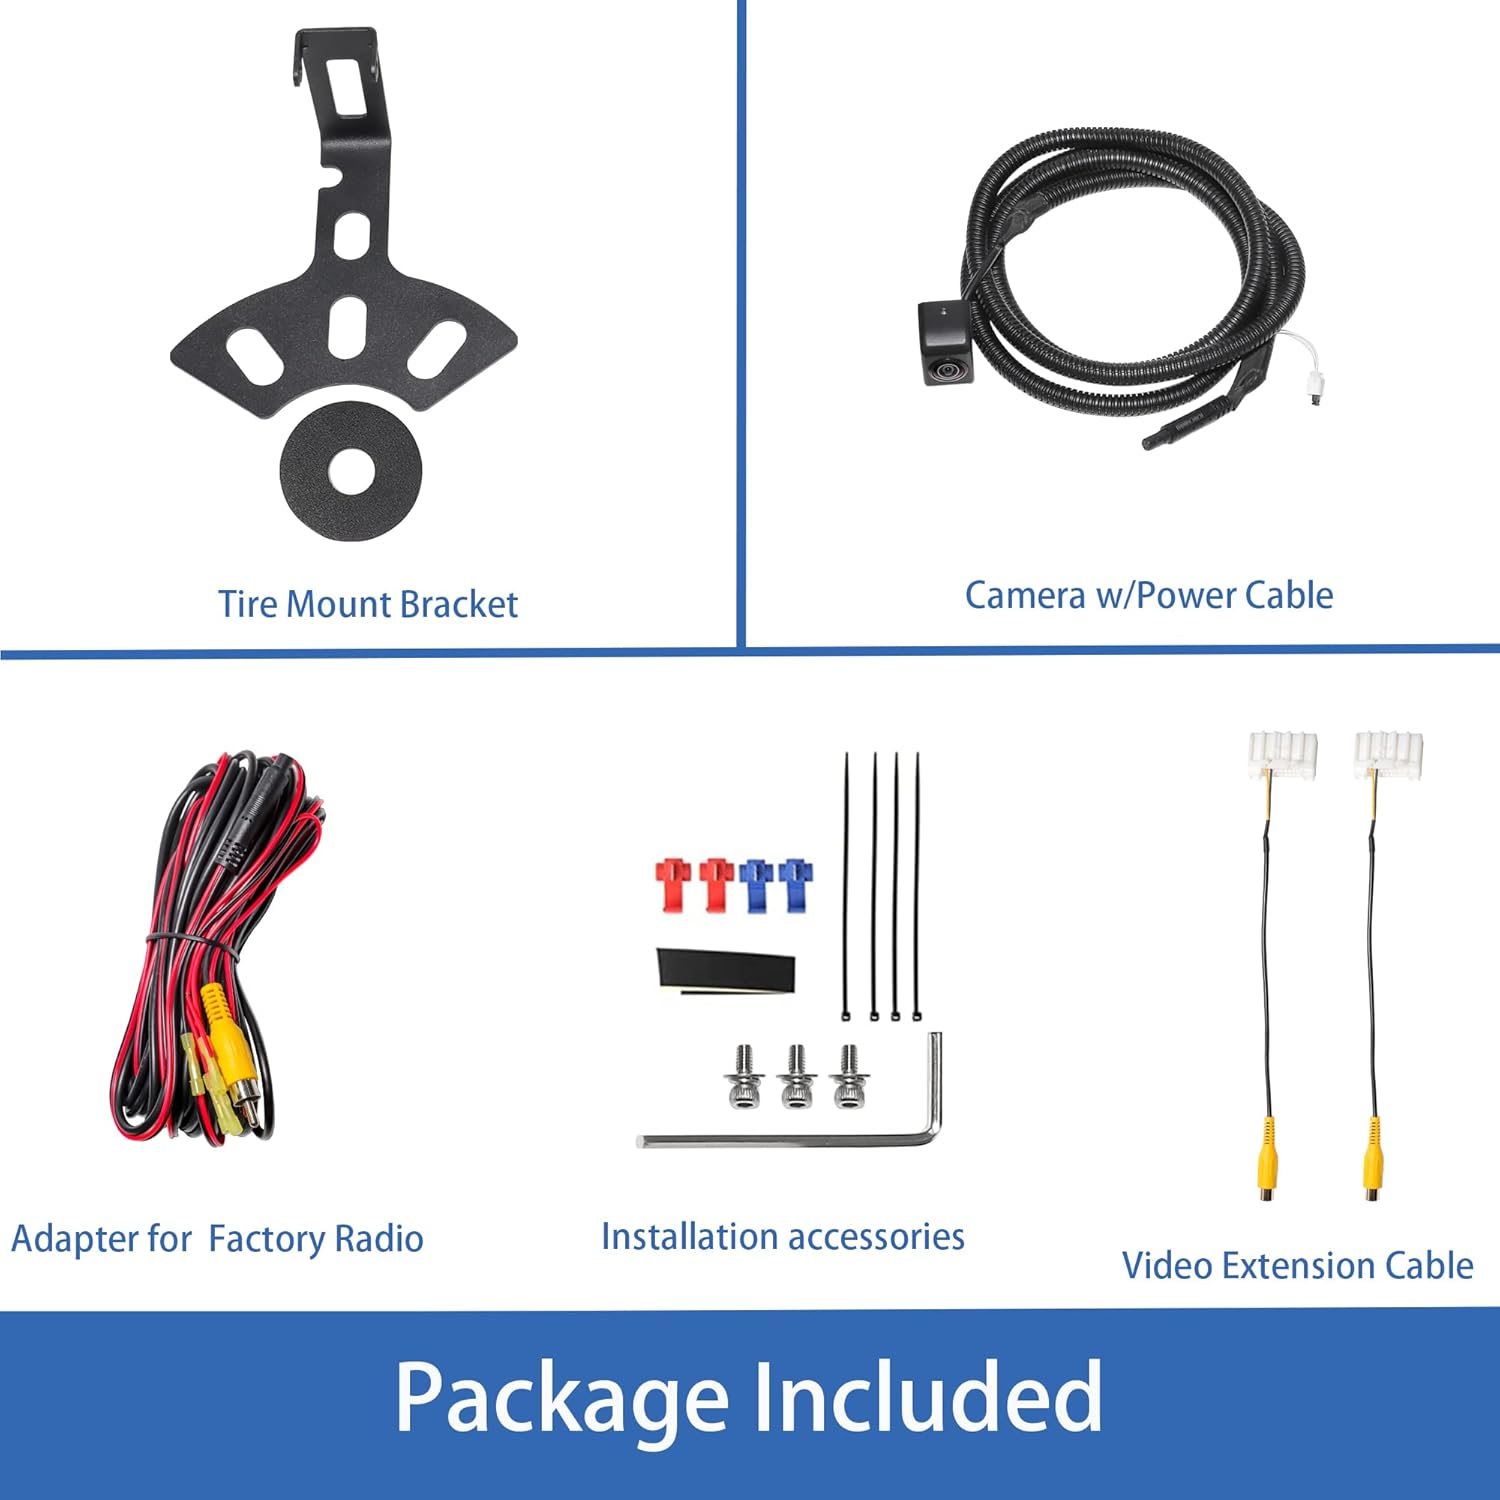
Image: All components included in the RED WOLF Spare Tire Rear View Backup Camera kit.
- Spare Tire Mount Bracket
- Backup Camera with Power Cable
- Adapter for Factory Radio (RCA to Uconnect plug)
- Video Extension Cable
- Installation Accessories (screws, zip ties, Allen wrench)
4. Installation Guide
Follow these steps for proper installation of your backup camera system.
4.1. Camera Mounting
- Remove the spare tire from the rear of your Jeep Wrangler JK.
- Attach the camera to the provided spare tire mount bracket. Ensure it is securely fastened and oriented correctly for optimal viewing angle.
- Mount the bracket with the camera onto the spare tire carrier studs. Reinstall the spare tire, ensuring the camera is positioned centrally within the spare tire opening.

Image: Close-up of the durable, rustproof spare tire mount bracket and camera.
4.2. Wiring Connections
- Power Connection: Connect the camera's power cable (red wire) to a 12V reverse light power source. The black wire is for ground. It is recommended to tap into the reverse light circuit at the rear of the vehicle so the camera activates only when reverse gear is engaged.
- Video Connection: Route the video extension cable from the camera to the front of the vehicle, typically along the vehicle's frame or under interior trim panels, to the location of your radio/display unit.
- Connect the yellow RCA plug from the video extension cable to the RCA input on the factory radio adapter.
- Plug the factory radio adapter into the appropriate port on your Jeep's factory radio (Uconnect system). Refer to your vehicle's radio wiring diagram if unsure.
4.3. Activating Parking Grid Lines
The camera features optional parking grid lines. To toggle these lines:
- Locate the small black block on the camera's wiring harness.
- To enable grid lines: Ensure the black block is inserted.
- To disable grid lines: Remove the black block.

Image: Illustration showing how to enable or disable parking reference lines using the switch on the wiring harness.
4.4. Radio Programming (for Factory Radios)
If your Jeep Wrangler JK did not originally come with a backup camera, the factory radio will need to be programmed to recognize and display the camera feed. This typically requires:
- Visiting a Jeep dealership for programming.
- Using a compatible Bluetooth OBD dongle (e.g., OBD Genie, Jscan) to enable the backup camera function in the vehicle's computer system.
Without this programming, the camera will not display on your factory radio, even if all physical connections are correct.
5. Operating Instructions
Once properly installed and programmed, the RED WOLF backup camera operates automatically:
- When the vehicle is shifted into reverse gear, the camera will activate, and its video feed will be displayed on your compatible factory radio or aftermarket monitor.
- The 170-degree wide-angle lens provides a broad view of the area behind your vehicle, assisting with parking and maneuvering.
- If enabled, the parking grid lines will appear on the screen to help estimate distance and trajectory.

Image: Examples of the backup camera display on various in-car screens, showing parking lines and rear view.

Image: Illustration demonstrating the wide 150-degree view angle provided by the camera.
6. Maintenance
- Cleaning the Lens: Periodically clean the camera lens with a soft, damp cloth to ensure a clear image. Avoid abrasive cleaners or materials that could scratch the lens.
- Inspect Wiring: Occasionally check the wiring and connections for any signs of wear, damage, or loose connections, especially after off-road driving or exposure to harsh conditions.
- Mounting Security: Ensure the camera and its mount remain securely fastened to the spare tire carrier.
7. Troubleshooting
| Problem | Possible Cause | Solution |
|---|---|---|
| No image on screen when in reverse |
|
|
| Poor image quality (blurry, distorted) |
|
|
| Parking lines not appearing/disappearing | Black block on wiring harness is incorrectly set. | Refer to Section 4.3 to correctly insert or remove the black block on the camera's wiring harness. |
| Camera stopped working after car wash | Water ingress due to improper sealing or damage. | Inspect camera housing and connections for damage. Ensure all connections are properly sealed during installation. Replace if water damage is confirmed. |
8. Specifications
| Feature | Detail |
|---|---|
| Image Sensor | 1/3 inch CMOS / CCD |
| Resolution | 972(H) x 504(V) pixels |
| View Angle | 170 Degrees (Wide Angle) |
| TV System | NTSC/PAL (Auto-switching) |
| Waterproof Rate | IP67 |
| Operating Voltage | 12 Volts DC |
| Installation Type | Surface Mount (Spare Tire) |
| Connector Type | RCA |
| Night Vision Distance | Approximately 35ft |

Image: Comparison of camera image clarity during daytime and nighttime conditions, highlighting the CCD sensor performance.
9. Warranty and Support
For technical assistance or warranty inquiries, please contact RED WOLF customer support through the retailer where the product was purchased. Keep your purchase receipt as proof of purchase for warranty claims.


