1. Introduction
The Nutricook Smart Pot Eko is a versatile electric multi-cooker designed to simplify your cooking process. It combines the functions of 9 different kitchen appliances into one compact unit, offering pressure cooking, sautéing, steaming, slow cooking, rice cooking, food warming, cake making, soup making, and egg cooking. This manual provides essential information for safe and efficient operation of your Smart Pot Eko.

Image 1.1: Nutricook Smart Pot Eko Electric Pressure Cooker.

Image 1.2: Overview of Nutricook Smart Pot Eko features, highlighting 11 safety mechanisms, stainless steel inner pot, 9-in-1 functionality, sleek design, and 1000W cooker base.
2. Important Safety Information
Please read all instructions carefully before using the Nutricook Smart Pot Eko. Failure to follow these safety guidelines may result in property damage, personal injury, or death.
General Safety Precautions:
- Always ensure the lid is properly sealed and locked before operating under pressure.
- Do not touch hot surfaces. Use handles or oven mitts.
- Exercise extreme caution when releasing pressure. Keep hands and face away from the steam release valve.
- Do not immerse the cooker base in water or other liquids.
- This appliance is not intended for use by persons with reduced physical, sensory, or mental capabilities, or lack of experience and knowledge, unless they have been given supervision or instruction.
- Keep out of reach of children.
- Always unplug the appliance when not in use and before cleaning.
- Do not operate any appliance with a damaged cord or plug, or after the appliance malfunctions or has been damaged in any manner.
Built-in Safety Mechanisms:
The Nutricook Smart Pot Eko is equipped with 11 safety mechanisms to ensure safe operation. These include features such as lid lock safety, anti-block shield, pressure regulator protection, and overheat protection.

Image 2.1: The Smart Pot Eko includes multiple safety mechanisms for user protection.
3. Product Components
Your Nutricook Smart Pot Eko package includes the following components:
- 1000 Watt Cooker Base
- Stainless Steel Cooking Pot (6 Liters capacity)
- Lid with Sealing Ring and Steam Release Valve
- Steam Rack
- Soup Spoon
- Rice Paddle
- Measuring Cup
- User Guide (this manual)

Image 3.1: Exploded view of the Nutricook Smart Pot Eko, showing the cooker base, inner stainless steel pot, and lid.

Image 3.2: Retail packaging and a list of included accessories: 1000W cooker base, stainless steel cooking pot, steam rack, soup spoon, rice paddle, measuring cup, and user guide.
4. Setup and First Use
4.1 Unpacking and Initial Cleaning
- Remove all packaging materials from the box.
- Wash the inner stainless steel cooking pot, lid, and accessories (steam rack, soup spoon, rice paddle, measuring cup) with warm soapy water. Rinse thoroughly and dry completely.
- Wipe the exterior of the cooker base with a damp cloth. Never immerse the cooker base in water.
4.2 Placement
Place the Smart Pot Eko on a stable, level surface, away from heat sources and flammable materials. Ensure there is adequate space around the unit for proper ventilation and steam release.
4.3 Water Test (Initial Run)
Before cooking food, perform a water test to familiarize yourself with the appliance and ensure it is functioning correctly.
- Add 3 cups of water to the inner stainless steel cooking pot.
- Place the inner pot into the cooker base.
- Close the lid, ensuring it is properly aligned and locked. The steam release handle should be in the 'Sealing' position.
- Plug in the Smart Pot Eko. The display will show 'OFF'.
- Press the 'Pressure Cook' button, then adjust the time to 5 minutes using the '+' or '-' buttons.
- Press 'Start'. The cooker will begin preheating and building pressure.
- Once pressure is reached, the cooking timer will begin to count down.
- After 5 minutes, the cooker will beep and switch to 'Keep Warm' mode.
- Carefully turn the steam release handle to the 'Venting' position to release pressure. Once the float valve drops, open the lid.
- Discard the water and dry the inner pot. Your Smart Pot Eko is now ready for use.
5. Operating Instructions
5.1 Control Panel Overview
The Smart Pot Eko features an intuitive control panel with a bright LED display and dedicated buttons for various cooking programs and functions.

Image 5.1: Close-up of the Nutricook Smart Pot Eko control panel, showing the LED display and various program buttons.
5.2 Smart Programs
The Smart Pot Eko offers 14 pre-set Smart Programs for one-touch cooking:
- Soup: For various soup recipes.
- Meat/Stew: Ideal for tenderizing meats and preparing stews.
- Dal/Bean: Specifically for cooking lentils and beans.
- Chicken: For cooking chicken dishes.
- Egg: For perfectly cooked eggs.
- Slow Cook: For traditional slow-cooked recipes.
- Sauté: For browning ingredients before pressure cooking or for stir-frying.
- Rice: For cooking various types of rice.
- Biryani: A specialized program for biryani.
- Porridge: For creamy porridges.
- Steam/Idli: For steaming vegetables, seafood, or making idli.
- Cake: For baking cakes.
- Manual: Allows custom time and pressure settings.
- Pressure Cook: General pressure cooking function with adjustable time.

Image 5.2: The Smart Pot Eko offers one-touch cooking with 14 pre-set programs.
5.3 General Cooking Steps
- Add ingredients to the inner stainless steel cooking pot. Ensure liquid levels are within the MIN and MAX lines.
- Place the inner pot into the cooker base.
- Close the lid and turn it clockwise until it locks. Ensure the steam release handle is in the 'Sealing' position for pressure cooking.
- Plug in the appliance.
- Select your desired Smart Program (e.g., 'Rice', 'Meat/Stew'). The default cooking time will appear.
- Adjust the cooking time using the '+' or '-' buttons if needed.
- Press 'Start'. The cooker will begin preheating.
- Once cooking is complete, the cooker will beep and automatically switch to 'Keep Warm' mode.
- For pressure release, choose between Natural Release (allow pressure to dissipate naturally) or Quick Release (carefully turn the steam release handle to 'Venting').
- Once the float valve drops, open the lid and serve.
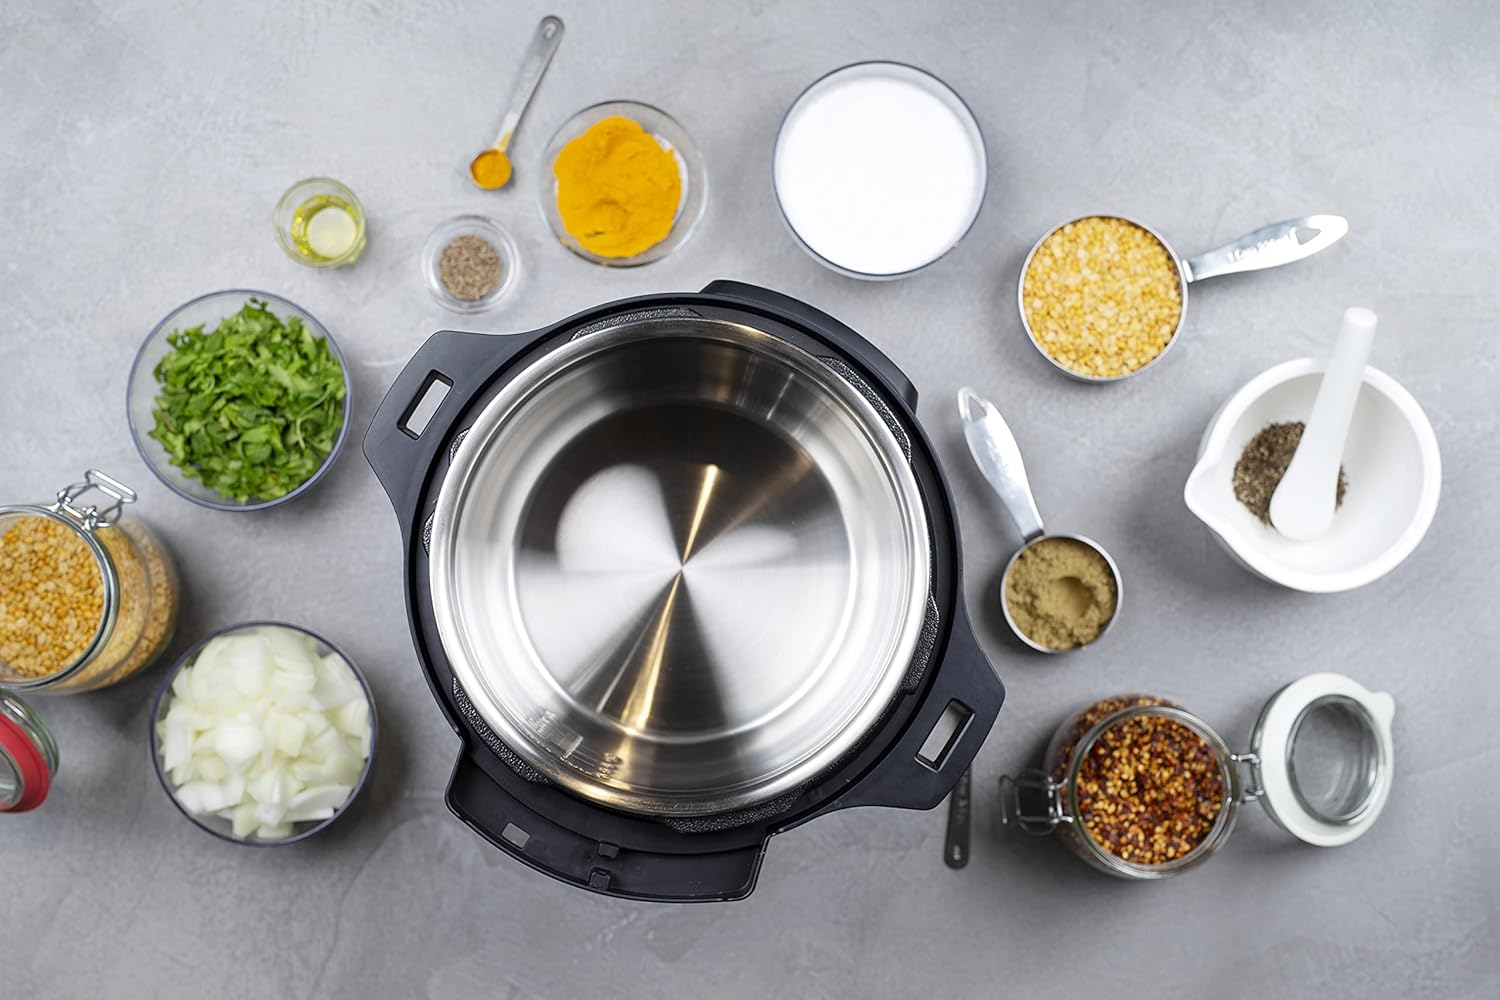
Image 5.3: Various ingredients laid out around the empty inner pot, ready for preparation.

Image 5.4: A top-down view of food cooking inside the Nutricook Smart Pot Eko, surrounded by prepared ingredients.
5.4 Keep Warm Feature
The 'Keep Warm' feature automatically activates after most cooking programs are completed, maintaining the food at a serving temperature. This helps preserve nutrition by avoiding reheating.
5.5 Adjust and Delay Functions
- Adjust: Allows modification of cooking time or pressure level for certain programs.
- Delay: Enables you to set a delayed start time for your cooking program, allowing you to prepare meals in advance.
6. Maintenance and Cleaning
Regular cleaning and maintenance will ensure the longevity and optimal performance of your Nutricook Smart Pot Eko.
6.1 Cleaning the Inner Pot
The inner stainless steel cooking pot is made of high-quality 304 (18/8) stainless steel and is dishwasher-safe. For manual cleaning, wash with warm soapy water and a non-abrasive sponge. Rinse thoroughly and dry.

Image 6.1: The stainless steel inner cooking pot is dishwasher-safe for easy cleaning.
6.2 Cleaning the Lid
Remove the sealing ring and anti-block shield from the lid. Wash the lid, sealing ring, and anti-block shield with warm soapy water. Rinse and dry all components thoroughly. Ensure the sealing ring is properly re-installed before next use.
6.3 Cleaning the Cooker Base
Wipe the exterior of the cooker base with a damp cloth. Never immerse the cooker base in water or any other liquid. Ensure the heating element is clean and dry before storage or next use.
7. Troubleshooting
If you encounter issues with your Nutricook Smart Pot Eko, refer to the following common troubleshooting steps:
| Problem | Possible Cause | Solution |
|---|---|---|
| Pressure not building | Lid not properly sealed; Steam release handle in 'Venting' position; Sealing ring damaged or missing; Insufficient liquid. | Ensure lid is locked; Turn steam release handle to 'Sealing'; Check and replace sealing ring if necessary; Add more liquid to the pot. |
| Food not cooking properly | Incorrect cooking time/program selected; Insufficient liquid; Power interruption. | Verify program and adjust time; Ensure adequate liquid; Check power connection. |
| Error code on display | Specific internal issue (e.g., overheating, sensor error). | Unplug the unit, wait a few minutes, then plug back in. If the error persists, contact customer support. |
| Steam leaking from lid | Sealing ring not properly installed or damaged; Food debris on sealing ring or rim. | Re-install sealing ring correctly; Clean sealing ring and lid rim; Replace sealing ring if damaged. |
For issues not covered here, please contact Nutricook customer support.
8. Specifications
Detailed technical specifications for the Nutricook Smart Pot Eko NC-SPEK6:
| Feature | Detail |
|---|---|
| Brand | Nutricook |
| Model Number | NC-SPEK6 (FS7) |
| Capacity | 6 Liters |
| Power / Wattage | 1000 watts |
| Voltage | 220 Volts |
| Material | Stainless steel |
| Product Dimensions | 32.5 x 32.3 x 37.36 cm |
| Item Weight | 6 Kilograms |
| Color | Silver/Black |
| Special Features | Programmable |
| Control Method | Touch |
9. Warranty and Support
9.1 Product Warranty
The Nutricook Smart Pot Eko NC-SPEK6 comes with a 2-year brand warranty. Please retain your proof of purchase for warranty claims. The warranty covers manufacturing defects under normal use conditions.
9.2 Customer Support
For technical assistance, warranty claims, or any questions regarding your Nutricook Smart Pot Eko, please contact Nutricook customer support through their official website or the contact information provided in your product packaging.


