1. Introduction
This manual provides essential instructions for the safe and effective use of your Panasonic HC-X2000 4K Professional Camcorder. The HC-X2000 is a compact and lightweight professional video camera designed for high-quality 4K 60p recording, featuring a wide-angle 25mm lens, 24x optical zoom, 5-Axis Hybrid O.I.S., and advanced professional functions like 3G SDI output, manual rings, ND filters, and built-in LED video light. Please read this manual thoroughly before using the product and retain it for future reference.
2. Safety Information
Always observe the following safety precautions to prevent injury, damage to the product, or loss of data.
- Power Source: Use only the specified AC adapter and power cord. Do not modify the power cord or use it with other devices.
- Battery Safety: Use only genuine Panasonic batteries. Do not expose batteries to heat, fire, or direct sunlight. Do not short-circuit or disassemble batteries.
- Water and Moisture: This camcorder is not waterproof. Do not expose it to rain, moisture, or immerse it in water.
- Handling: Avoid dropping or subjecting the camcorder to strong impacts. Do not attempt to disassemble or repair the unit yourself. Refer all servicing to qualified personnel.
- Operating Environment: Operate the camcorder within the specified temperature and humidity ranges. Avoid extreme temperatures, dust, and strong vibrations.
- Lens Care: Do not point the lens directly at the sun or other strong light sources, as this may damage the image sensor.
3. What's in the Box
Verify that all the following items are included with your Panasonic HC-X2000 camcorder:
- Panasonic HC-X2000 Camcorder Body
- AC Adaptor
- AC Cable
- Battery (Lithium Ion)
- Eyecup
- Lens Hood
- VW-HU1 Detachable Handle (for HC-X2000 model)
4. Product Overview
Familiarize yourself with the main components and controls of your HC-X2000 camcorder.

Image 4.1: Angled view of the Panasonic HC-X2000 camcorder with the VW-HU1 detachable handle attached. This view highlights the overall form factor and the integrated handle for professional use.

Image 4.2: Angled view of the Panasonic HC-X2000 camcorder without the detachable handle. This shows the compact body of the camcorder, emphasizing its portability.
4.1 Front and Lens Area
- Lens: Leica Dicomar lens with 24x optical zoom.
- Lens Hood: Detachable hood to prevent glare.
- ND Filter Dial: Adjusts built-in Neutral Density filters (1/4, 1/16, 1/64, OFF).
- Focus Ring: For manual focus adjustments.
- Zoom Ring: For manual zoom adjustments.
- Built-in LED Video Light: Provides illumination in low-light conditions.
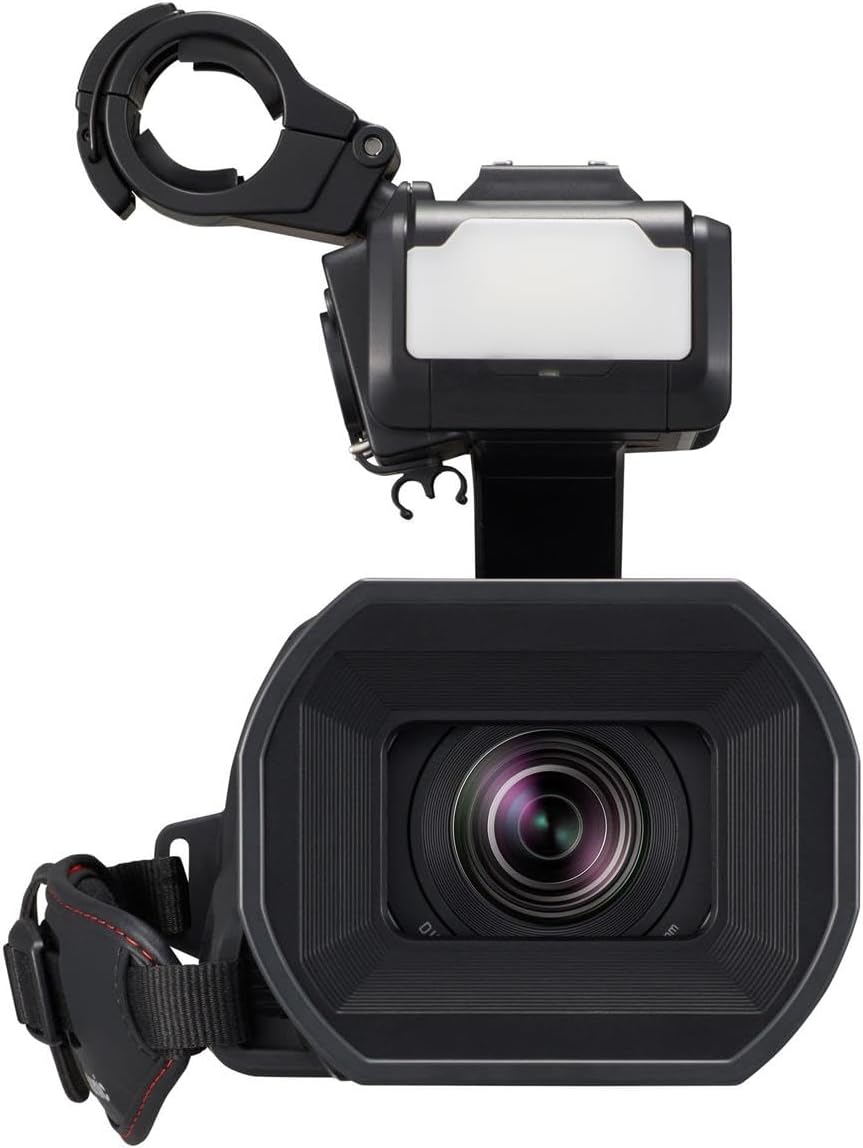
Image 4.3: Front view of the Panasonic HC-X2000 camcorder, highlighting the lens, lens hood, and the built-in LED video light located above the lens.
4.2 Top and Handle Area (with VW-HU1 Handle)
- VW-HU1 Detachable Handle: Includes 2-channel XLR audio inputs, audio control dials, and an additional LED light.
- Cold Shoe Mount: For attaching external accessories.
- Record Button: Initiates and stops recording.
- Zoom Lever: For electronic zoom control.
- User Buttons (USER 1-5): Customizable function buttons.
- O.I.S. Button: Activates/deactivates Optical Image Stabilization.
- Wi-Fi Button: For wireless connectivity.

Image 4.4: Top-down view of the Panasonic HC-X2000 camcorder with the VW-HU1 handle attached. This image clearly shows the XLR audio inputs, audio level controls, and the various user buttons on the handle and camcorder body.
4.3 Side and Rear Area
- Battery Compartment: For inserting the battery.
- SD Card Slots (x2): Supports SDXC cards for recording.
- 3.5-inch LCD Monitor: Electrostatic touch panel for menu navigation and monitoring.
- Viewfinder (LVF): Up/down tiltable electronic viewfinder.
- HDMI Output: For connecting to external monitors.
- 3G SDI Output: Professional video output.
- DC IN Terminal: For connecting the AC adapter.
- Headphone Jack: For audio monitoring.
- USB Terminal: For data transfer and connectivity.

Image 4.5: Side view of the Panasonic HC-X2000 camcorder, displaying the various input/output ports including SDI OUT, HDMI, headphone jack, and DC IN. The battery compartment is also visible.

Image 4.6: Another side view of the Panasonic HC-X2000 camcorder, focusing on the battery release and compartment area.
5. Setup
5.1 Charging the Battery
- Connect the AC adapter to the DC IN terminal on the camcorder.
- Plug the AC cable into a power outlet.
- The charge indicator will light up during charging and turn off when complete.
- A fully discharged battery typically takes approximately 3-4 hours to charge.
5.2 Inserting the Battery
- Ensure the camcorder is turned off.
- Slide the battery release lever and insert the battery pack into the battery compartment until it clicks into place.
- To remove, slide the release lever again and gently pull the battery out.
5.3 Inserting SD Cards
- Open the SD card slot cover.
- Insert the SD card(s) into the slots until they click. Ensure the card is facing the correct direction.
- Close the SD card slot cover.
- Format new SD cards before first use via the camcorder's menu.
5.4 Attaching the VW-HU1 Detachable Handle
The VW-HU1 handle provides enhanced audio capabilities and additional controls.
- Align the handle's mounting base with the accessory shoe on top of the camcorder.
- Slide the handle forward until it locks into place.
- Tighten the securing screw on the handle to ensure a firm connection.
- To remove, loosen the screw and slide the handle backward.

Image 5.1: A pair of hands demonstrating the attachment of the detachable handle to the top of the Panasonic HC-X2000 camcorder. This illustrates the physical connection process.
6. Operating the Camcorder
6.1 Basic Recording
- Power On: Flip the POWER switch to ON.
- Open LCD Monitor: Open the LCD monitor to power on the camcorder and view the live image.
- Adjust Settings: Use the touch screen LCD or physical buttons to adjust exposure (IRIS, GAIN, SHUTTER), white balance, and focus.
- Start/Stop Recording: Press the RECORD button (located on the camcorder body or handle) to start recording. Press again to stop.
- Zoom: Use the zoom lever on the camcorder or handle, or the manual zoom ring on the lens.

Image 6.1: A person operating the Panasonic HC-X2000 camcorder outdoors, demonstrating a typical handheld shooting scenario. The camcorder is equipped with an external microphone.
6.2 Advanced Features
- ND Filters: Rotate the ND filter dial to select appropriate filter strength (1/4, 1/16, 1/64) to control exposure in bright conditions.
- Optical Image Stabilization (O.I.S.): Press the O.I.S. button to activate 5-Axis Hybrid O.I.S. for stable footage, especially during handheld shooting.
- Audio Recording: Utilize the 2-channel XLR inputs on the VW-HU1 handle for professional microphones. Adjust audio levels using the dedicated dials.
- Wi-Fi HD Live Streaming: Connect the camcorder to a network via Wi-Fi or an optional USB-Ethernet adapter for live streaming capabilities. Access settings through the Wi-Fi menu.

Image 6.2: The Panasonic HC-X2000 camcorder connected to a Panasonic VW-UEA1 USB-Ethernet adapter, illustrating its capability for wired network connectivity, often used for stable live streaming.
6.3 Menu Navigation
Access the camcorder's comprehensive settings and functions via the 3.5-inch electrostatic touch panel LCD monitor.
- Tap the MENU button on the LCD screen to open the main menu.
- Navigate through categories and options by tapping on them.
- Use the BACK or EXIT buttons to return to previous screens or exit the menu.
- Customizable user buttons can be assigned frequently used functions for quick access.
7. Maintenance
7.1 Cleaning
- Camcorder Body: Wipe with a soft, dry cloth. For stubborn dirt, use a cloth lightly dampened with water and then wipe dry. Avoid using organic solvents.
- Lens: Use a lens brush to remove dust, then gently wipe with a lens cleaning cloth and lens cleaning fluid. Do not touch the lens surface with your fingers.
- LCD Monitor: Gently wipe with a soft, dry cloth. Avoid pressing hard on the screen.
7.2 Storage
- Store the camcorder in a cool, dry, and well-ventilated place, away from direct sunlight and high humidity.
- Remove the battery if the camcorder will not be used for an extended period.
- Use a desiccant (silica gel) in the storage case to prevent mold and mildew, especially in humid environments.
8. Troubleshooting
If you encounter issues with your camcorder, refer to the following common problems and solutions.
| Problem | Possible Cause | Solution |
|---|---|---|
| Camcorder does not power on. | Battery is discharged or not inserted correctly. | Charge the battery. Ensure the battery is inserted securely. |
| Cannot record. | SD card is full, not inserted, or write-protected. | Insert a formatted SD card. Check if the card's write-protect tab is unlocked. Delete unnecessary files or use a new card. |
| Image is blurry or out of focus. | Autofocus issue or manual focus not set correctly. | Ensure autofocus is enabled, or adjust manual focus using the focus ring. Clean the lens if dirty. |
| No audio recorded. | Microphone not connected, audio levels too low, or input settings incorrect. | Check microphone connection. Adjust audio input levels. Verify audio input settings in the menu (e.g., XLR input selection). |
| Poor low-light performance / grainy image. | Insufficient lighting or high gain setting. | Increase ambient lighting. Reduce gain settings if possible. Utilize the built-in LED light. |
For more detailed troubleshooting, please refer to the full operating instructions available on the Panasonic support website.
9. Specifications
Key technical specifications for the Panasonic HC-X2000 4K Professional Camcorder.
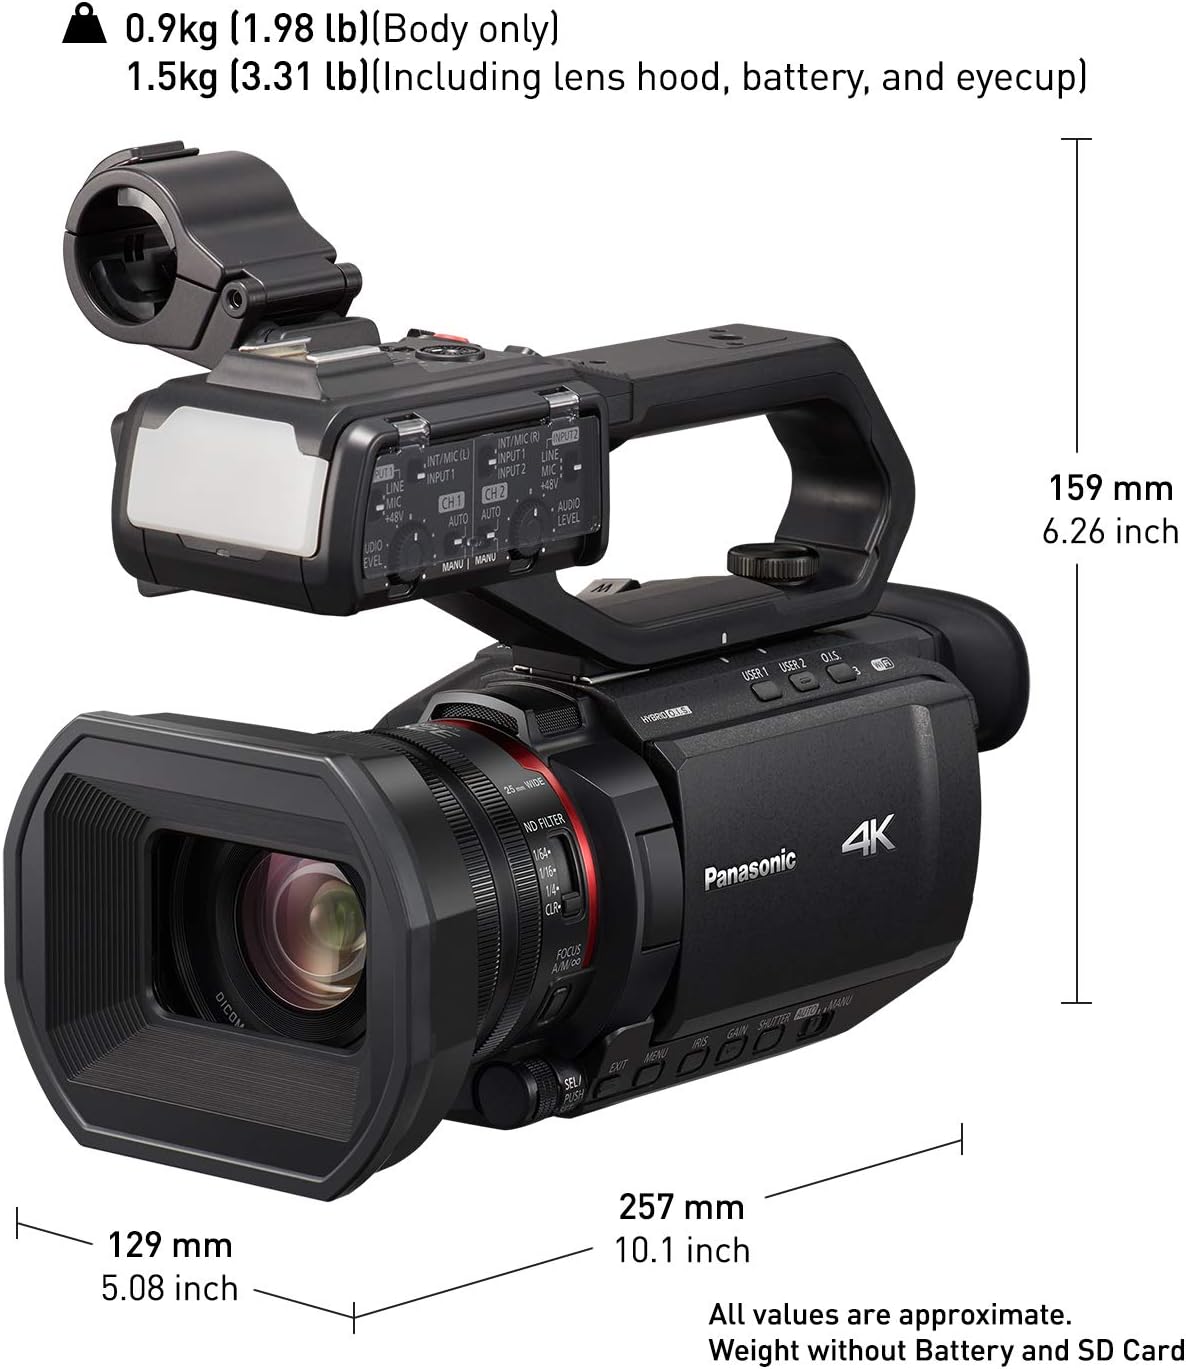
Image 9.1: Diagram illustrating the approximate dimensions of the Panasonic HC-X2000 camcorder, including length, height, and width, along with its body-only weight and weight including lens hood, battery, and eyecup.
| Feature | Detail |
|---|---|
| Model Number | HC-X2000 |
| Video Capture Resolution | 4K (3840 x 2160) 60p, Full HD (1920 x 1080) |
| Optical Zoom | 24x |
| Lens | Leica Dicomar Lens, Wide-angle 25mm (35mm equivalent) |
| Image Stabilization | 5-Axis Hybrid O.I.S. |
| Sensor Type | CMOS |
| Display | 3.5-inch (2,760K-dots) electrostatic touch panel LCD |
| Viewfinder | Up/down tiltable (1,555K-dot) |
| Connectivity | Wi-Fi, HDMI, 3G SDI, USB |
| Audio Input | 2-channel XLR (with VW-HU1 handle), 3.5mm stereo mini jack |
| Recording Media | SD/SDHC/SDXC Memory Card (Dual Slots) |
| Dimensions (W x H x D) | Approx. 12.79 x 11.1 x 8.46 inches (with handle) |
| Weight | Approx. 5.77 pounds (with handle, battery, and eyecup) |
| Power Supply | 7.28V (Battery), 12V (AC Adaptor) |
10. Warranty & Support
10.1 Warranty Information
Panasonic products are manufactured to high quality standards and are covered by a limited warranty. The specific terms and conditions of your warranty may vary by region and purchase date. Please refer to the warranty card included with your product or visit the official Panasonic website for detailed warranty information. Keep your proof of purchase for warranty claims.
10.2 Customer Support
For technical assistance, product inquiries, or service requests, please contact Panasonic customer support.
- Online Support: Visit the official Panasonic support website for FAQs, driver downloads, and digital manuals.
- Telephone Support: Refer to your product documentation or the Panasonic website for regional contact numbers.
- Service Centers: Information on authorized service centers can be found on the Panasonic website.
When contacting support, please have your camcorder's model number (HC-X2000) and serial number ready.


