Introduction
This manual provides essential instructions for the safe and effective use of your REACTOR A-800 Analog Multi Meter. The A-800 is a versatile instrument designed for measuring various electrical parameters across 12 distinct ranges. It features a mirror back-scale for accurate readings and is equipped with overload protection for enhanced durability. Please read this manual thoroughly before operating the device.
Important Safety Information
Always adhere to the following safety precautions to prevent personal injury or damage to the meter:
- Do not attempt to measure voltages or currents exceeding the maximum specified limits for each range.
- Ensure the test leads are in good condition, without any cracks or damaged insulation.
- Always select the correct function and range before connecting the test leads to the circuit under test.
- Exercise extreme caution when working with live electrical circuits. Avoid contact with bare wires or terminals.
- If the meter shows signs of damage or malfunction, discontinue use immediately.
- Replace the battery promptly when the low battery indicator appears to ensure accurate measurements.
Product Overview and Components
The REACTOR A-800 Analog Multi Meter is a compact and portable device. Familiarize yourself with its main components:
- Analog Display: Features a clear scale with a mirror for parallax error reduction.
- Rotary Function/Range Switch: Used to select the desired measurement type (DCV, ACV, DCmA, Resistance) and range.
- Input Jacks: Terminals for connecting the test leads. Typically marked as '+' (positive/red) and '-' (negative/black).
- Test Leads: Red and black leads with probes for connecting to circuits.
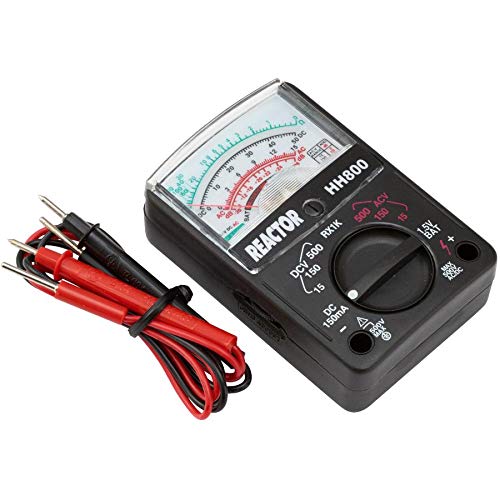
An image showing the REACTOR A-800 analog multimeter, featuring its display, rotary dial, input jacks, and the included red and black test leads. The meter is black with a clear display showing measurement scales and the 'REACTOR HH800' branding.
Setup
- Battery Installation: The A-800 requires a 1.5V battery for operation, particularly for resistance measurements. Locate the battery compartment on the back of the meter, open it, and insert the battery according to the polarity markings. Close the compartment securely.
- Connecting Test Leads:
- Insert the red test lead into the positive (+) input jack.
- Insert the black test lead into the negative (-) input jack.
Operating Instructions
The A-800 offers 12 measuring ranges for various electrical tests. Always select a range higher than the expected value to prevent meter damage.
1. DC Voltage Measurement (DCV)
- Set the rotary switch to the desired DCV range (e.g., 15V, 150V, 500V).
- Connect the red test lead to the positive side of the DC circuit and the black test lead to the negative side.
- Read the voltage value from the DCV scale on the analog display.
2. AC Voltage Measurement (ACV)
- Set the rotary switch to the desired ACV range (e.g., 15V, 150V, 500V).
- Connect the test leads across the AC circuit. Polarity is not critical for AC voltage.
- Read the voltage value from the ACV scale on the analog display.
3. DC Current Measurement (DCmA)
The A-800 has a 100mA DC range.
- Important: To measure current, the meter must be connected in series with the circuit. Break the circuit and insert the meter.
- Set the rotary switch to the DC 150mA range.
- Connect the red test lead to the higher potential side and the black test lead to the lower potential side of the break in the circuit.
- Read the current value from the DCmA scale.
4. Resistance Measurement (RX1K)
The A-800 includes a resistance measurement function (RX1K).
- Set the rotary switch to the RX1K range.
- Before measuring: Short the test leads together and adjust the "OHMS ADJ" knob (if present, or zero adjustment on the dial) until the needle reads zero ohms.
- Connect the test leads across the component whose resistance you wish to measure. Ensure the component is de-energized.
- Read the resistance value from the Ohms scale and multiply by the range factor (e.g., x1K).
Maintenance
- Cleaning: Wipe the meter with a dry, soft cloth. Do not use abrasive cleaners or solvents.
- Battery Replacement: When the meter's readings become erratic or the needle does not zero correctly in resistance mode, replace the 1.5V battery. Refer to the "Battery Installation" section under Setup.
- Storage: Store the meter in a cool, dry place away from direct sunlight and extreme temperatures. If storing for extended periods, remove the battery to prevent leakage.
- Test Leads: Regularly inspect test leads for any signs of damage, such as cuts, cracks, or frayed insulation. Replace damaged leads immediately.
Troubleshooting
| Problem | Possible Cause | Solution |
|---|---|---|
| Meter does not respond or needle does not move. | Incorrect range selected, dead battery (for resistance), open circuit, faulty test leads. | Verify range selection. Check and replace battery if necessary. Inspect test leads for continuity. Ensure proper circuit connection. |
| Inaccurate readings. | Incorrect range, low battery, parallax error, meter not zeroed (resistance). | Select appropriate range. Replace battery. Read the needle directly over the mirror. Zero the meter before resistance measurement. |
| Resistance measurement fails to zero. | Low battery, faulty test leads, "OHMS ADJ" knob not adjusted. | Replace battery. Check test leads. Adjust the "OHMS ADJ" knob with leads shorted. |
Specifications
| Feature | Detail |
|---|---|
| Model | A-800 |
| Brand | REACTOR |
| Measurement Type | Analog Multimeter |
| Measuring Ranges | 12 ranges (DCV, ACV, DCmA, Resistance) |
| DC Current Range | 100 mA |
| Display | Mirror back-scale analog display |
| Protection | Meter overload protected |
| Included Accessories | Test leads |
| Product Dimensions (L x W x H) | 30.48 x 20.32 x 5.08 cm (12 x 8 x 2 inches) |
| Item Weight | 140.61 g (0.31 Pounds) |
| Color | Black |
| UPC | 822733106916 |
Warranty and Support
For specific warranty information and customer support, please refer to the documentation provided at the time of purchase or contact your retailer. Keep your purchase receipt as proof of purchase for any warranty claims.


