
1. Introduction
The ORNO PRE-433 Digital Timer Relay is a versatile device designed for precise control over the operating times of various electrical appliances. It is suitable for DIN rail mounting and features a clear LED indicator. With its extensive programming capabilities, including 52 time programs, weekly cycles, and pulse settings, this timer provides efficient management for lighting, fans, heaters, and other electrical equipment.
2. Safety Instructions
- Always disconnect power to the circuit before installing, servicing, or removing the device. Failure to do so may result in electric shock or damage to the device.
- Installation should only be performed by a qualified electrician in accordance with local electrical codes and regulations.
- Do not expose the device to moisture, extreme temperatures, or corrosive environments.
- Ensure proper wiring connections as indicated in the wiring diagram to prevent malfunction or damage.
- Do not exceed the maximum load capacity of 16A/250V AC1.
3. Product Overview
The ORNO PRE-433 Digital Timer Relay is a compact unit designed for integration into electrical panels. It features a digital display for time and program information, along with four control buttons for navigation and setting adjustments.

Figure 3.1: Front view of the ORNO PRE-433 Digital Timer Relay, highlighting the display and control buttons (MENU, UP, DOWN, OK).

Figure 3.2: Angled front view of the ORNO PRE-433 Digital Timer Relay, showing the overall design and terminal connections.
3.1 Components
- Digital Display: Shows current time, date, and program status.
- MENU Button: Accesses the main menu and programming options.
- UP (▲) Button: Navigates up or increases values.
- DOWN (▼) Button: Navigates down or decreases values.
- OK Button: Confirms selections and settings.
- Terminals: For power input (A1, A2) and output (15, 16, 18).
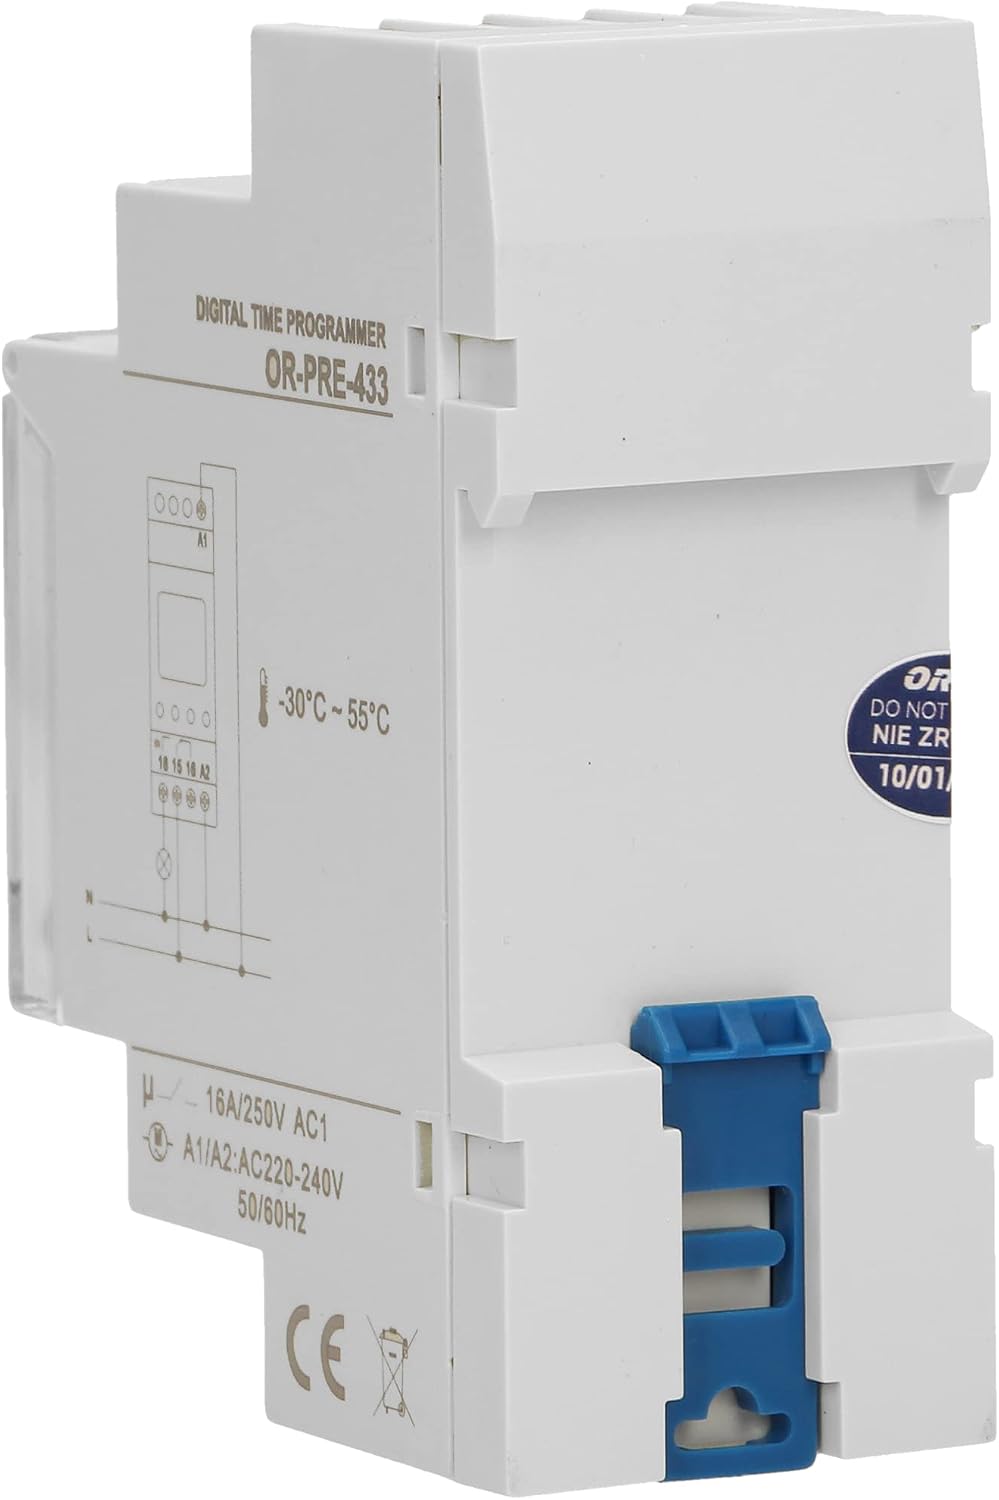
Figure 3.3: Side view of the ORNO PRE-433 Digital Timer Relay, showing the wiring diagram and technical specifications like voltage and current ratings.
4. Setup
4.1 Initial Power-Up and Battery
The ORNO PRE-433 is equipped with an integrated lithium battery that provides power backup for the clock and settings for up to 3 years. This ensures that your programmed schedules are retained even during power outages or when the device is disconnected from the main power source.
Upon initial power-up, or after a prolonged period of storage, the display may be blank. Connect the device to power (220-240V AC) and allow a few minutes for the internal battery to charge sufficiently for the display to activate.
4.2 Setting Current Date and Time
It is crucial to set the correct date and time for accurate program execution.
- Press the MENU button to enter the main menu.
- Navigate using the UP or DOWN buttons to find the 'Time' or 'Clock' setting.
- Press OK to select.
- Adjust the year, month, day, hour, and minute using the UP and DOWN buttons. Press OK to confirm each segment.
- Once all settings are confirmed, the device will return to the main display.
4.3 Language Selection
The device menu supports three languages: English, German, and Polish. To change the language:
- Press the MENU button.
- Navigate to 'Language' or a similar setting.
- Press OK and select your preferred language using the UP or DOWN buttons.
- Confirm with OK.
5. Operating
5.1 Operating Modes
The ORNO PRE-433 offers three distinct operating modes:
- Manual Mode: Allows you to manually switch the output ON or OFF, overriding any programmed schedules.
- Automatic Mode: The device operates according to the programmed schedules. This is the standard mode for automated control.
- Random Mode: Provides an additional security feature. When activated, the device will randomly switch connected lights or appliances ON and OFF at varying times, simulating presence, which can be useful when you are away from home.
To switch between modes, press the MENU button and navigate to the 'Mode' setting. Select your desired mode and confirm with OK.
5.2 Programming Schedules
The timer supports up to 52 individual programs. Each program consists of an ON time and an OFF time. For a complete cycle, you will typically set one program for 'ON' and another for 'OFF'.
- Press the MENU button to access the main menu.
- Navigate to 'Program' and press OK.
- Select an available program number (e.g., '1 ON') using UP or DOWN and press OK.
- Set the desired hour and minute for the 'ON' event using UP/DOWN and OK.
- Select the days of the week for this program to be active. You can choose individual days, weekdays, weekends, or all days. Confirm with OK.
- Repeat steps 3-5 for the corresponding 'OFF' event (e.g., '1 OFF'). Ensure the 'OFF' time is set after the 'ON' time for the same program number.
- Continue this process for all desired programs.
5.3 Weekly Cycle and Pulse Settings
The timer allows for flexible weekly programming. When setting the days for a program, you can select various combinations:
- Individual days (e.g., Monday only)
- Groups of days (e.g., Mon-Fri, Sat-Sun, Mon-Sat)
- All 7 days of the week
The device also supports pulse settings, allowing for short, timed activations. Refer to the on-screen menu for specific pulse duration adjustments.
5.4 Automatic Summer/Winter Time Change
The ORNO PRE-433 is designed to automatically adjust for daylight saving time (summer/winter time changes). This feature ensures your schedules remain accurate without manual intervention. The device handles leap years automatically as well.
6. Maintenance
6.1 Battery
The integrated lithium battery is designed for long-term operation (up to 3 years of backup). It is not user-replaceable. If the battery fails to hold a charge after several years, the device may need to be replaced.
6.2 Cleaning
To clean the device, gently wipe the exterior with a dry, soft cloth. Do not use liquid cleaners, abrasive materials, or solvents, as these can damage the casing or internal components.
7. Troubleshooting
| Problem | Possible Cause | Solution |
|---|---|---|
| Display is blank or dim. | No power supply; internal battery discharged. | Check power connection (220-240V AC). Allow time for internal battery to charge. |
| Programs are not executing. | Device is not in Automatic Mode; incorrect program settings; incorrect current time/date. | Ensure the device is set to 'Automatic' mode. Verify program ON/OFF times and selected days. Check and correct current date and time. |
| Output remains ON/OFF continuously. | Device is in Manual Mode; faulty wiring. | Switch the device to 'Automatic' mode. Check wiring connections according to the diagram. |
| Time is incorrect after power outage. | Internal battery fully discharged or at end of life. | Reset the current date and time. If the issue persists frequently, the device may need replacement. |
8. Specifications
| Feature | Specification |
|---|---|
| Model Number | OR-CR-209 |
| Power Supply | 220-240V AC, 50/60Hz |
| Max Load | 16A / 250V AC1 |
| Number of Programs | 52 |
| Operating Modes | Manual, Automatic, Random |
| Display Size | 1.5 Inches |
| Material | Plastic |
| Dimensions (L x W x H) | 90 x 36 x 65 mm (approx. 2.76 x 6.89 x 6.3 cm) |
| Weight | 140 grams |
| Operating Temperature | -30°C to 55°C |
| Battery Type | Integrated Lithium (CR2 type, non-replaceable) |
| Battery Backup | Up to 3 years |
| Mounting | DIN Rail |
| Country of Origin | China |

Figure 8.1: Dimensions of the ORNO PRE-433 Digital Timer Relay.
9. Warranty and Support
For warranty information, technical assistance, or customer support, please refer to the documentation provided with your purchase or contact your retailer. You may also visit the official Orno website for further resources.

Figure 9.1: Product label with manufacturer details and barcode (UPC: 5902560327410).