
1. Introduction
Thank you for choosing the ENDARK Digital Tire Pressure Gauge and Inflator Gun. This 3-in-1 multi-function tool is designed for precise tire pressure measurement, inflation, and deflation. It is suitable for various vehicles including cars, motorcycles, trucks, and bicycles, ensuring optimal tire maintenance and safety.
This manual provides detailed instructions for the safe and efficient operation of your device. Please read it thoroughly before use and retain it for future reference.
2. Package Contents
Verify that all items are present in the package:
- 1 x Tire Inflator with Pressure Gauge
- 4 x Tire Valve Caps
- 1 x Dual-Head Air Chuck (for trucks)
- 1 x Valve Adapter (converts Schrader to Presta)
- 1 x 1/4" NPT Male Quick Connect Fitting
- 2 x Replacement Gaskets
- 1 x Roll of Thread Seal Tape
- 1 x Screwdriver
- 1 x Multi-language Manual

Image: The ENDARK Digital Tire Pressure Gauge and Inflator Gun, along with its complete set of accessories including tire caps, dual-head chuck, valve adapter, quick connect fitting, gaskets, thread seal tape, and screwdriver.
3. Setup
3.1 Battery Installation
The digital gauge requires 2 AAA batteries (not included). Open the battery compartment on the back of the gauge and insert the batteries, ensuring correct polarity. Close the compartment securely.
3.2 Connecting to an Air Compressor
- Ensure your air compressor is turned off and depressurized.
- Attach the 1/4" NPT male quick connect fitting to the air inlet of the inflator gun. Use the provided thread seal tape for a secure, airtight connection.
- Connect the quick connect fitting to your air compressor's quick coupler.

Image: Illustration of the inflator gun connected to an air compressor hose, ready for use.
4. Operating Instructions
4.1 Powering On and Unit Selection
- Press the ON/OFF button to turn on the digital gauge. The blue backlight will illuminate.
- Press the UNIT/LED button to cycle through the four measurement units: PSI, KPA, BAR, and KG/CM². Select your desired unit.
- The gauge will automatically turn off after a period of inactivity to conserve battery.
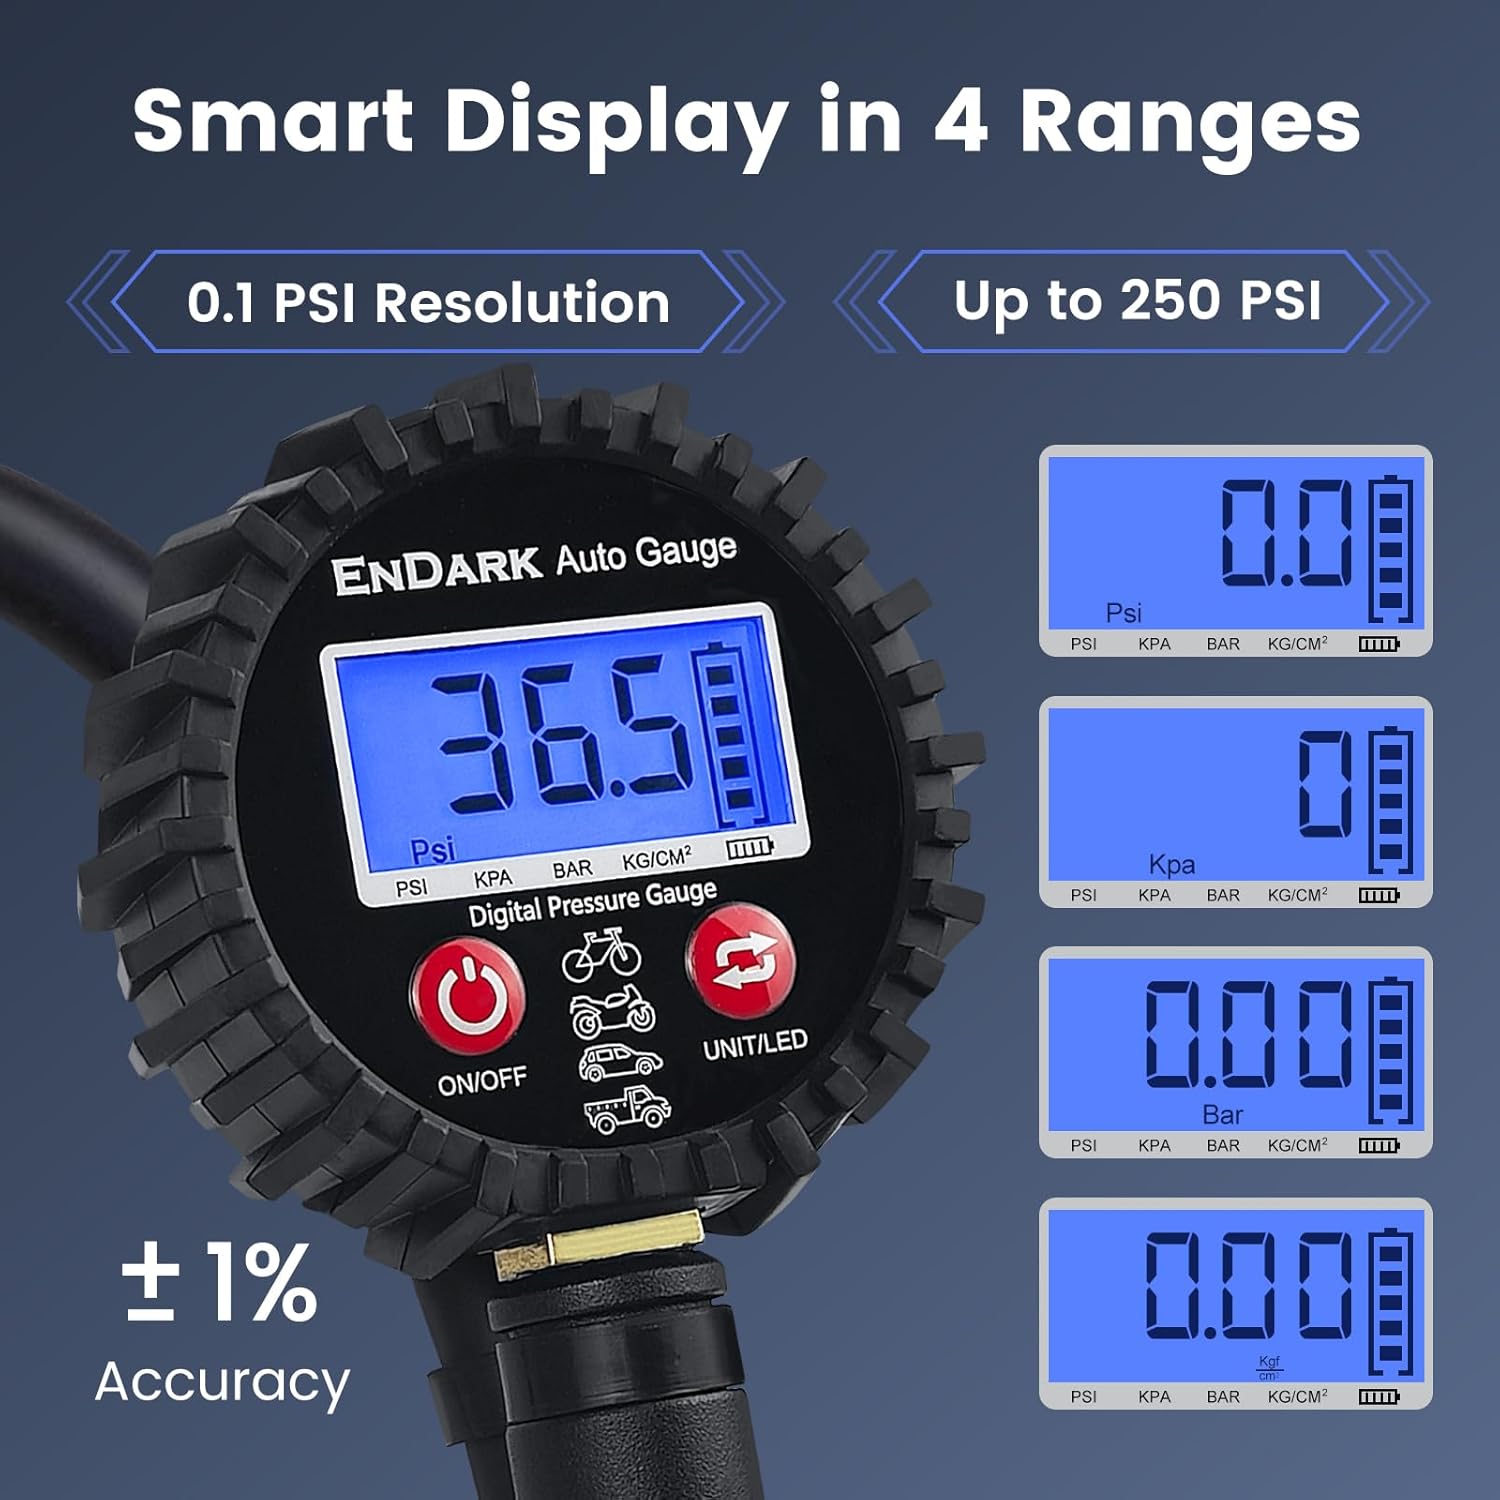
Image: Close-up of the digital display showing various pressure units (PSI, KPA, BAR, KG/CM²) and control buttons.
4.2 Checking Tire Pressure
- Ensure the gauge is powered on and the correct unit is selected.
- Remove the valve cap from the tire.
- Firmly press the chuck onto the tire valve stem. A slight hiss is normal. Ensure a tight seal to get an accurate reading.
- The current tire pressure will be displayed on the LCD screen.
- Remove the chuck from the valve stem and replace the valve cap.

Image: A person checking the tire pressure of a car using the digital gauge, with the reading visible on the screen.
4.3 Inflating Tires
- Connect the inflator gun to your air compressor as described in Section 3.2.
- Attach the chuck firmly to the tire valve stem.
- Press the inflation trigger to begin inflating the tire. The digital display will show the pressure in real-time.
- Release the trigger once the desired pressure is reached.
- Remove the chuck and replace the valve cap.

Image: A hand operating the inflation trigger of the ENDARK digital tire inflator gun while connected to a tire valve.
4.4 Deflating Tires
- Attach the chuck firmly to the tire valve stem.
- Press the air bleed button (purge valve) to release air from the tire. The digital display will show the decreasing pressure in real-time.
- Release the button once the desired pressure is reached.
- Remove the chuck and replace the valve cap.

Image: A hand pressing the air bleed button on the inflator gun to release air from a tire.
4.5 Using the Dual-Head Air Chuck (for Trucks)
For vehicles with dual wheels or hard-to-reach inner valves, use the included dual-head air chuck. This chuck allows access to both inner and outer valves on truck tires.

Image: A person using the dual-head air chuck to check or inflate a truck tire, demonstrating its reach for outer valves.
4.6 Using the Presta Valve Adapter (for Bicycles)
For bicycles equipped with Presta valves, screw the brass Presta valve adapter onto the valve stem before attaching the inflator chuck. This converts the Presta valve to a Schrader type, allowing inflation with the gauge.

Image: A person inflating a bicycle tire using the ENDARK digital gauge, with the brass Presta valve adapter clearly visible on the valve stem.
5. Maintenance
- Cleaning: Wipe the gauge with a soft, dry cloth. Do not use abrasive cleaners or immerse the unit in water.
- Storage: Store the device in a cool, dry place away from direct sunlight and extreme temperatures.
- Battery Replacement: Replace batteries when the display becomes dim or the unit fails to power on. Always use new AAA batteries.
- Gaskets: Periodically check the rubber gaskets for wear and tear. Replace them with the provided spare gaskets if necessary to maintain an airtight seal.
6. Troubleshooting
| Problem | Possible Cause | Solution |
|---|---|---|
| Gauge does not power on. | Dead or incorrectly installed batteries. | Replace batteries with new AAA batteries, ensuring correct polarity. |
| Inaccurate pressure reading. | Loose connection to tire valve or air compressor. | Ensure the chuck is firmly pressed onto the valve stem. Check air compressor connection for leaks. |
| Air leaks during inflation/deflation. | Worn gasket or improper connection. | Replace the gasket if worn. Ensure the chuck is properly seated on the valve stem. Use thread seal tape for NPT connections. |
| Cannot inflate Presta valve tires. | Missing or improperly used Presta valve adapter. | Ensure the Presta valve adapter is correctly screwed onto the Presta valve before attaching the inflator chuck. |
7. Specifications
- Pressure Range: 0-200 PSI
- Accuracy: ±1% (at 25 °C relative humidity)
- Display Resolution: 0.1 PSI
- Measurement Units: PSI, KPA, BAR, KG/CM²
- Display Type: Digital LCD with blue backlight
- Hose Length: Approximately 35 cm (13.8 inches)
- Power Source: 2 x AAA batteries (not included)
- Materials: Brass, Stainless Steel, Rubber, Plastic
- Product Dimensions: 24.38 x 9.4 x 7.87 cm (9.6 x 3.7 x 3.1 inches)
- Weight: 500 Grams (1.1 lbs)
- Model Number: EN52A
8. Warranty and Support
ENDARK products are designed for durability and performance. For any questions, technical assistance, or warranty claims, please contact ENDARK customer support through your purchase platform or the official ENDARK website.
Please retain your proof of purchase for warranty purposes. Specific warranty terms may vary by region and retailer.